

GENERAL
- Navigate to the Sales2CM site
- On the General tab you can configure the following settings:
| FUNCTIONALITY | DESCRIPTION |
|---|---|
| IMPORT/EXPORT SETTINGS | Export existing configuration settings or import previously configured settings. See the EXPORTING AND IMPORTING SETTINGS section of this guide. |
| DOWNLOAD LOGS | Download a zip file containing all the Sales2CM log files |
| WHITELIST ADMIN ACCESS | This field allows you to whitelist Content Manager users who are not an Administrator or Records manager to allow them access to Sales2CM's admin section. |
| DATASET ID | The two-digit dataset identifier of the Content Manager Dataset you wish to connect to |
| WORKGROUP SERVER NAME | The Content Manager Workgroup Server name. IMPORTANT: The workgroup server value must be set to local this is required so that Sales2CM can perform impersonation and all CM Access Controls are applied to displayed records |
| TEMP PATH | The folder Sales2CM will use to store temporary files |
If the Temp Path, Dataset ID, or workgroup server name is updated, an app pool restart is required
- To save the settings on this tab, click Save

EXPORTING AND IMPORTING SETTINGS
You can either export the current configuration settings or import existing settings using the buttons below.
EXPORTING SETTINGS
To export Sales2CM's current settings, click the Export Settings button. This will automatically download the zip file containing the Sales2CM configuration files. These files can be imported back into Sales2CM when required.
IMPORTING SETTINGS
To import existing settings, follow the steps below.
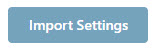
Only import files that were previously taken from the Sales2CM App_Data folder or exported from Sales2CM.
-
Click on the Import Settings button
-
Select the files previously exported with Sales2CM (or copied out of the Sales2CM App_Data folder) then click Open. Multiple files can be selected by holding down the SHIFT or CTRL key
-
A success message will appear once the settings files have been updated and the admin page will reload shortly after to update the settings
APPEARANCE
The appearance tab allows you to control general appearance settings for the application.
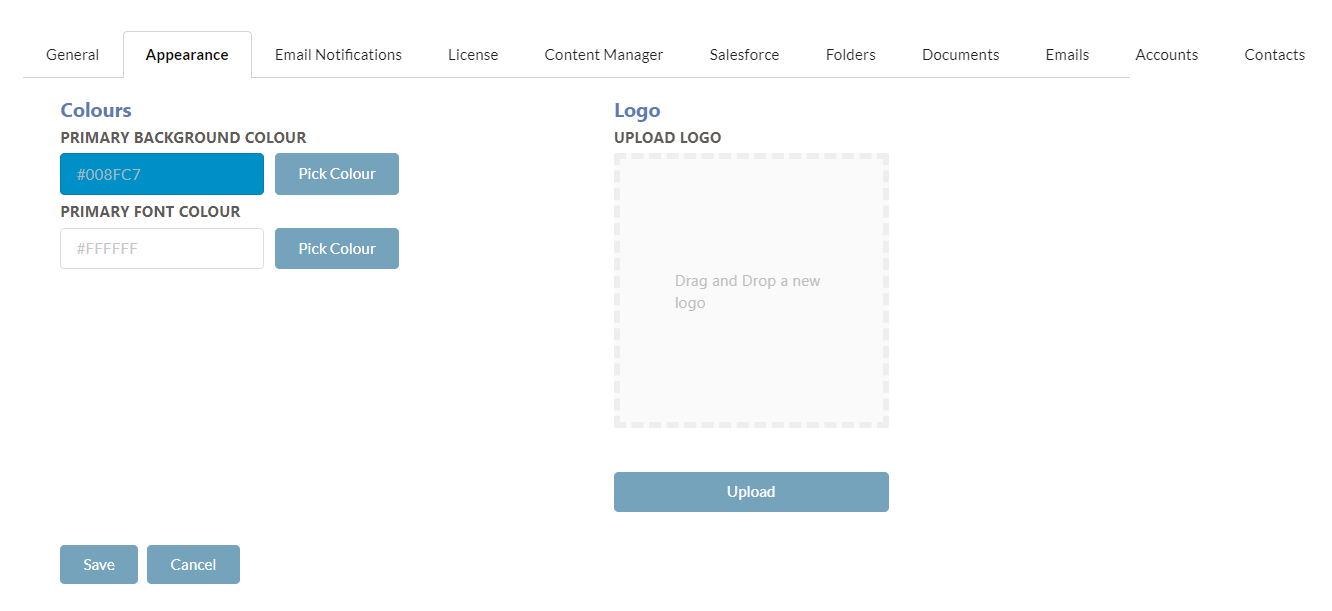
| FUNCTIONALITY | DESCRIPTION |
|---|---|
| PRIMARY BACKGROUND COLOUR | Controls the colour of the header and footers for the application |
| PRIMARY FONT COLOUR | Controls the font colour of the header and footers for the application |
| UPLOAD LOGO | Allows the administrator to set the logo for the application. |
EMAIL NOTIFICATIONS
The Email Notifications page allows you to specify the mail settings for Sales2CM.
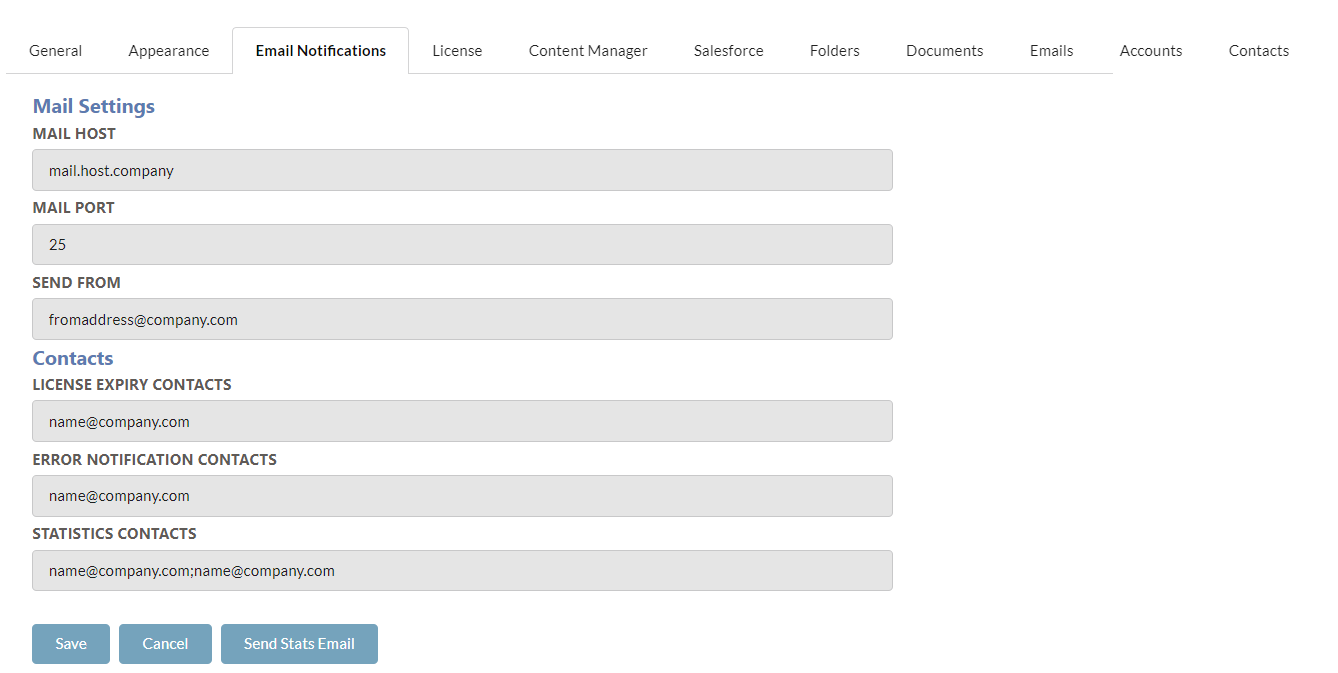
| FUNCTIONALITY | DESCRIPTION |
|---|---|
| MAIL HOST | Your organisation's Email server address |
| MAIL PORT | The Email server port |
| SEND FROM | Nominated sender e-mail address |
| LICENSE EXPIRY CONTACTS | Specify email address (separated by a semi-colon) to be notified when the Sales2CM license is about to expire |
| ERROR NOTIFICATION CONTACTS | Specify email address (separated by a semi-colon) to be notified of any errors that occur from Sales2CM |
| STATISTICS CONTACTS | Specify email address (separated by a semi-colon) to be notified of Sales2CM statistic usage |
LICENSE
The license tab allows you to view details about the existing license and upload a new license if required. For steps on updating the license please see the dedicated SALES2CM LICENSE UPDATE guide.
CONTENT MANAGER
On the Content Manager tab you can configure the following settings:
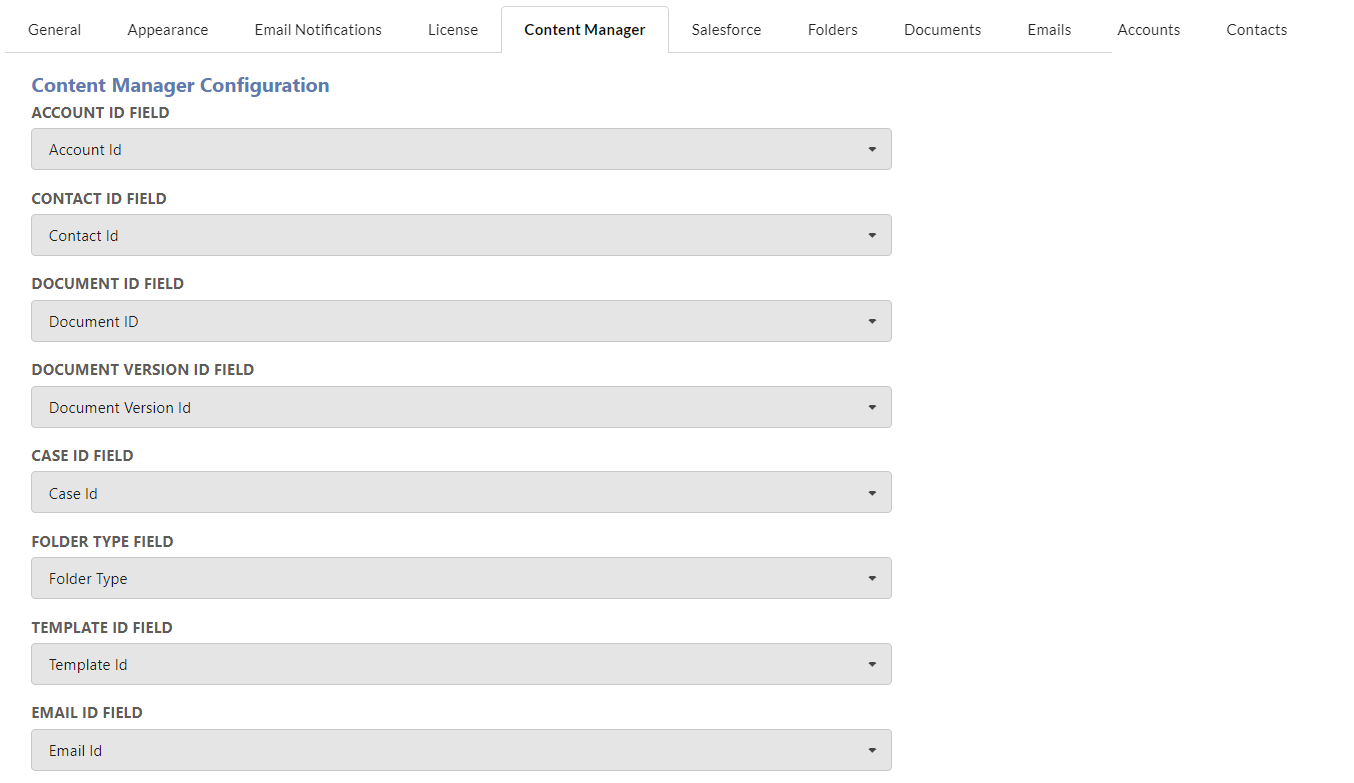
| FUNCTIONALITY | DESCRIPTION |
|---|---|
| Account ID Field | The Content Manager additional field that is used to store the ID of the Salesforce Account. |
| Contact ID Field | The Content Manager additional field that is used to store the ID of the Salesforce Contact. |
| Document ID Field | The Content Manager additional field that is used to store the ID of the Salesforce Document. |
| Document Version ID Field | The Content Manager additional field that is used to store the Version ID of the Salesforce Document. |
| Case ID Field | The Content Manager additional field that is used to store the ID of the Salesforce Case. |
| Folder Type Field | The Content Manager additional field that is used to store the folder type of folders created by Sales2CM |
| Template ID Field | The Content Manager additional field that is used to store the folder template Id configured in Sales2CM for a Content Manager Container |
| Email ID Field | The Content Manager additional field that is used to store the ID of an email sent from Salesforce. |
SALESFORCE
- On the Salesforce tab you can configure the following settings:
An app pool restart will be required for updating any of these fields
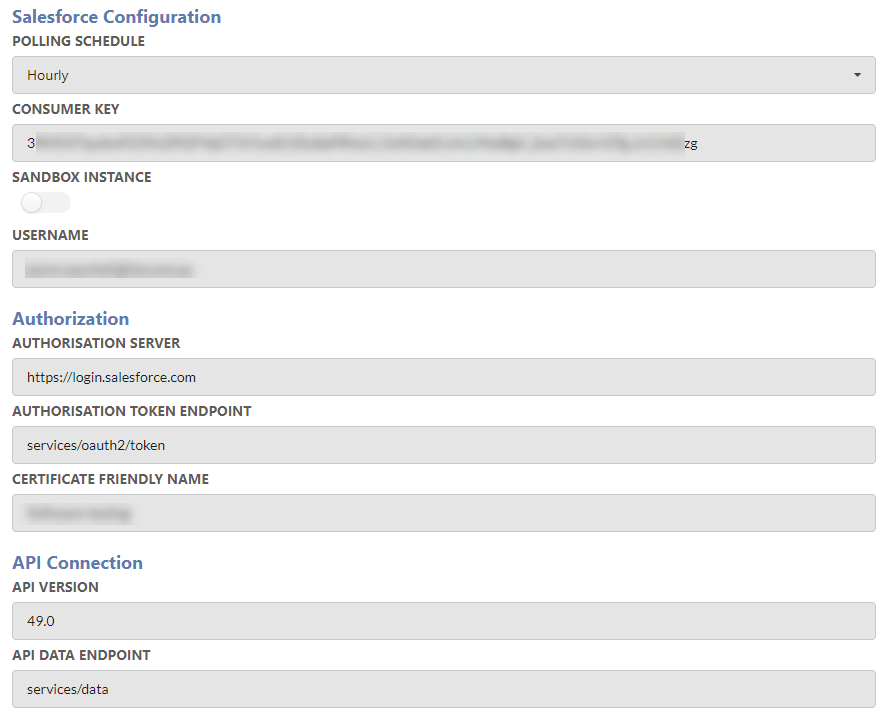
| FUNCTIONALITY | DESCRIPTION |
|---|---|
| Polling Schedule | The time frequency that Sales2CM will wait between polling cycles where it checks for new objects in Salesforce. The polling schedule can be set to Hourly, Daily, Weekly or Monthly. Hourly runs on the hour every hour. Daily runs every day at 7am. Weekly runs Monday at 7am. Monthly runs first of the month at 7am |
| Consumer Key | The Consumer Key of the Salesforce connected app. This is obtained during the Sales2CM installation process. |
| Sandbox Instance | Sandbox instances require for this option to be enabled. |
| Username | The username of the account that Sales2CM will use to connect to Salesforce. |
| Authorisation Server | The web address of the Salesforce authorisation server. This should be set to https://login.salesforce.com |
| Sandbox Authorisation Server | The web address of the Salesforce sandbox authorisation server. This should be set to https://test.salesforce.com. This will only be visible if the Sandbox Instance checkbox is enabled. |
| Authorisation Token Endpoint | The token endpoint that Sales2CM will use to acquire an access token. This should be set to services/oauth2/token |
| Certificate Friendly Name | The certificate friendly name of the certificate used to authenticate with Salesforce |
| API Version | The version of the Salesforce instance. This must be in format XX.X. For example ( 49.0) |
| API Data Endpoint | The endpoint that Sales2CM will use to connect to the Salesforce REST API. This should be set to services/data |
- To save the settings on this tab, click Save
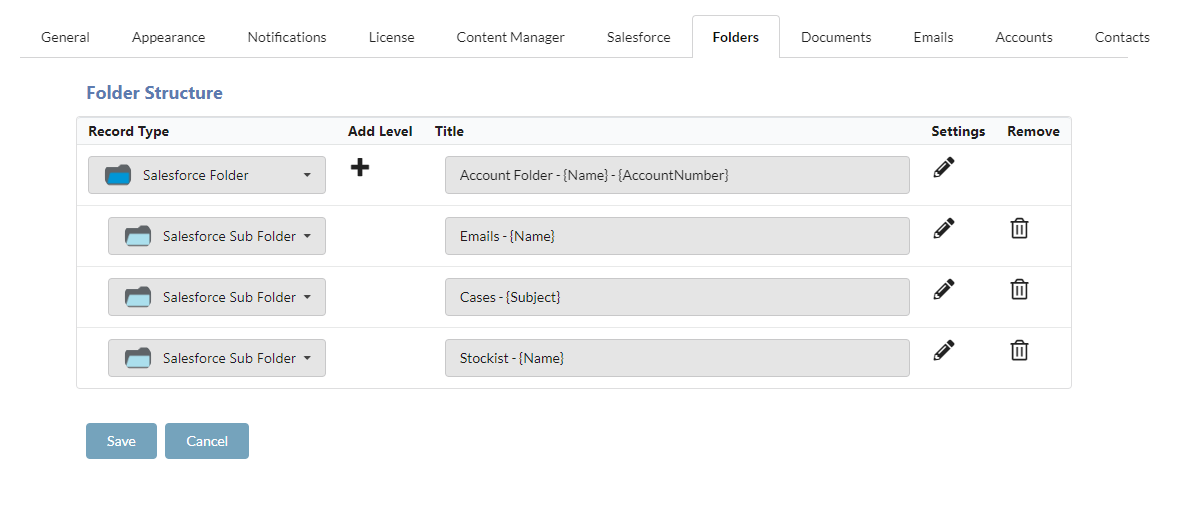
FOLDERS
-
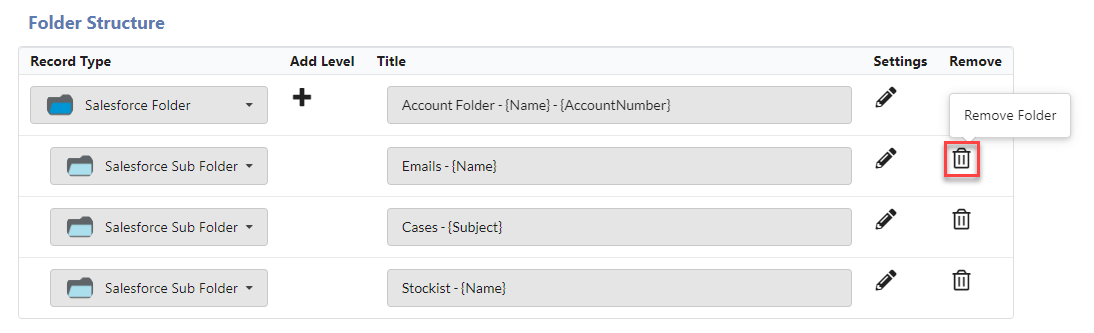
On the Folders tab, you can define the folder structure that should be created in Content Manager for each account that is created in Salesforce
-
For each folder, select the record type from the dropdown box in the Record Type column
-
You can add extra folders by clicking the Add Level button

-
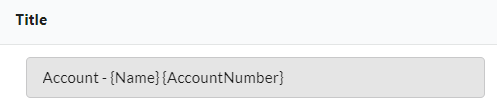
Enter the folder's title in the Title column
To include an account field in the title, include the field name within {}, e.g. {Name}
- Click on the Settings icon to configure additional settings for the folder selected. This will open a modal window

The modal will appear with all settings. Required settings will contain a red asterisk *
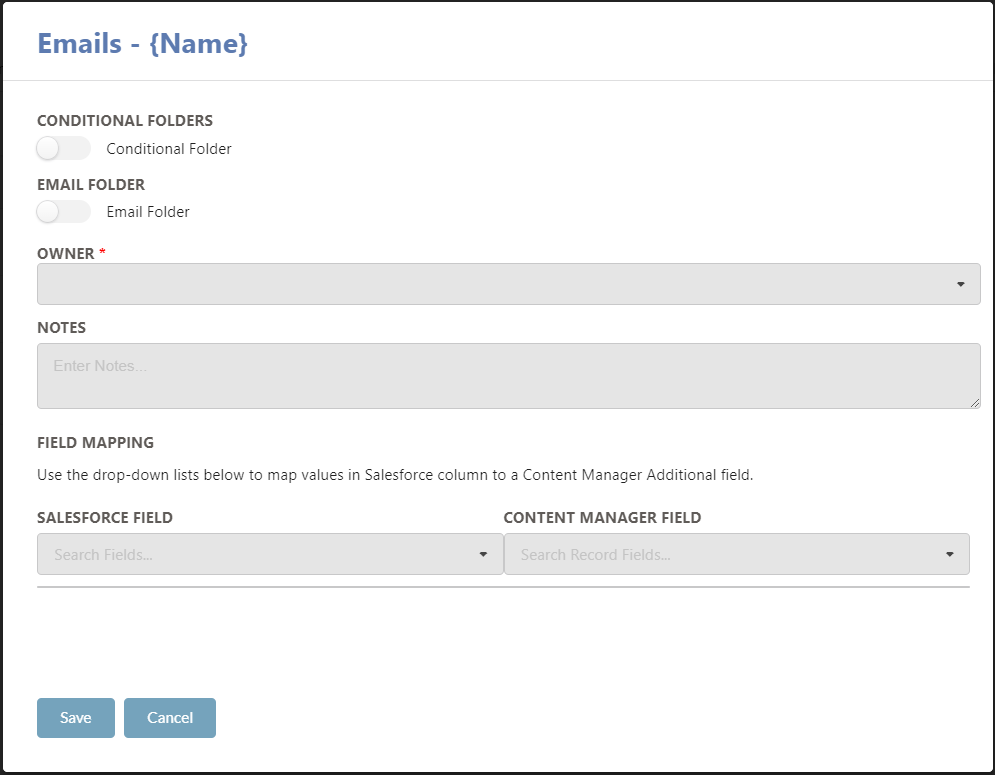
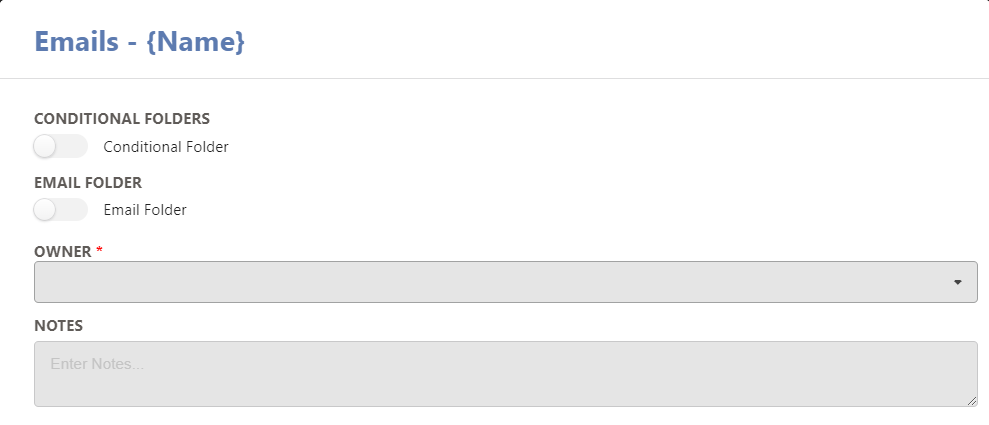
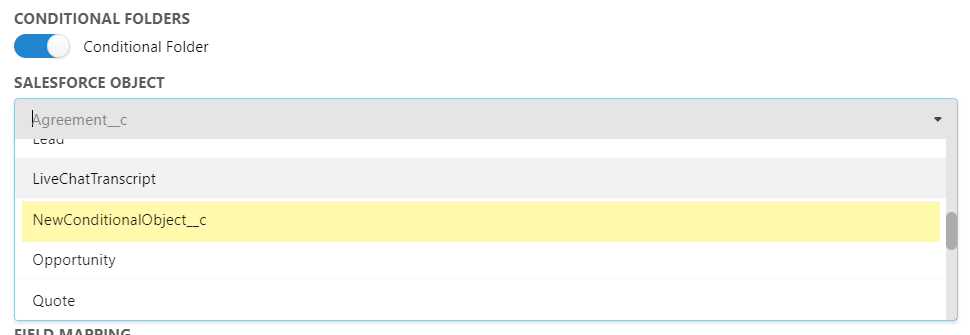
- If Conditional is selected, then the folder will only be created if the relevant conditional object is created on Salesforce. If Conditional is selected you must select the relevant Salesforce object.
Only Custom Salesforce Objects and the following objects can be selected by default: Campaign, Case, Contact, ContractLineItem, Entitlement, Lead, LiveChatTranscript, Opportunity, Quote, QuoteLineItem, ServiceAppointment, ServiceContract, Task, WorkOrder, WorkOrderLineItem. To add additional conditional objects for selection, see the Conditional Object section for more information

- Select which folder that emails from Salesforce should be transferred into
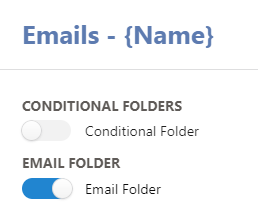
Folders that have been selected as the Email folder cannot be set as conditional folders.
-
All mandatory folder properties will display with a red asterisk. These must be populated to successfully create a folder
-
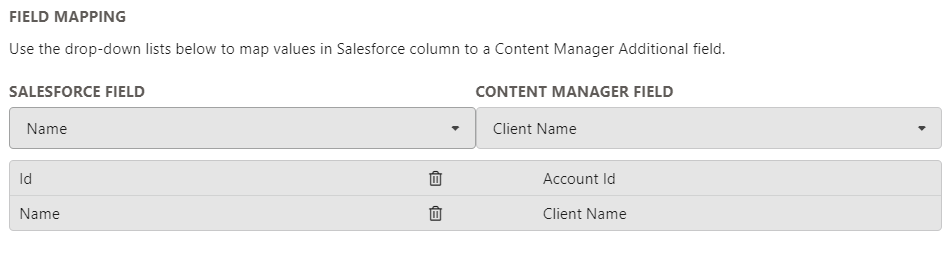
You can set folder additional fields to values from Salesforce objects by mapping these fields. Select a Salesforce field and a Content Manager field to map them
-
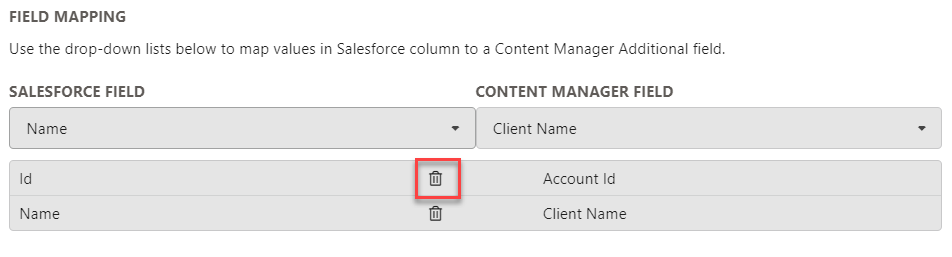
You can click on the Remove button to remove a field mapping
-
To update the current Folders settings, click on the Save button

-
To remove an entire folder from the structure, click on the Remove button
-
To save the folder structure, click on the Save button
DOCUMENTS
On the Documents tab, you can configure the record metadata used when transferring account and case files from Salesforce to Content Manager.
If a new version of a document is created in Salesforce, the new version will be captured in Content Manager. If it is required to capture new versions of documents, the polling scheduler must be set to Daily or later. This is a limitation from Salesforce API as new document versions are on a delayed processor which commits them into Salesforce for polling.
- Under Document Record Type Field, select the Record Type. Selecting a record type will display any mandatory fields associated with the record type
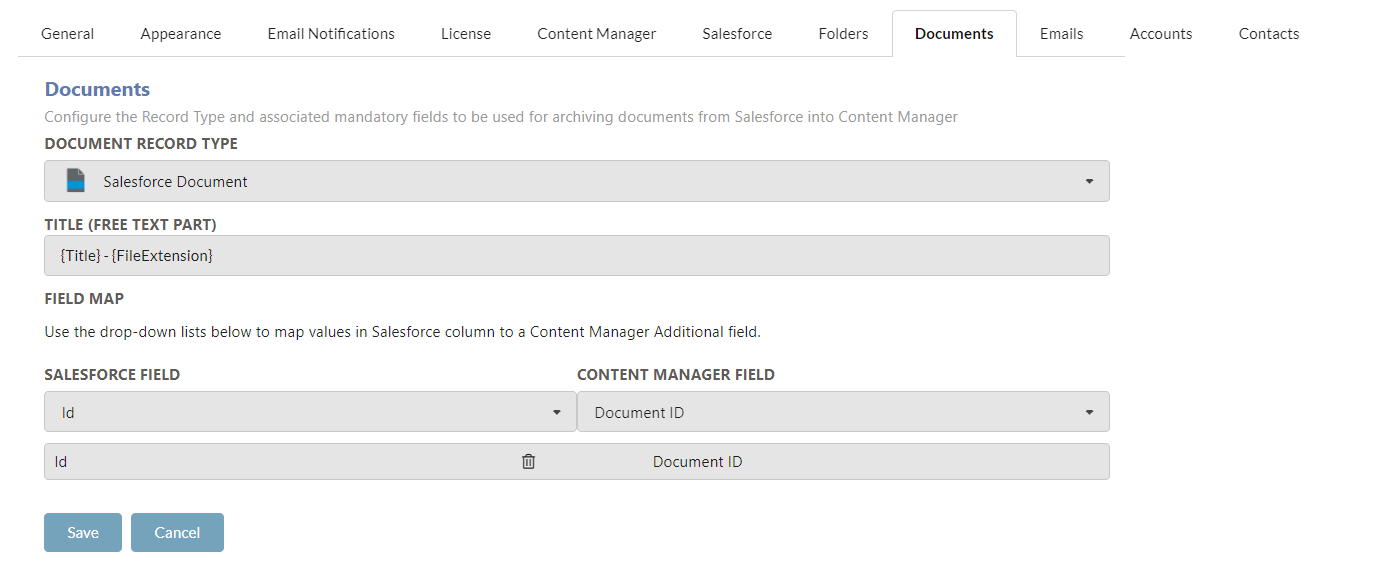
If required you can leave the title field blank and Sales2CM will use the filename as the title.
-
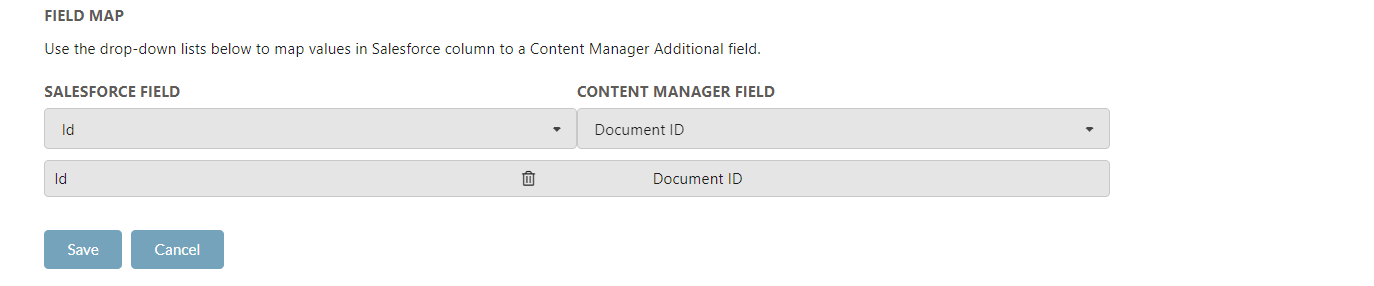
Select a Salesforce field and a Content Manager field to map them together
-
Click on the Remove button to remove a field mapping (if required)

-
To save the Record configuration, click on the Save button
EMAILS
On the Emails tab, you can configure the record metadata used when transferring emails from Salesforce to Content Manager.
- Under Document Record Type Field, select the Record Type. Selecting a record type will display any mandatory fields associated with the record type
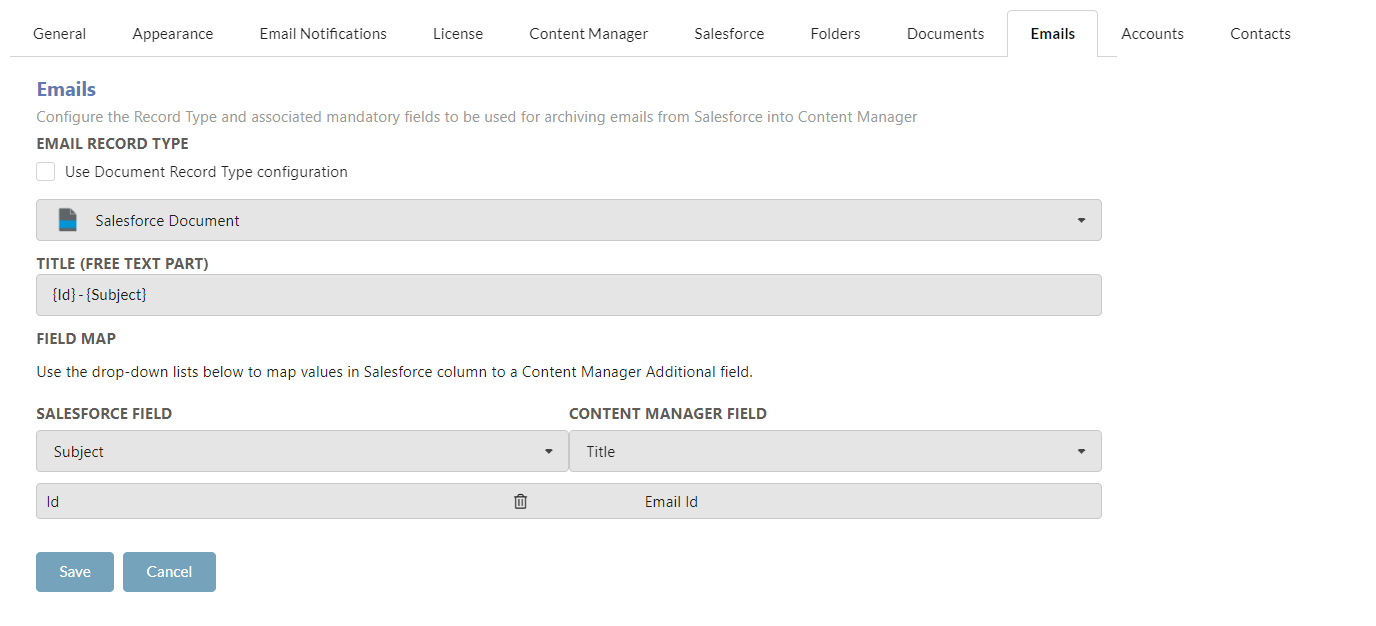
If required you can leave the title field blank and Sales2CM will use the filename as the title.
If you would like to use the same Record Type configuration that is used for documents, enable the "Use document record type configuration" option

-
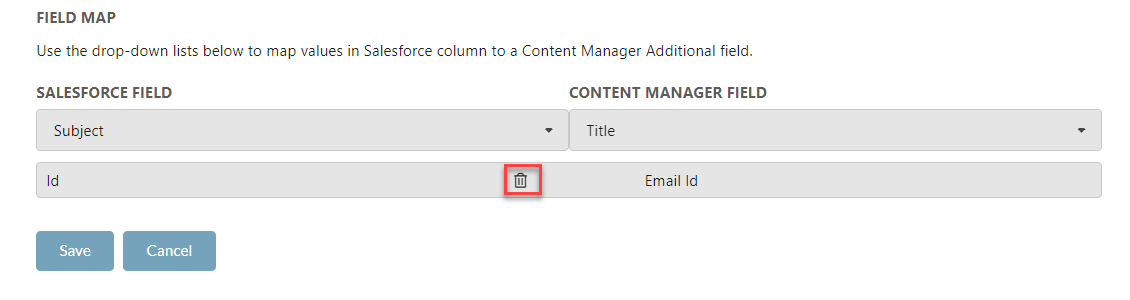
Select a Salesforce field and a Content Manager field to map together

-
To remove a field mapping click on the Remove button
-
Clickon the Save button to update and changes
ACCOUNTS
On the Accounts tab, you can map values from Salesforce Account objects to fields on the related organization locations in Content Manager.
-
Select a Salesforce field and a Content Manager field to map
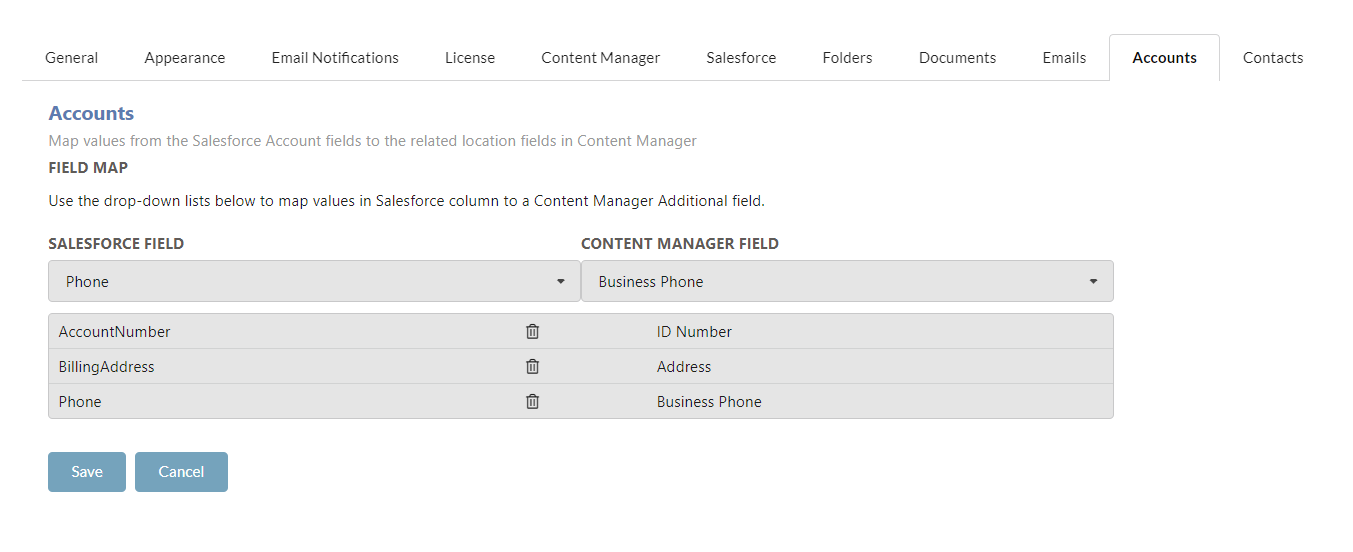
-
Click on the Remove button to remove a field mapping (if required)

-
To save the account field mappings, click on the Save button
CONTACTS
On the Contacts tab, you can map values from Salesforce Contact objects to fields on the related person locations in Content Manager.
-
Select a Salesforce field and a Content Manager field to map
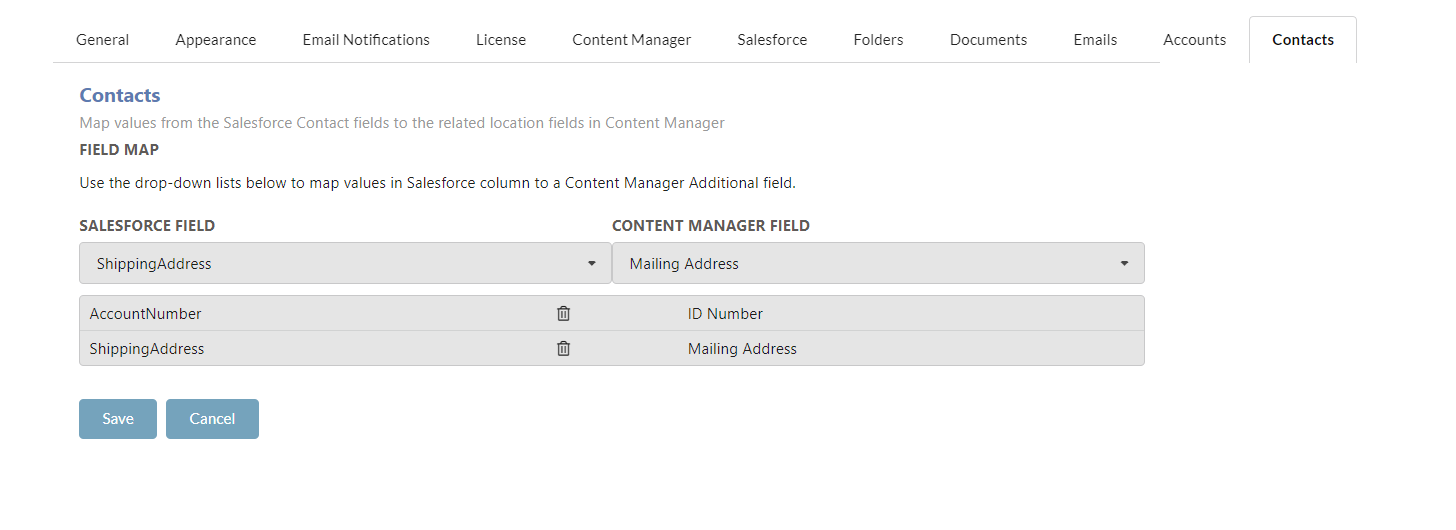
-
Under Contact Id Field, select the Content Manager field to store the Contact Id from salesforce.

To remove a field mapping click on the Remove button
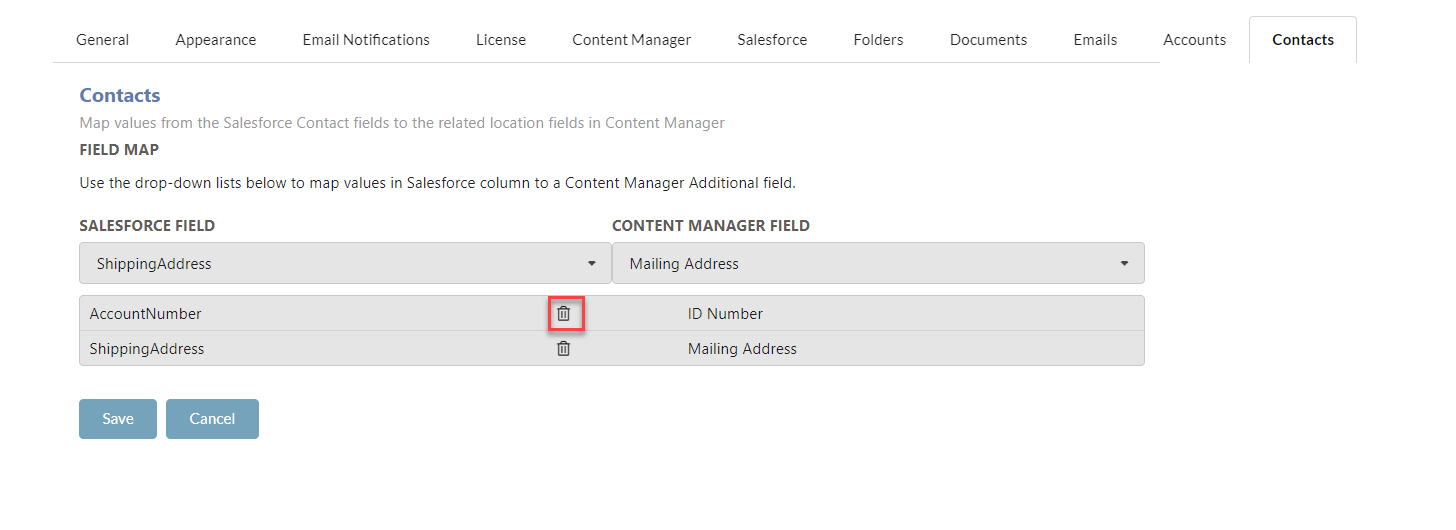
- To save the contact field mappings, click on the Save button
CONDITIONAL OBJECTS
The following conditional objects are provided by Sales2CM for capturing into Content Manager:
- Campaign
- Case
- Contact
- ContractLineItem
- Entitlement
- Lead
- LiveChatTranscript
- Opportunity
- Quote
- QuoteLineItem
- ServiceAppointment
- ServiceContract
- Task
- WorkOrder
- WorkOrderLineItem.
- Any custom objects created in Salesforce
Attempting to capture other conditional objects that do not reside within the default list is not supported. There is a probability that partial, or no capturing of the object could occur.
To add more conditional objects that are not a part of the above list the following can be completed.
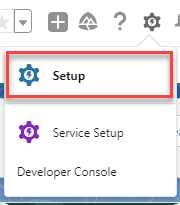
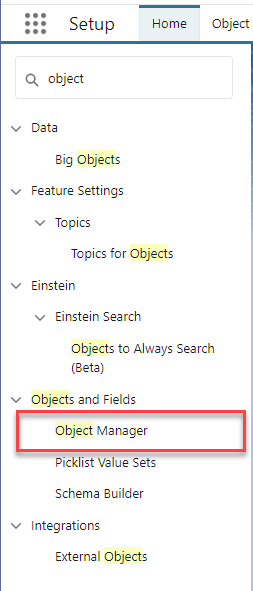
- Navigate to Salesforce and click on the Setup icon
- Search for "Objects" and click on the Object Manager
-
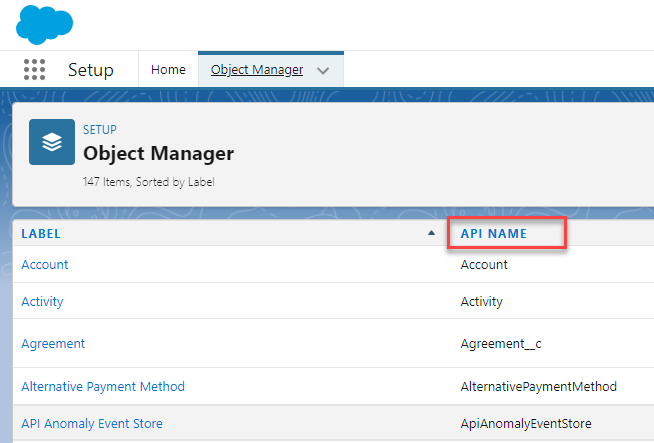
Find the object type that you want to be captured with Sales2CM, take note of the object's API Name
-
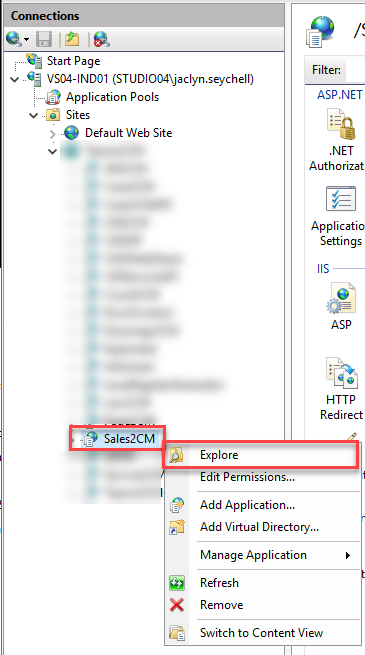
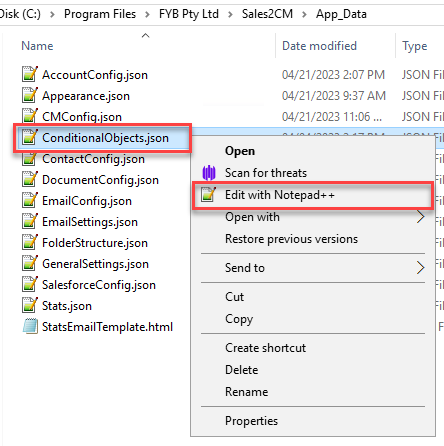
Navigate to where Sales2CM is installed > App_Data .
-
Edit the ConditionalObjects.json file
-
Add the new conditional object's API Name to the list. Ensure to add " " around the API Name, and add a ',' to the last object before highlighted in yellow
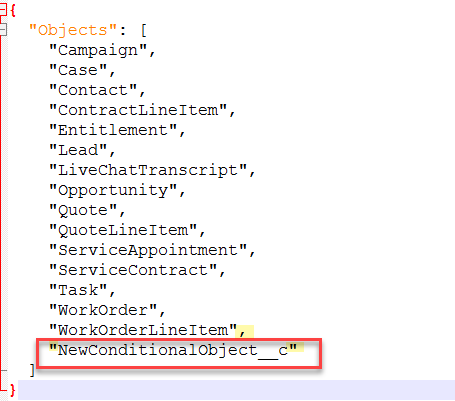
-
Save the file. Complete an app pool restart to ensure the latest changes have been added to Sales2CM
-
The option will now be available to be chosen from the Conditional Object dropdown in Sales2CM.
RECORD DISPLAY WITHIN SALESFORCE
If this functionality has been set up in Salesforce, a document window will display any created folder structure and its records in Content Manager.
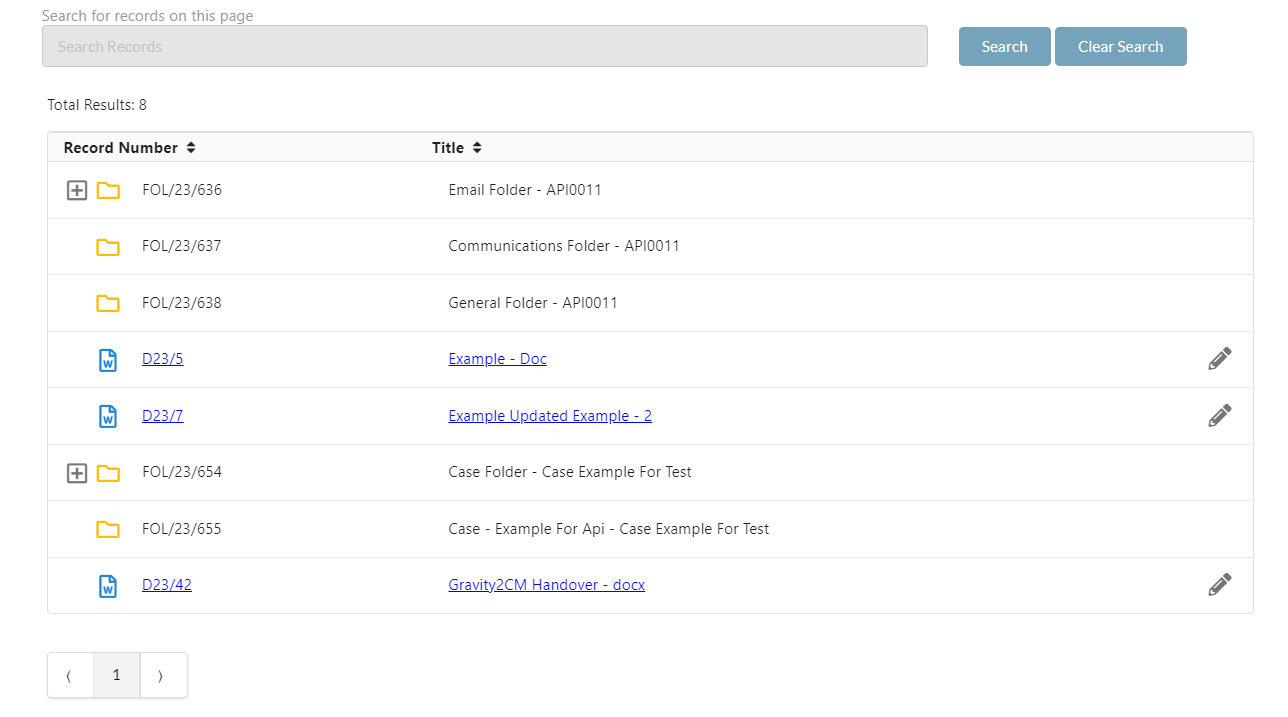
Folders with '+' can be expanded to see any contained records.


Records highlighted blue when clicked will download the record.
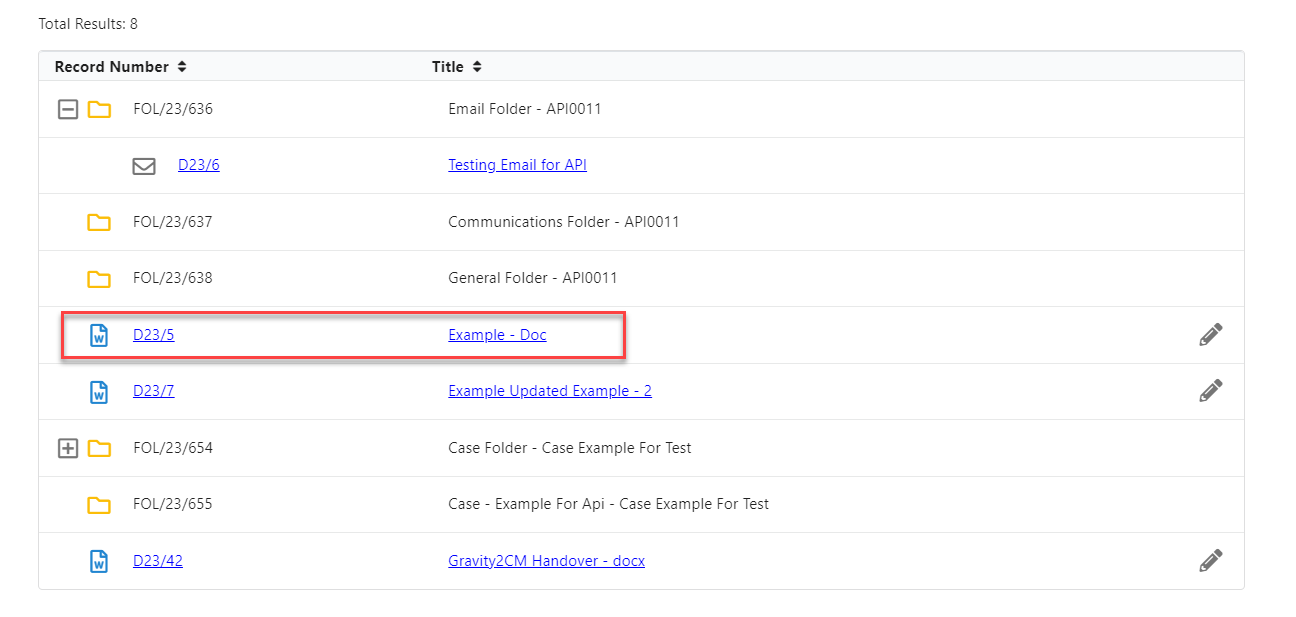
Clicking on the Pencil Icon will open the record using CM Launcher (please ensure this is installed on your computer prior to use).
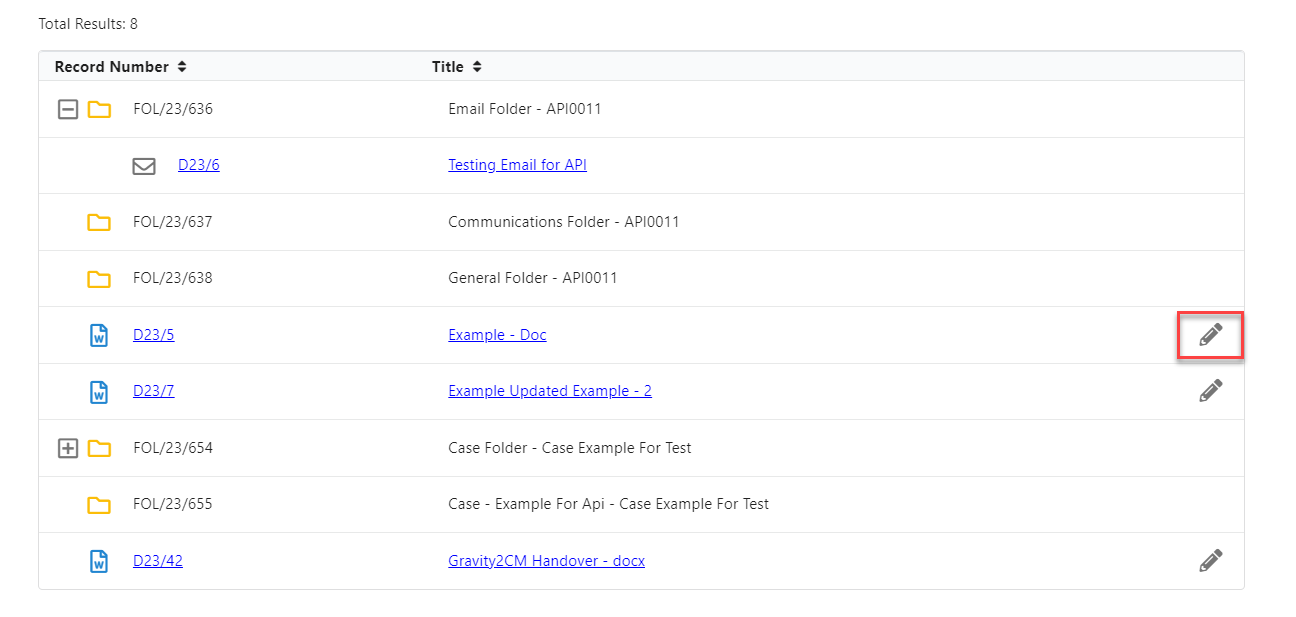
The search bar allows for searching for any records within the account display.
