AUTHENTICATION
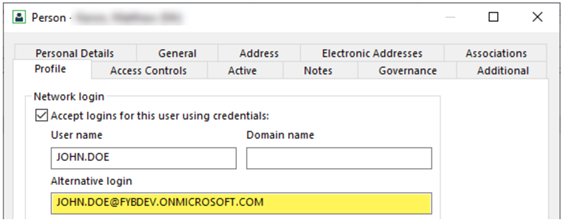
The Power2CM application uses Azure AD authentication to validate the user’s credentials. Users will be required to enter their Microsoft 365 login details to sign into the application. The user's 365 login will need to be populated on their Content Manager profile so that the authenticated user can connect to Content Manager. This is done using the alternate login field.
Note that the Power2CM admin console is only accessible to CM Admins, Records Managers or Whitelisted users.
LAUNCHING THE APP
If this is your first time launching the application, your browser may be blocking the sign-in pop-up. Check for this icon in the top right of your browser and allow the pop-up.

-
Open a web browser and navigate to the Power2CM address
-
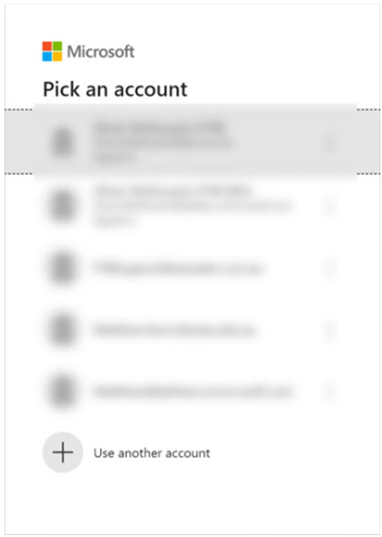
Sign in using your Microsoft Account. This account must belong to the Microsoft Tenant used during the installation of FYB Power2CM
-
After a successful sign-in, the app will load
GENERAL TAB
OVERVIEW
Below is the Power2CM general tab. General Settings can be configured using the interface below.

EXPORT SETTINGS
Click on the Export Settings button to download all JSON settings files from Power2CM.
IMPORT SETTINGS
Click on the Import Settings button to import selected JSON settings files to Power2CM.
DOWNLOAD LOGS
Click on the Download Logs button to automatically download all Power2CM logs from the server.
ACCESS
Select the Content Manager users that should have admin console access (whitelisting).
ADVANCED
The following advanced settings can be applied:
| FUNCTIONALITY | DESCRIPTION |
|---|---|
| Database ID | The two alphanumeric character dataset identifier of the server Power2CM is installed on. |
| Workgroup Server Name | The workgroup server name that Power2CM is installed on. |
| Workgroup Server URL | The workgroup server naURLme that Power2CM is installed on. |
| Temp Path | The temp path used by Power2CM |
The Workgroup Server Name must be set to local to ensure user impersonation occurs correctly in Content Manager.
APPEARANCE TAB
OVERVIEW
The Appearance tab allows for the Power2CM interface appearance to be updated.
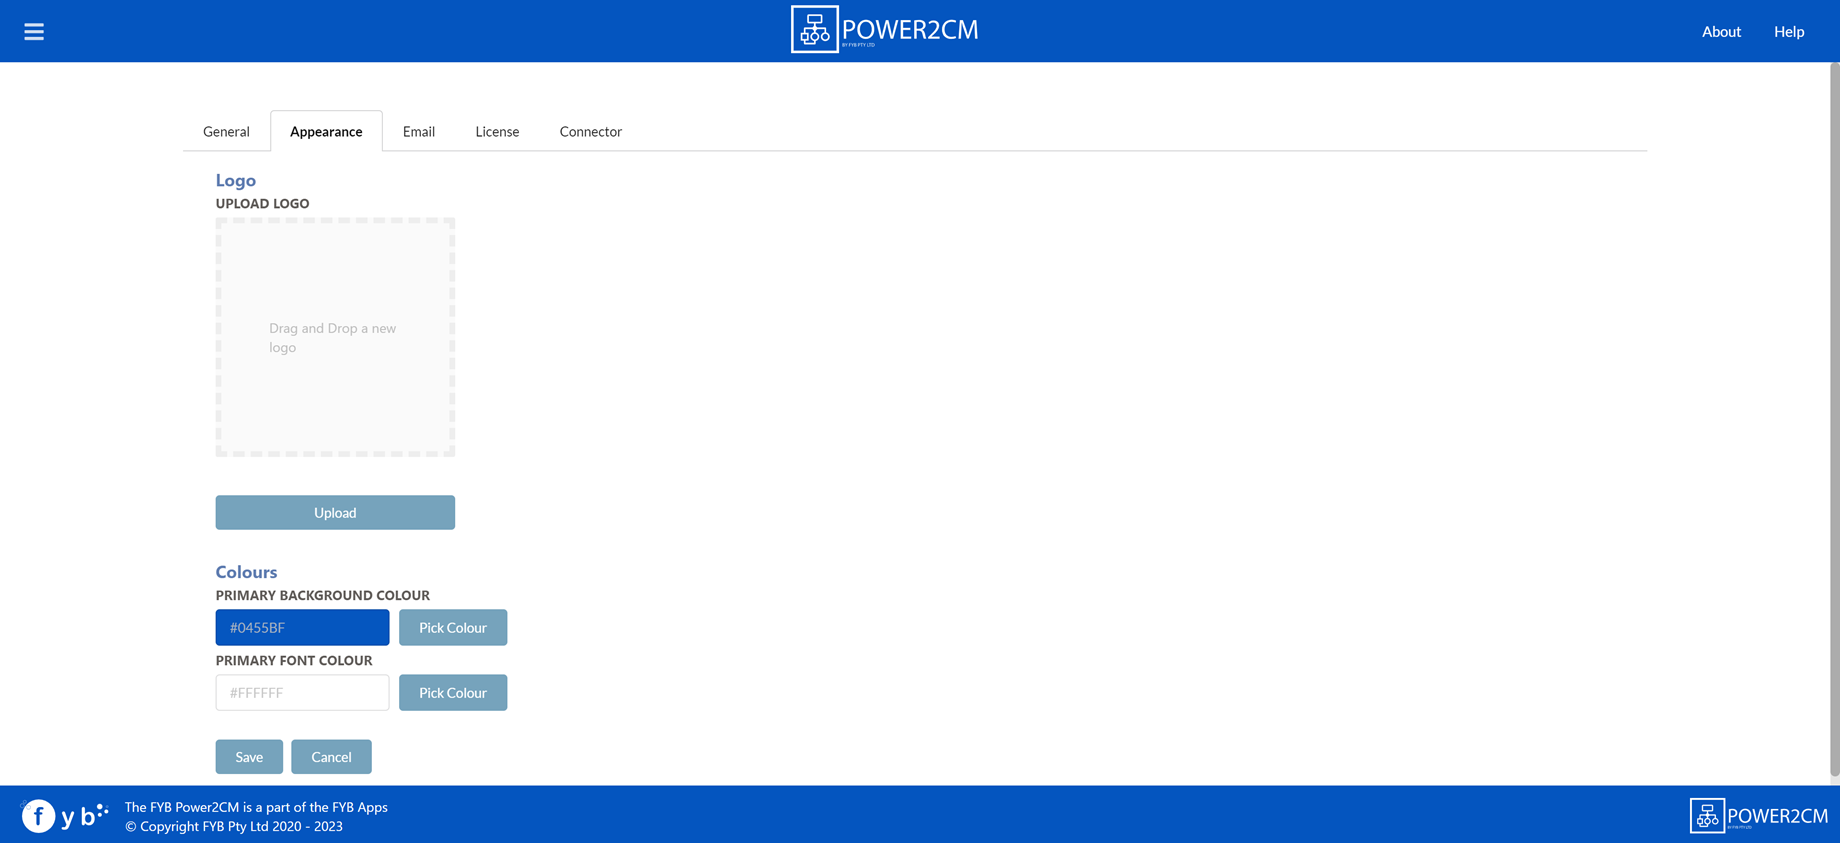
PRIMARY BACKGROUND COLOUR
The primary background colour will update the header and footer of the Power2CM interface.
Click the Pick Colour button to enable the colour picker. Select the desired colour.
PRIMARY FONT COLOUR
The primary font colour will update the header and footer fonts of the Power2CM interface.
Click the Pick Colour button to enable the colour picker. Select the desired colour.
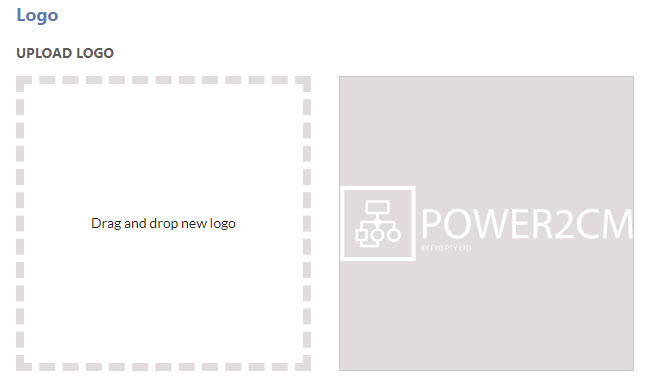
LOGO
The Logo in the header can be updated using the drag-and-drop field.
EMAIL TAB
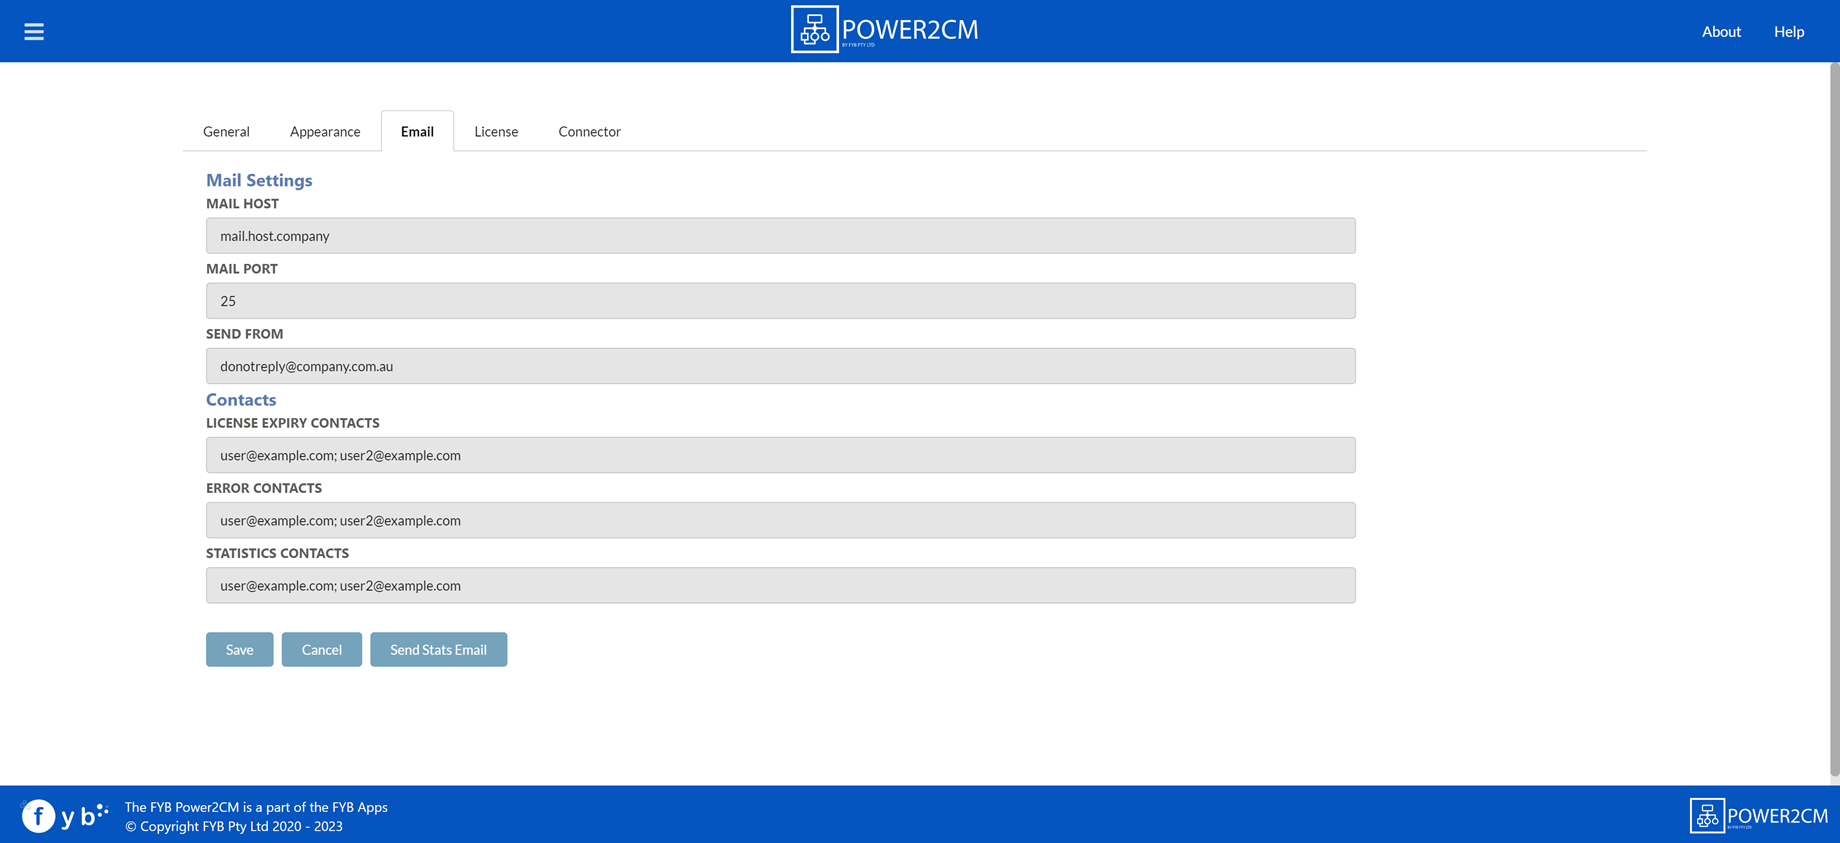
OVERVIEW
The email notifications tab allows the configuration of email host/port settings and the contacts that should receive notifications.
| FUNCTIONALITY | DESCRIPTION |
|---|---|
| MAIL HOST | The mail host that is used to send all email notifications. |
| MAIL PORT | The mail port allows for email notifications to be sent. |
| SEND FROM | The email address that all email notifications are sent from. |
| LICENSE EXPIRY CONTACTS | Provide the email addresses of the users who shall receive an email notification when the Power2CM license is due to expire. Multiple contacts can be added by adding a ';' between each contact. (e.g. name@company.com.au; secondname@company.com.au). |
| ERROR CONTACTS | Contacts that will receive any error notifications. Multiple contacts can be added by separating them with ; |
| STATISTICS CONTACTS | Provide the email addresses of the users that shall receive an email of the monthly usage statistics for Power2CM |
| SEND STATS EMAIL | Instantly send the monthly usage statistics for Power2CM to the email addresses listed in the STATISTICS CONTACTS |
LICENSE TAB
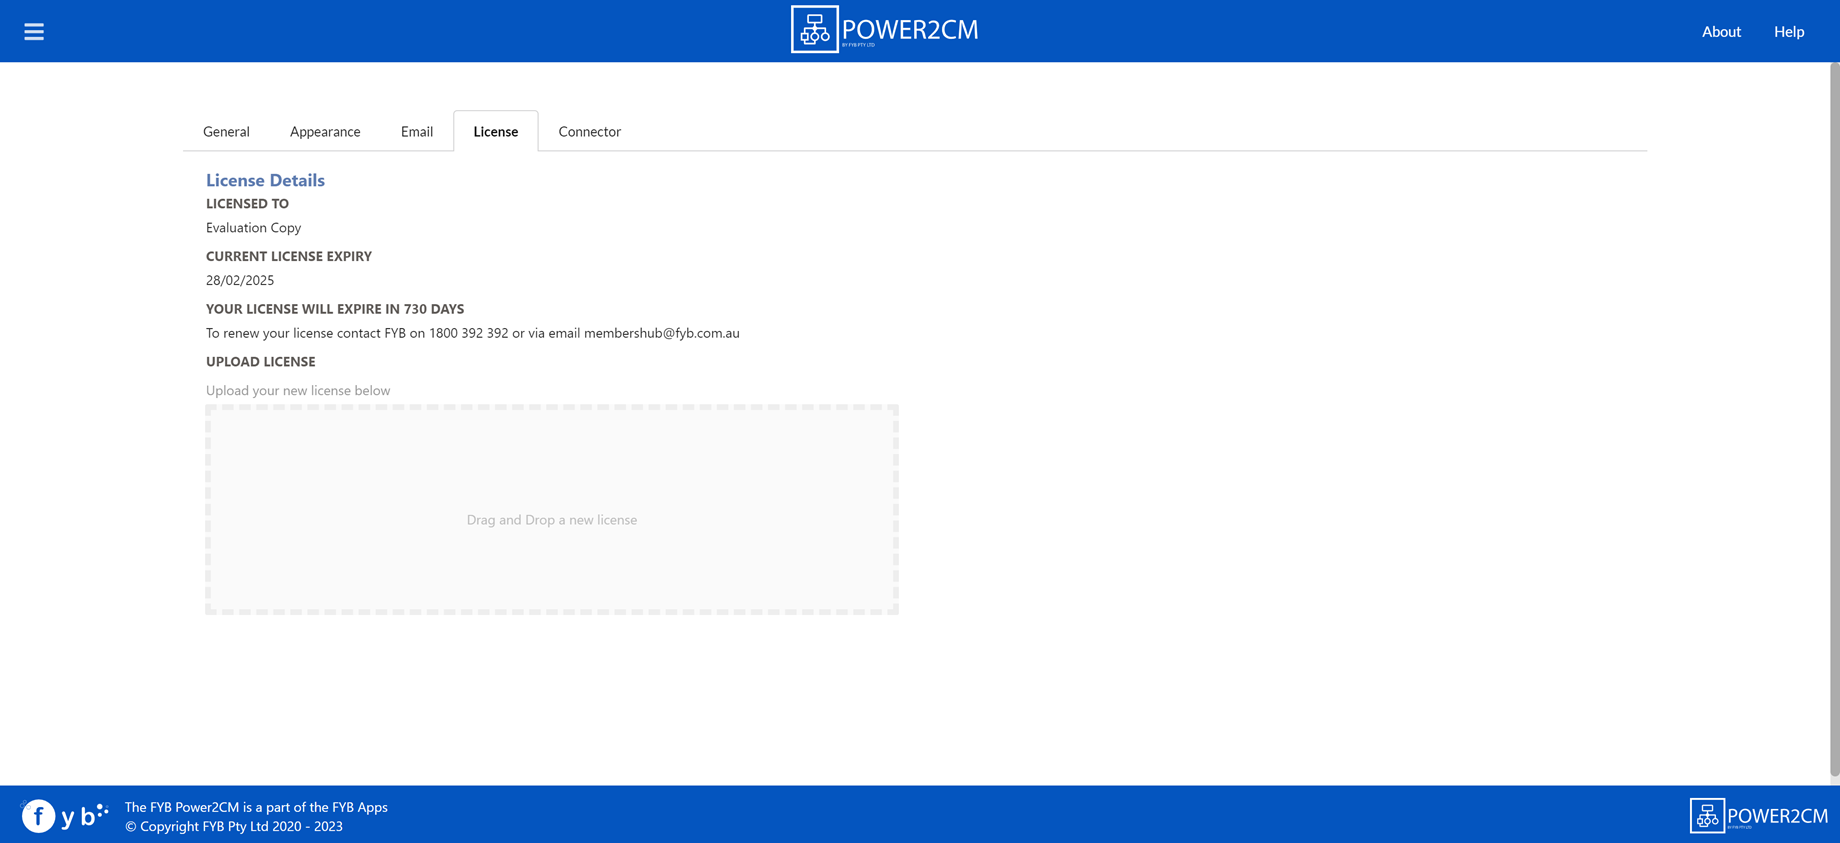
OVERVIEW
Licenses can be uploaded from the Power2CM interface. Please refer to the license update guide for further details.
CONNECTOR TAB
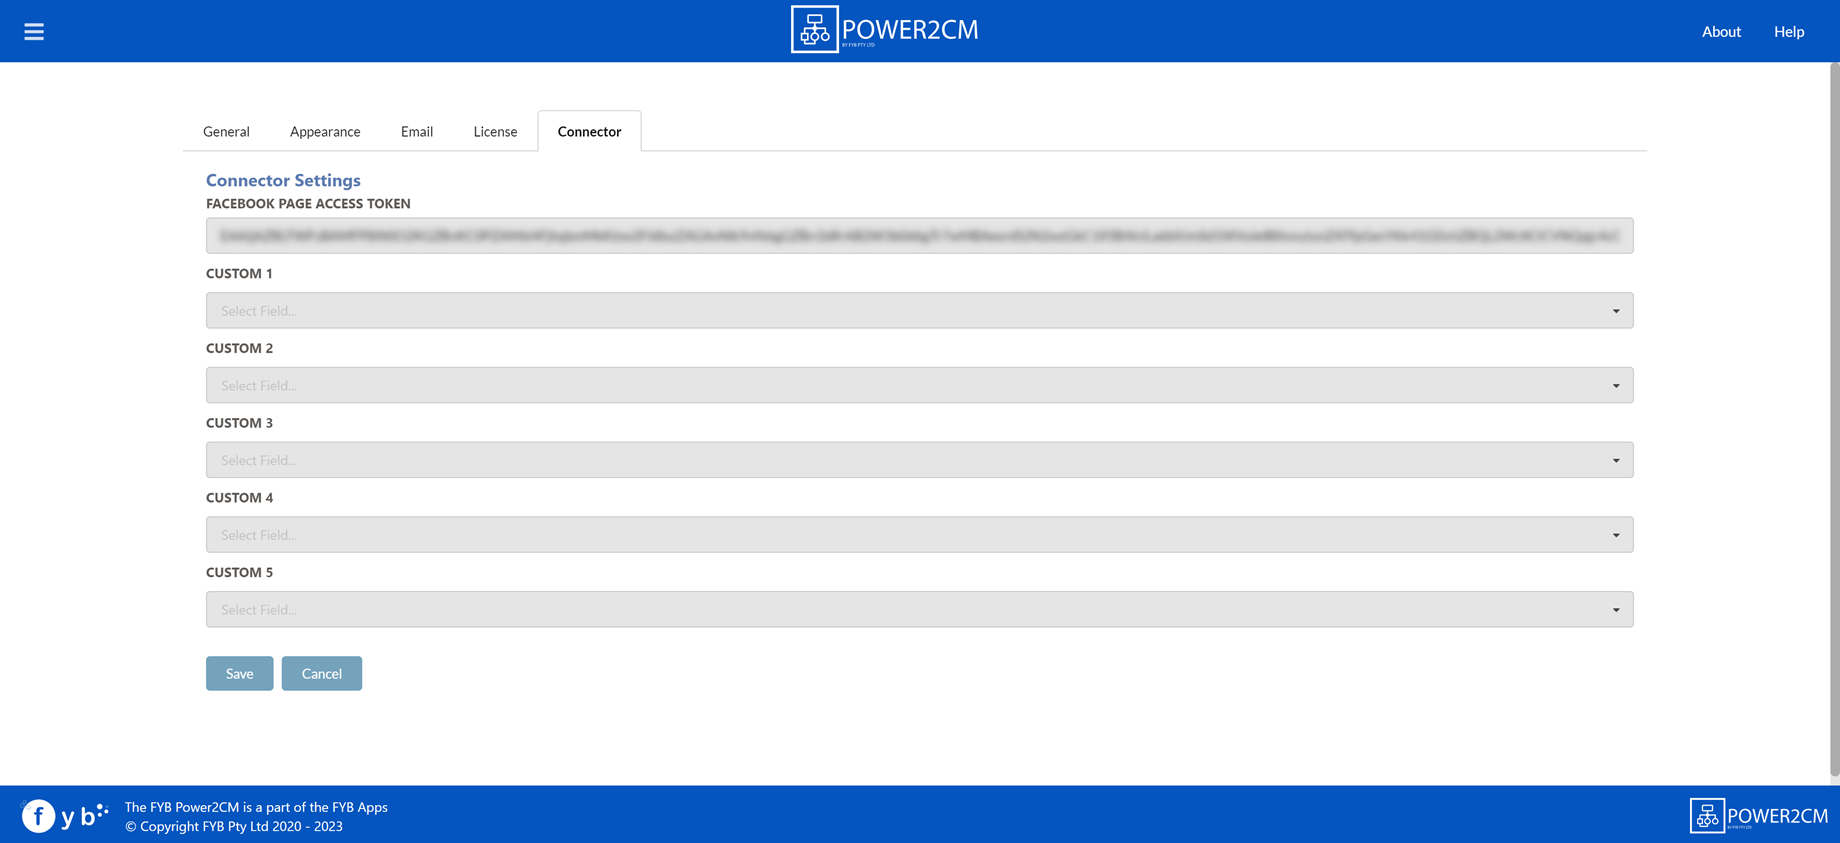
OVERVIEW
The Connector tab assists with the configuration of Power2CM's connection to the Facebook / Instagram applications. It also allows custom fields to be mapped.
| FUNCTIONALITY | DESCRIPTION |
|---|---|
| Facebook Page Access Token | The Facebook page access token that is generated during the Facebook Connector Install Guide. |
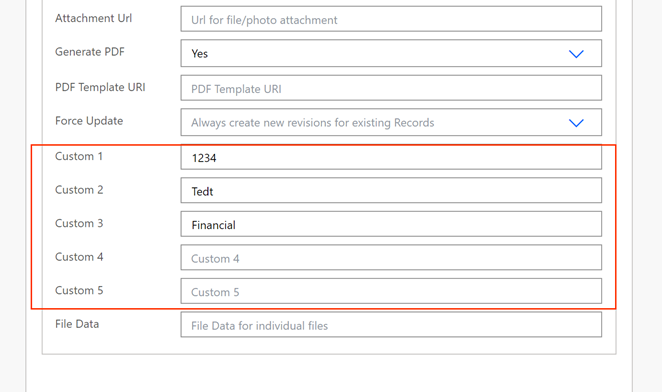
| Custom 1 - 5 | Select the relevant Content Manager fields that you wish to map the custom flow fields too. |
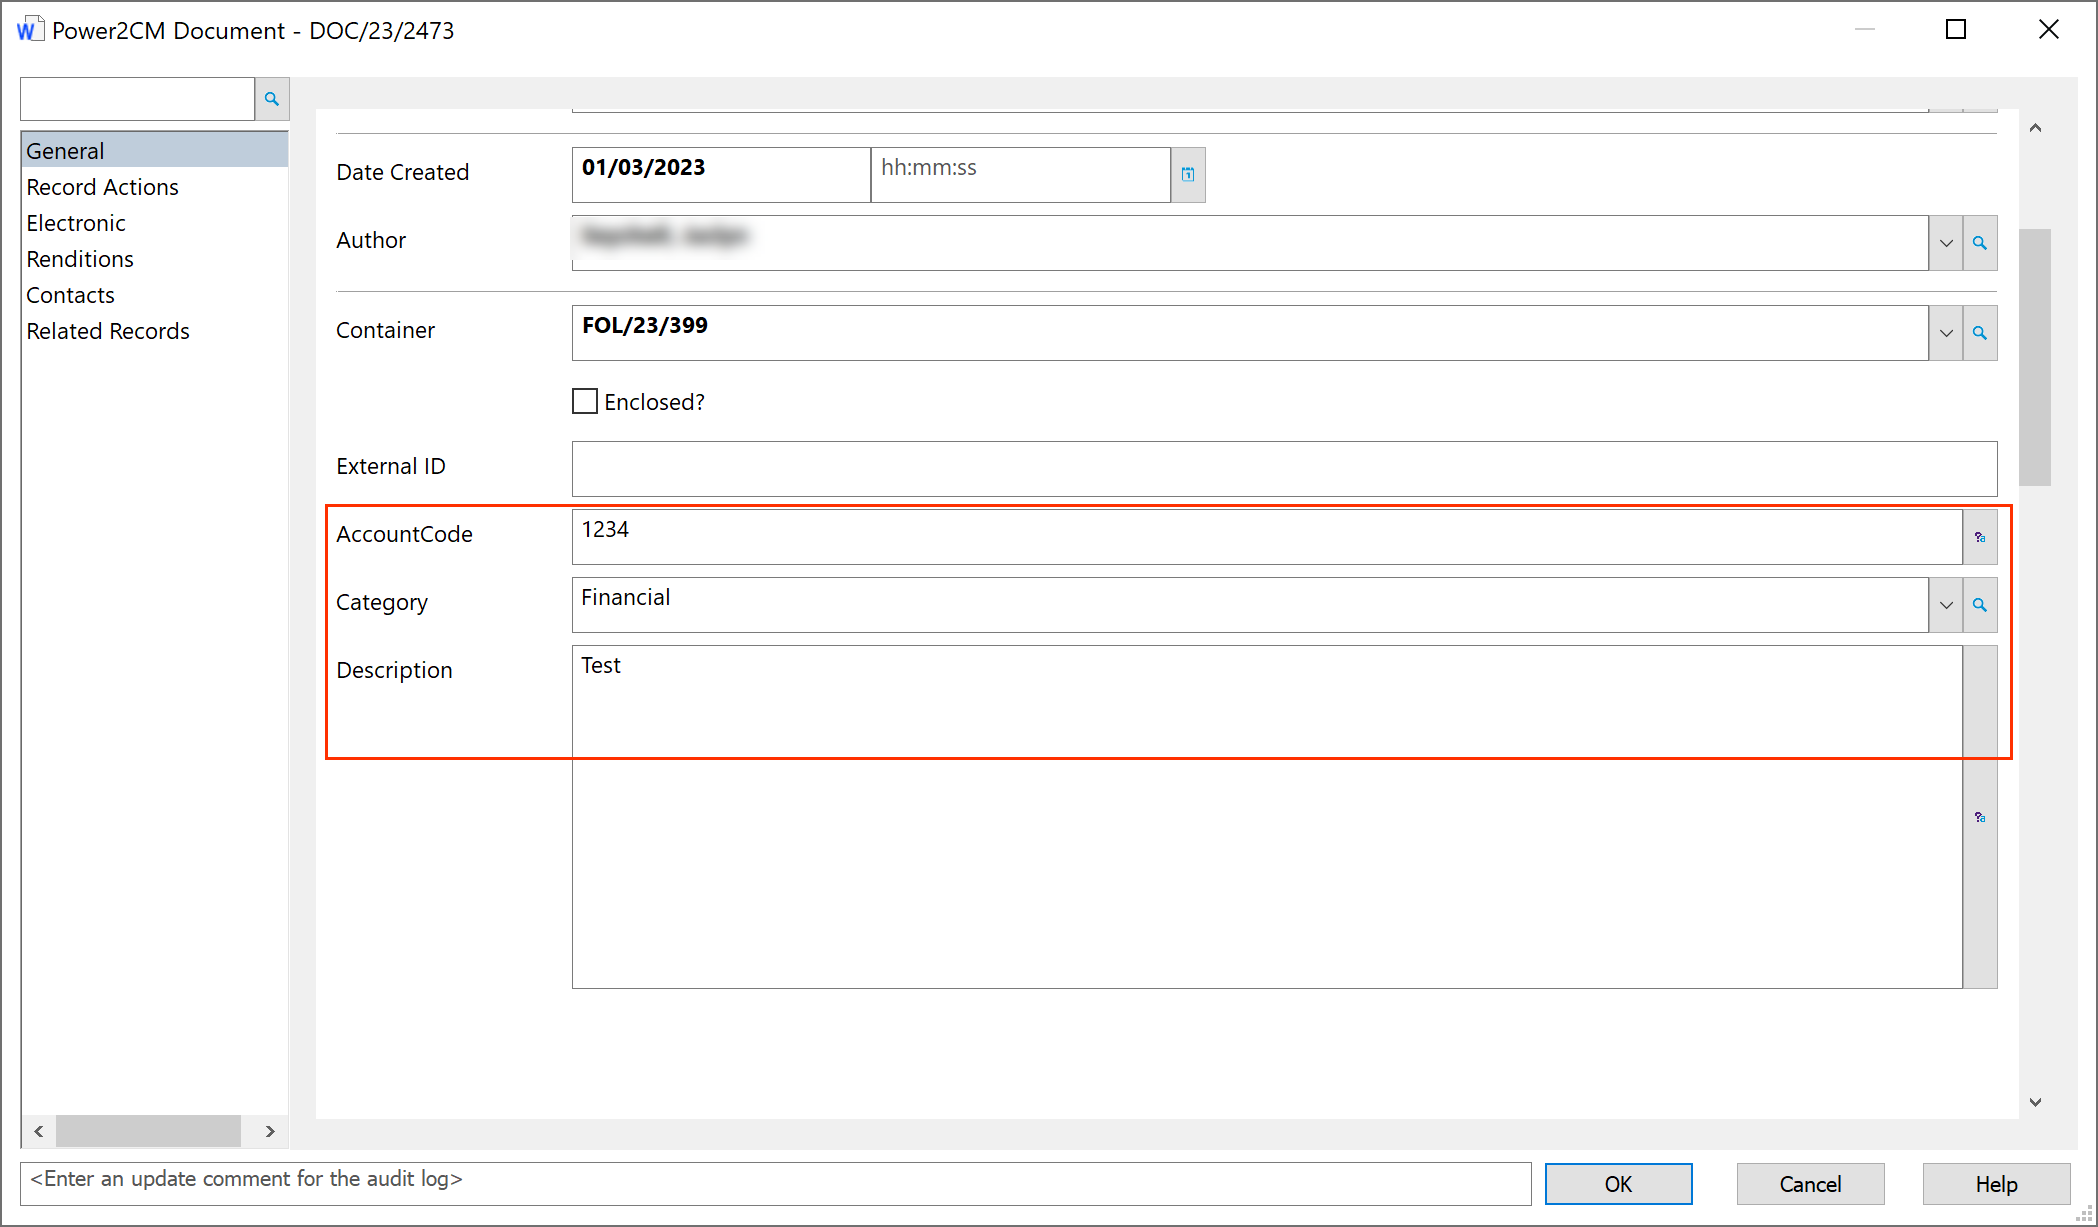
MAPPING CUSTOM FIELDS
To map values specified in any of the five custom fields to an additional field follow the steps below:
-
Navigate to the Power2CM Interface > Connector Tab
-
Select the Content Manager additional fields to use for custom1 - custom5.

These reflect the custom fields found in the Create Records action on Power Automate. Any data entered into these fields in the Power Automate flow will be added to the mapped field in Content Manager.
Power2CM Create Record in CM action
Content Manager Record