

AUTHENTICATION AND ACCESS
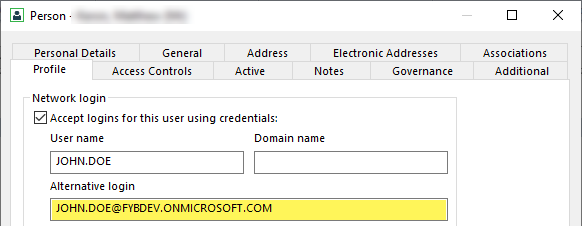
The 365|2CM application uses Azure AD authentication to validate the user’s credentials. Users will be required to enter their Microsoft 365 login details to sign into the application. The user's 365 login will need to be populated on their Content Manager profile so that the authenticated user can connect to Content Manager, this is done using the alternate login field.
Only Content Manager Administrators, Record Managers and users added to the basic access list in the admin console can access 365|2CM. This excludes the Teams Chat area which is open to all users as it's user-specific.
LAUNCHING THE APP
- Open a web browser and navigate to the 365|2CM address
- Sign in using your Microsoft Account. This account must belong to the Microsoft Tenant used during the installation of FYB 365|2CM
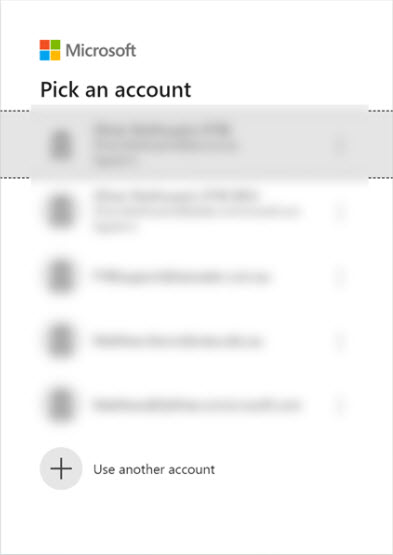
- After a successful sign in, the app will load
MULTIPLE DATASETS
365|2CM supports connection to multiple Content Manager Datasets as long as they are on the same server.

365|2CM will display Content Manager data from the current dataset.
During the scheduled archive process, all connections made across all datasets will be archived.
To switch Datasets, click on a different dataset from the Dataset Dropdown.
Datasets can be added, edited and deleted in the Admin Console
NAVIGATION
SIDE MENU
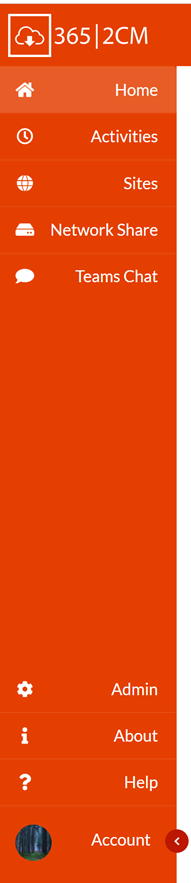
The side menu menu allows you to navigate to different areas of the application, each navigation item is explained below. Further detail can be found under the corresponding heading throughout this document.
-
Home – Displays a list of all current connections
-
Activities – Displays a list of documents that have been recently transferred
-
Sites – Displays all sites on SharePoint/Teams/OneDrive that the user has access to
-
Network Share - Allows configuration of network shares
-
Teams Chats - Displays a list of your Teams Chats and allows for archiving of Teams Chats
-
Admin - Display the Admin settings. This option is only available for 365|2CM Administrators
-
About - Displays the About Modal
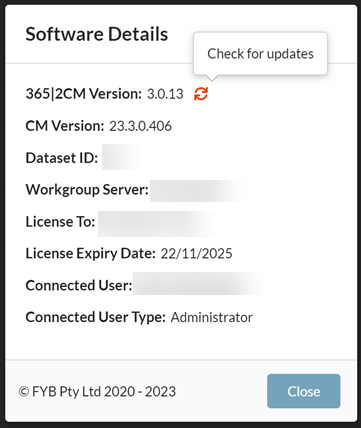
Use the Check for Updates button to check for new releases of 365|2CM -
Help - Opens the D360 365|2CM User manual in a new tab in your browser.
-
Sign out - Sign out of the application
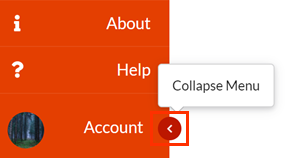
COLLAPSE SIDE MENU
The side menu can be collapsed by clicking this button:
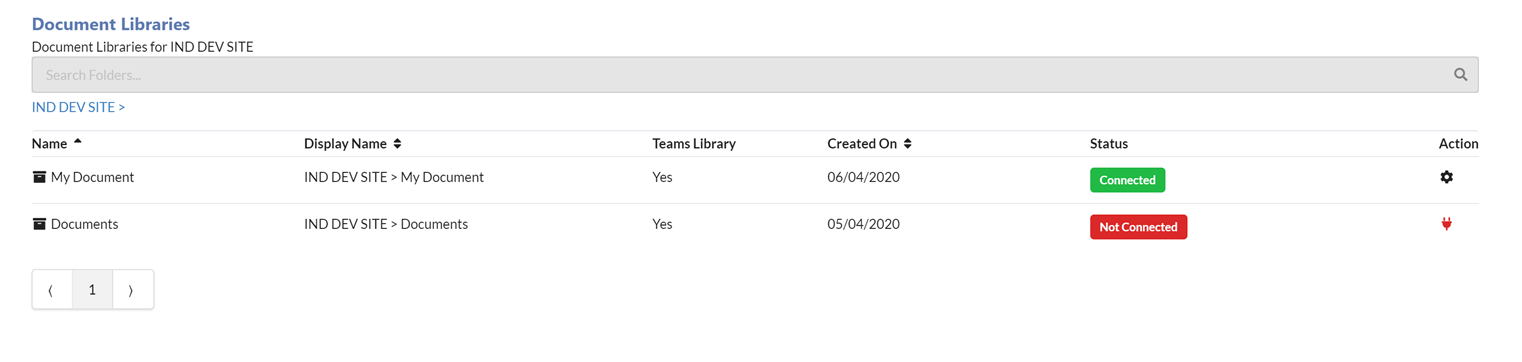
HOME
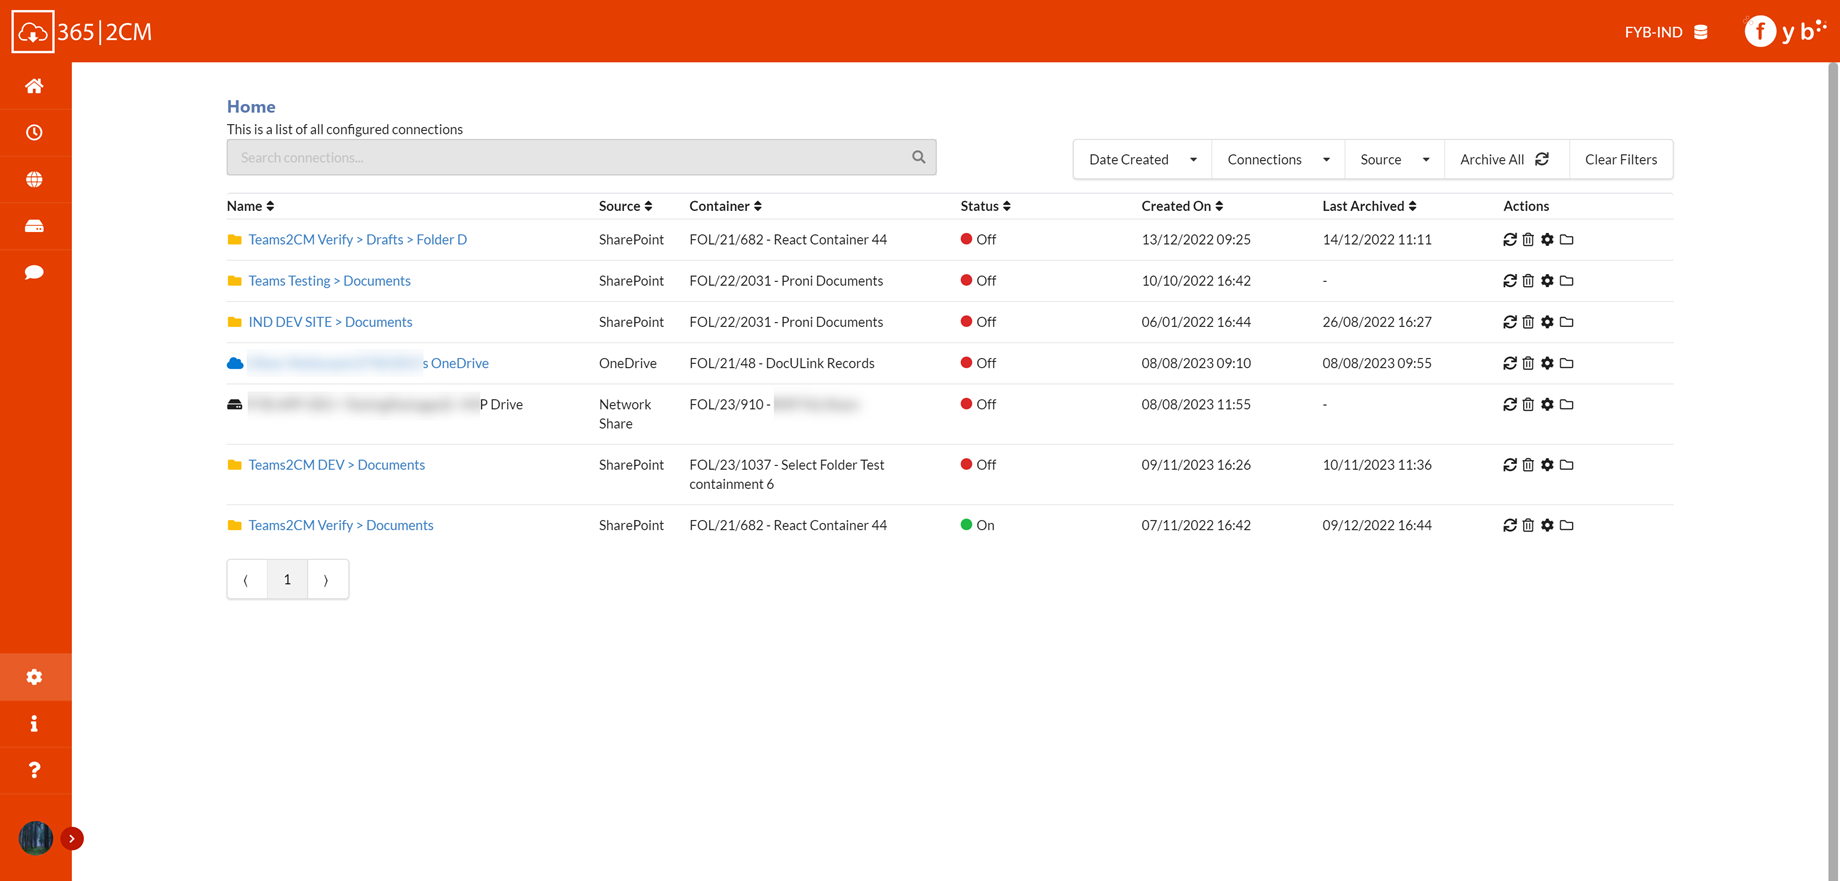
The home screen displays a list of connected document libraries. Initially, this screen will be blank as there are no connected libraries.

The action icons allow you to perform a certain function on each document library, details of each action are explained below.
FILTERING
Connections can be filtered by the following:
Using the Search Bar to filter connections by their Display Name
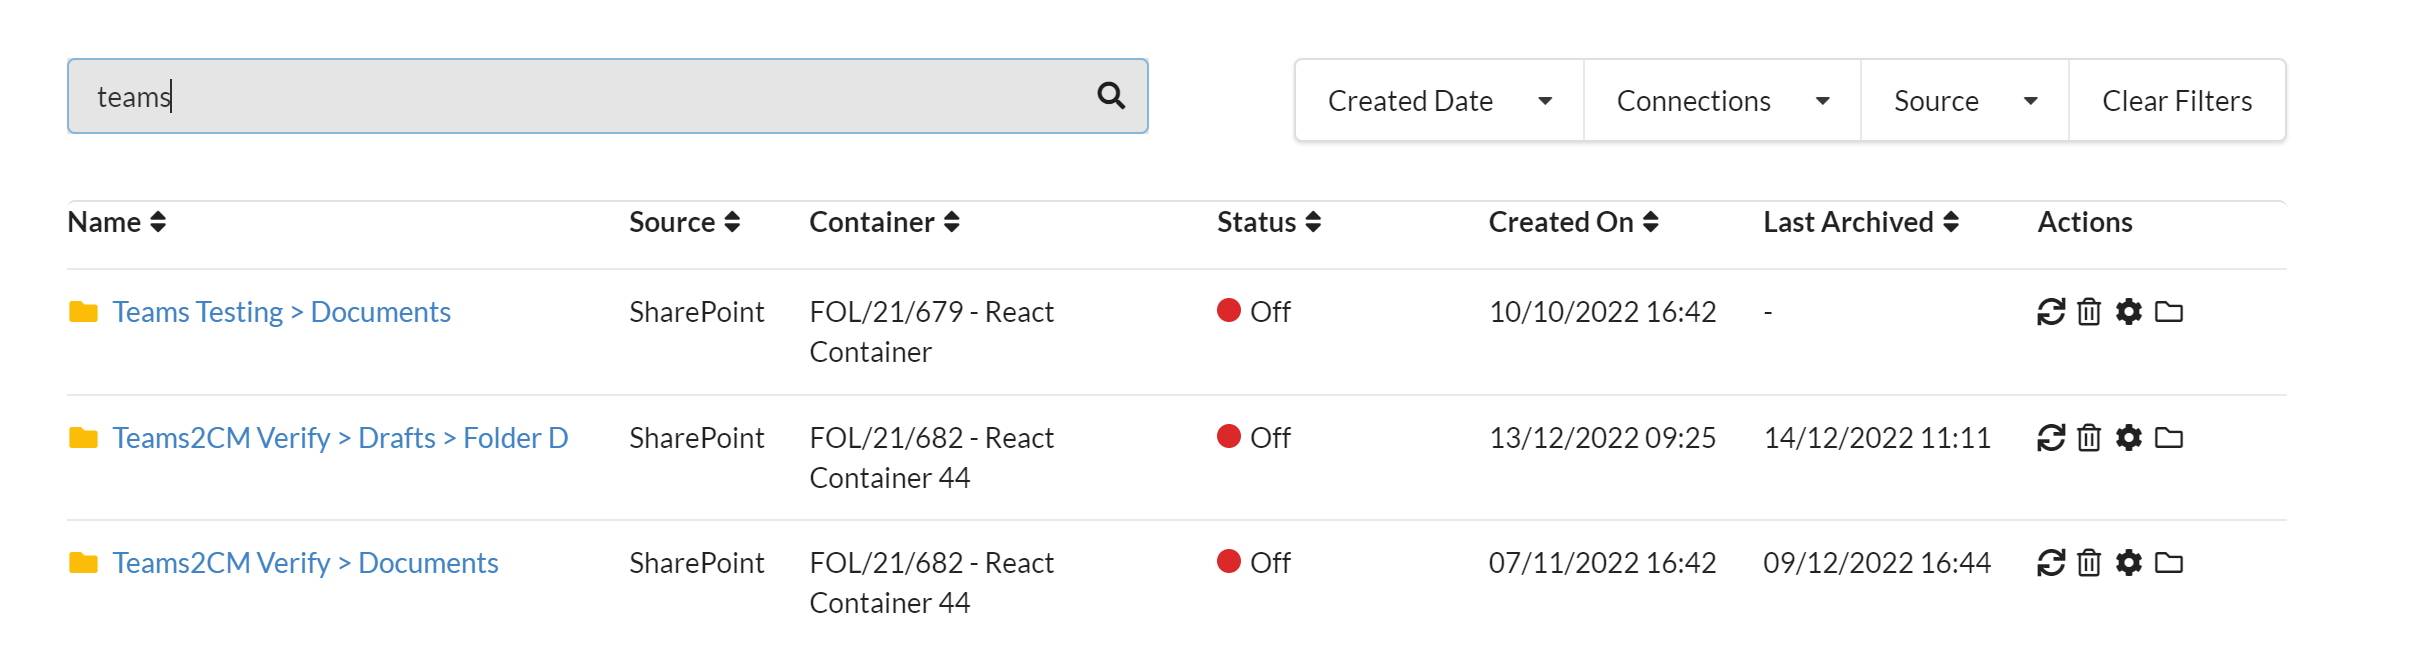
Created Date
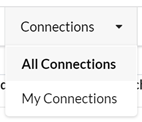
Connection Type (either connections made by you or all connections)
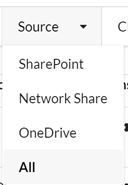
Source
Use the Clear Filters button to clear the currently set filters.
Connections can also be sorted by clicking on the Column headings.
ARCHIVE ALL
Clicking this button will archive all connections.
INSTANT ARCHIVE
If there is ever a need to instantly process all documents outside of the scheduled period the instant process button can be used.

For Sharepoint and OneDrive connections, clicking this button will display two options.
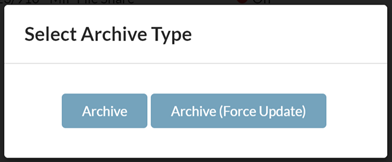
ARCHIVE
This option will transfer new and updated documents.
ARCHIVE (FORCE UPDATE)
This option will transfer all documents and folders
DELETE CONNECTION
You can remove a connection by pressing the bin icon, once deleted the document library will no longer be processed by the background schedular.
CONFIGURE
The configure action allows you to quickly adjust the current settings.
CONTENT MANAGER FOLDER
The CM folder action allows you to view the connected CM folder.

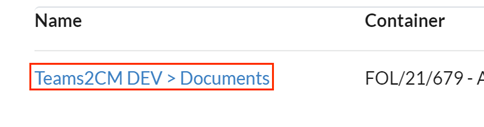
NAVIGATING TO THE DOCUMENT LIBRARY
You can navigate to the desired document library on SharePoint by clicking on the name of the library, this will launch an external browser window that takes you to the document library itself.
STATUS
The status column determines whether the document library should be processed by the background service. The status can be updated via the settings screen.
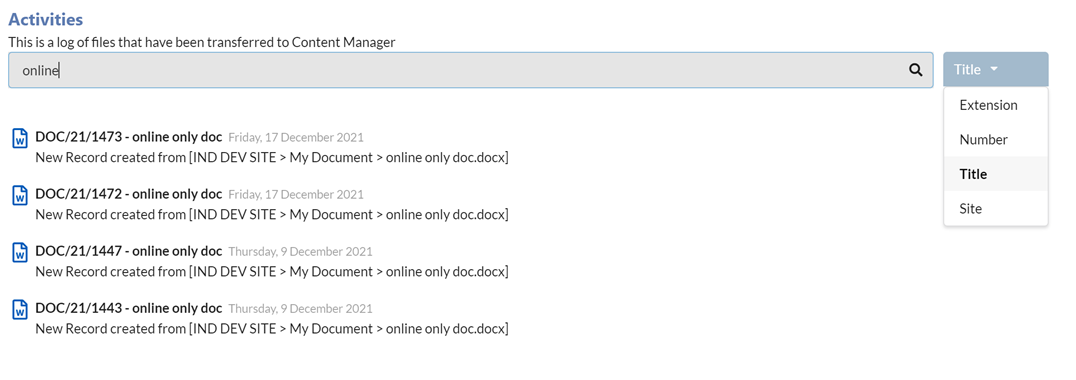
ACTIVITIES
The activities screen displays all transactions recorded by the background process over time with the most recent transaction appearing at the top. You will find information on each transaction such as the document origin (where it came from on SharePoint), the date it was processed, and whether the document was a new revision or a new record that was created.

SEARCH BAR
The search bar will allow you to quickly search for transactions based on the search criteria such as Extension, Record Number, Title and Site.
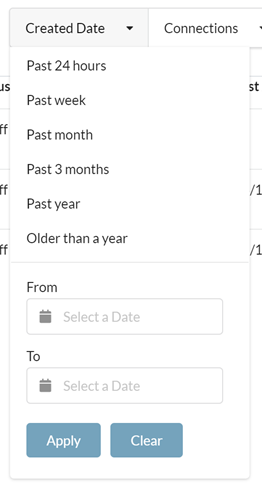
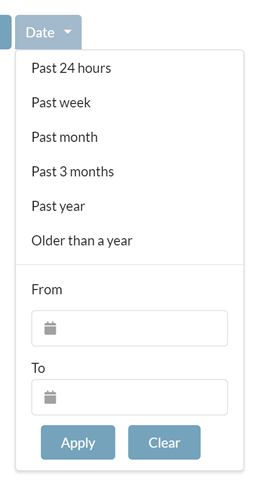
DATES FILTERING
Use the Date Filter Dropdown to search for Activities within a certain Date Range.
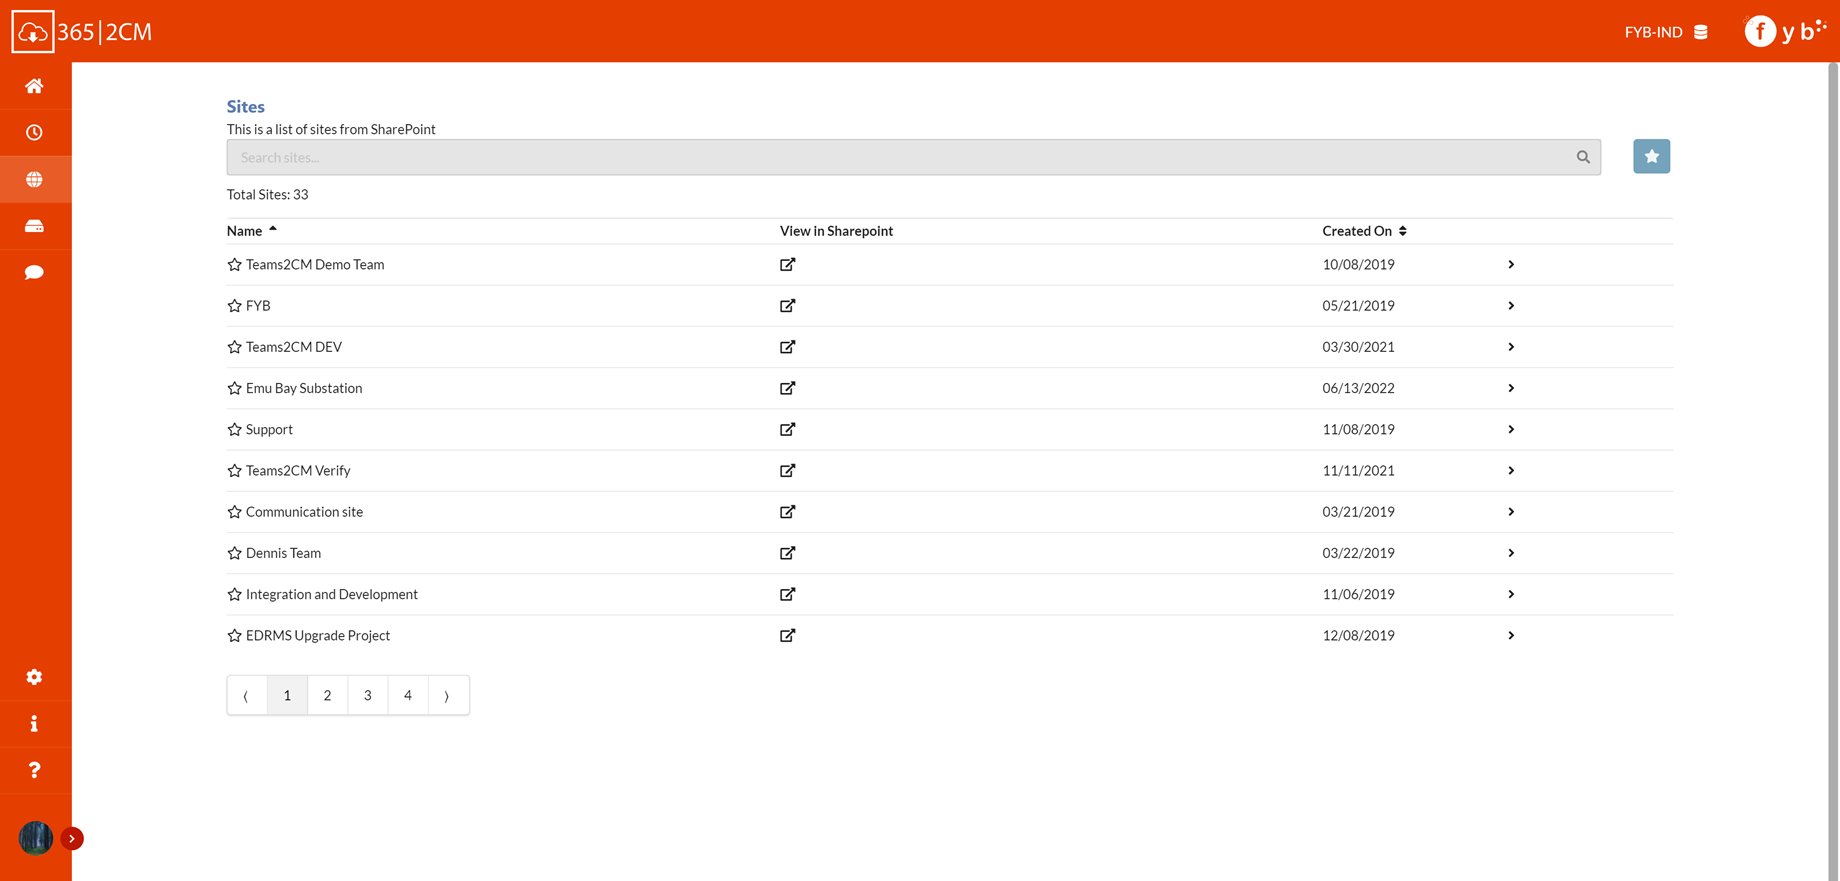
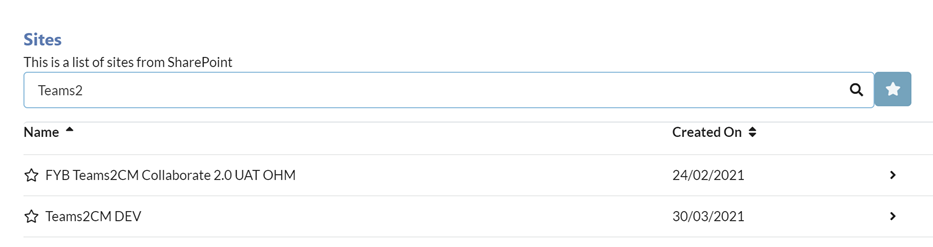
SITES
The sites screen displays all SharePoint/Teams sites for the organization that the logged-in user has access to.
SEARCH BAR
The search bar allows you to search for specific sites.
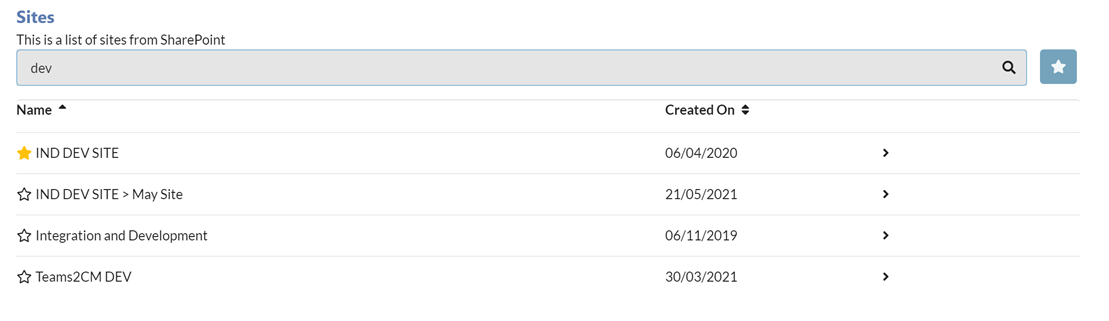
In addition to searching, you can view all your favourite sites by clicking on the favourite icon.
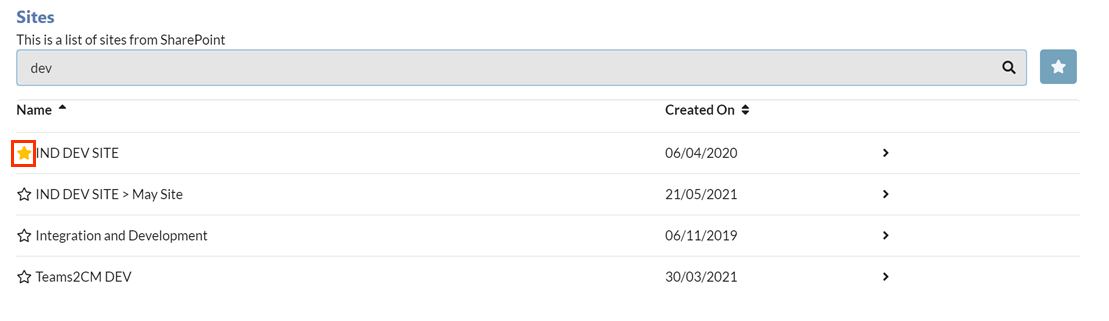
FAVOURITE SITE
Any site can be added to your favourite list by clicking on the star icon and to unfavourite simply click the icon again.
CONNECTING A DOCUMENT LIBRARY
To connect a document library to Content Manager please follow the steps below:
-
Click on the arrow icon on the desired site

-
This will display all document libraries associated with the site
Document Libraries connected to Microsoft Teams will have a Team Library value of Yes
-
Select the desired document library you wish to connect by clicking on the plug icon

-
You will be redirected to the configuration screen
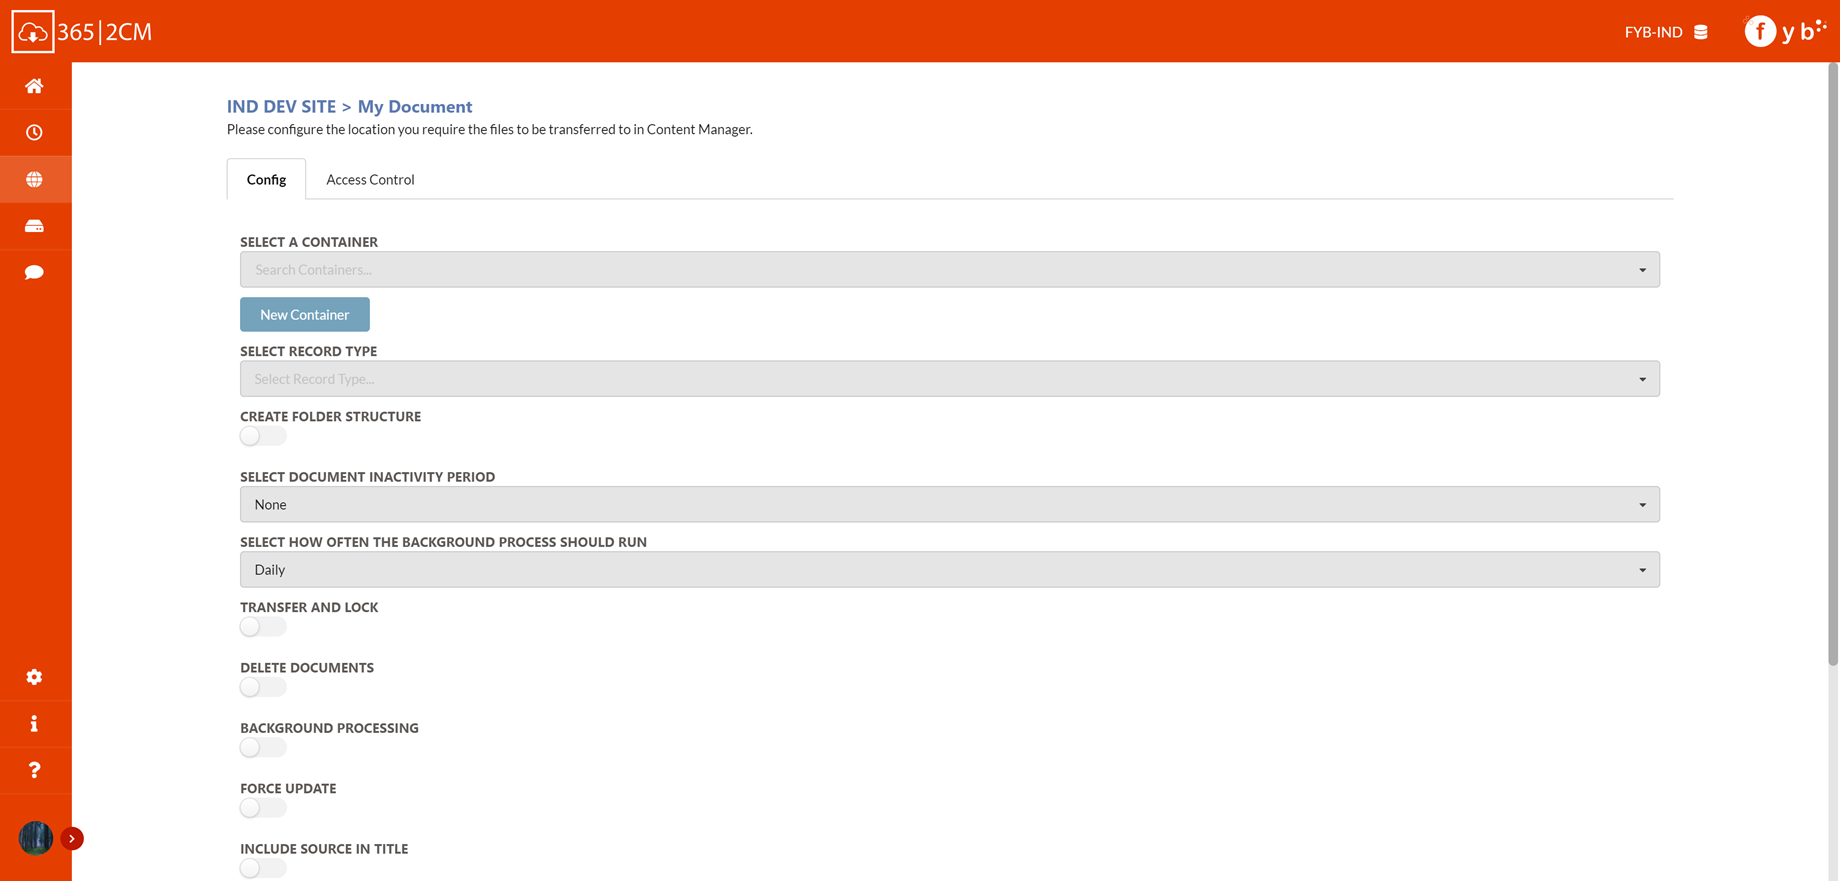
-
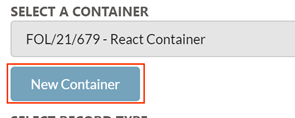
Provide the record number for the CM container you wish to connect to, this can be searched for by number, title or URI

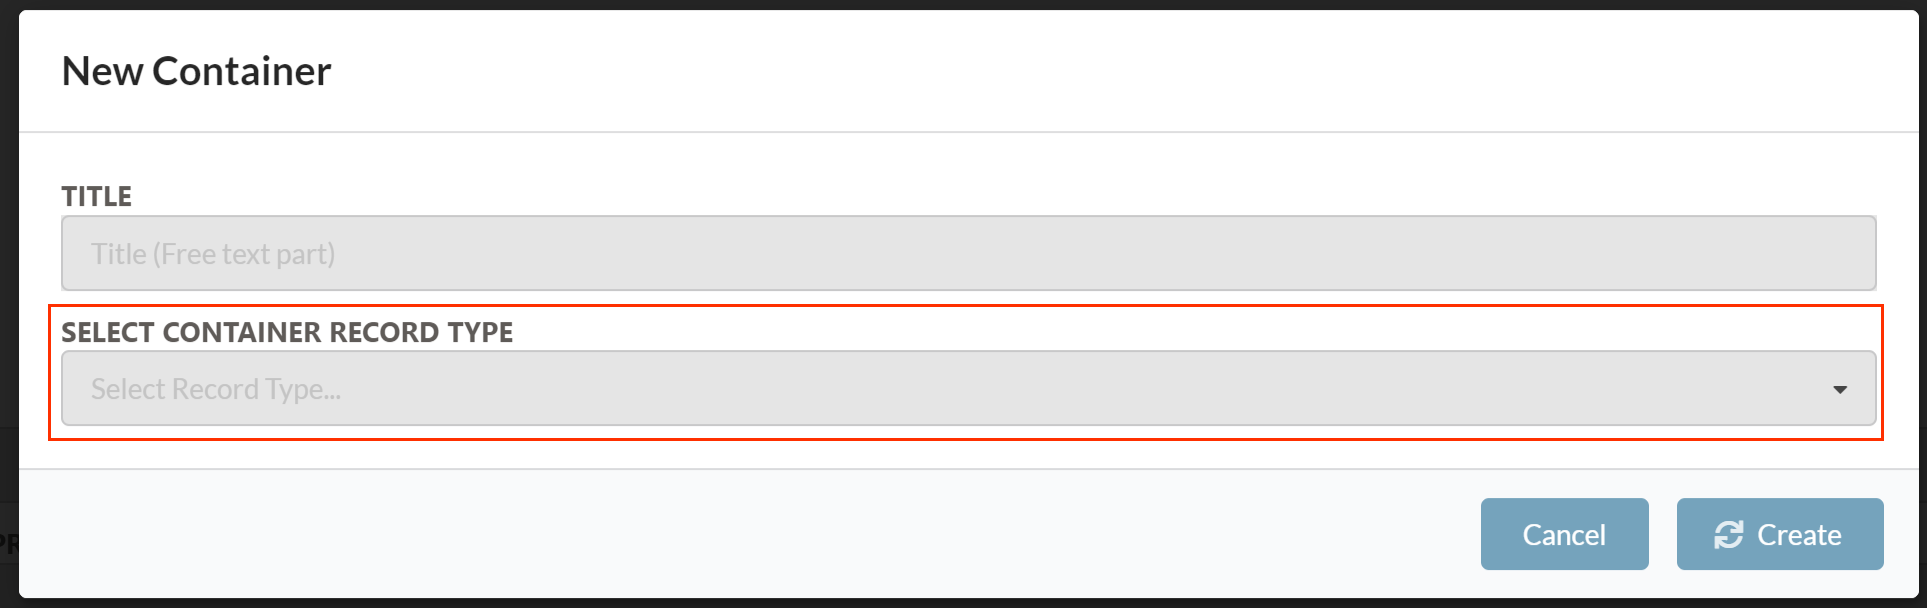
Alternatively, you can create a new folder by pressing on the New Container button, this will redirect you to the Create a new Container screen.

- Select the desired document record type from the drop-down menu
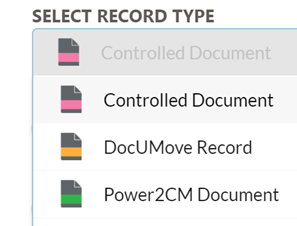
365|2CM does not support record types that have a mandatory additional field with the search clause value "DocumentType". This is because of a conflict with the Content Manager SDK.
-
Enable or Disable Create Folder Structure. This will replicate the folder structure found in the SharePoint Library. If this option is not enabled, folders will not be created and all documents will be uploaded to the root container selected in Step 5

-
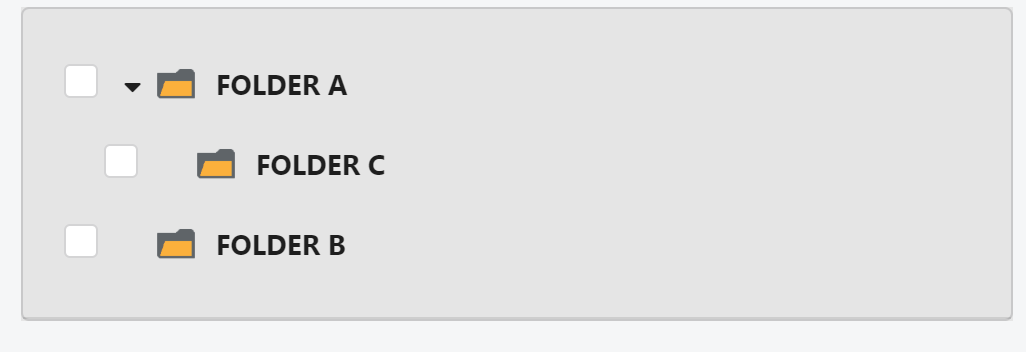
Enable or Disable Select Folders

Enabling Select Folders will allow you to specify which folders you would like to archive during the archive process by selecting the adjacent checkboxes. Clicking on a folder will display its child folders (if any).
Documents outside of the selected folders will not be archved by 365|2CM
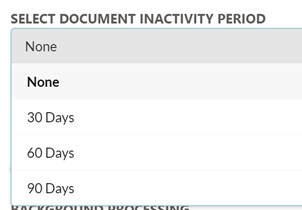
- Select the document inactivity period from the drop-down menu. This is how long a document must be inactive before the connector will move it to CM
If none is selected, the inactivity period is ignored
- Select the run frequency from the drop-down menu. This function determines how often the background process will run and transfer documents

| NAME | DESCRIPTION |
|---|---|
| Hourly | The connection will archive documents every hour. |
| Daily | The connection will archive documents daily at 7:00 AM. |
| Weekly | The connection will archive documents once a week on Monday at 7:00 AM. |
| Monthly | The connection will archive documents on the first day of every month at 7:00 AM. |
-
Enable or disable the Delete Document option to remove documents from the source after the transfer has been completed. If this option is enabled, then the Transfer and Lock is disabled.
-
Enable or disable the Transfer and Lock option. If enabled, the Update Document Access control will be locked to the Service Account for all documents transferred via 365|2CM. This will allow users to only make changes to the Document in its original source (e.g. Sharepoint). If this option is enabled, then the Delete Document option is disabled.
Enabling this feature will prevent manual archiving for users that do not have the Bypass all access controls permission

-
Enable or disable the Leave TR5 option (This option will only appear if the delete option is enabled). The Leave TR5 option allows you to leave a Content Manager reference file after deleting the document from the document library

-
Enable or disable the Finalize Record option (this option will only appear if the delete option is enabled). The Finalize Record option allows you to finalize the record after deleting the document from the document library

-
Enable or disable the Leave Link option (this option will only appear if the delete option is enabled). The Leave Link option will replace the deleted SharePoint document with a link to view the document in CM

-
Enable or disable the Background Processing option this allows the background service to automatically archive the library periodically without user intervention
-
Enable or disable the Force Update option. If disabled, only new and updated documents are transferred. If enabled, all documents and folders are transferred.
-
The Restrict File Types section allows you to enter any file types that you do not want to migrate to Content Manager. For example, if you do not want mp4 and text files to be migrated, enter a comma-separated list of these extensions: .mp4,.txt

-
The Configure Columns section allows you to map SharePoint/OneDrive fields to Content Manager fields and push across the data when archiving Documents

-
Once you’re happy with the configuration, click the Save button at the bottom to save the connection

-
You will notice on the home screen that the document library is now registered, and it’s now possible to perform various actions with the connected document library.

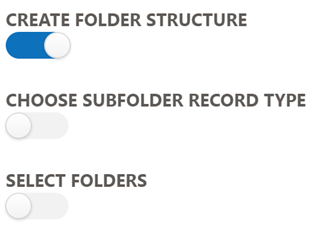
SPECIFYING A RECORD TYPE FOR SUBFOLDERS
To specify a different Container Record Type for creating subfolders, follow the steps below:
-
Enable the Create Folder Structure option
-
Enable the Choose Subfolder Record Type option

-
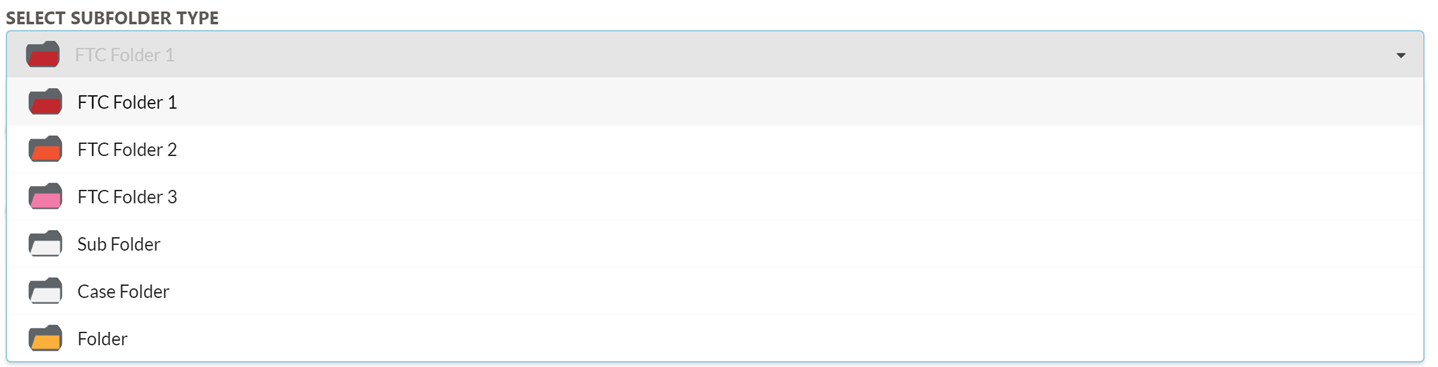
Select a Record Type
-
Selecting a Record Type will display the mandatory fields required for that Record Type

-
Enabling the Alternatively Contain Subfolders will create alternatively contained relationships between the subfolders. If this is disabled, then sub-containers will be contained within each other
ACCESS CONTROLS
To use this feature, the ENABLE ACCESS CONTROLS must be enabled in the Admin Console
This feature is only available to 365|2CM Administrators.
The Access Controls screen allows 365|2CM Administrators to lock certain access controls to locations that are members of the Sharepoint Site. Locations are matched by the email addresses of the users found within the Sharepoint Site.
- Enable the desired Access Controls to apply to the Containers and Document records that will be generated during the archiving process. Access Controls that are not enabled will use the default access controls for the record type.
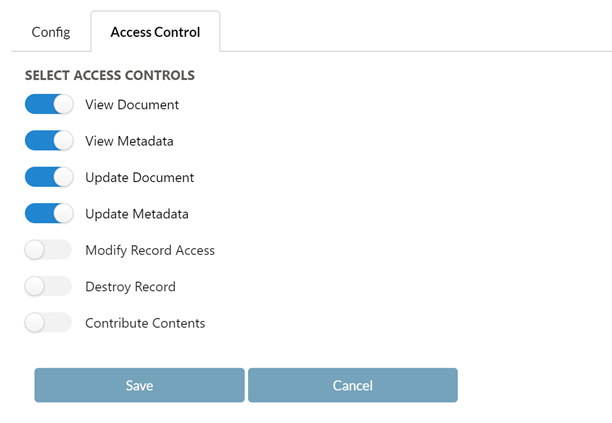
- Click on the Save button
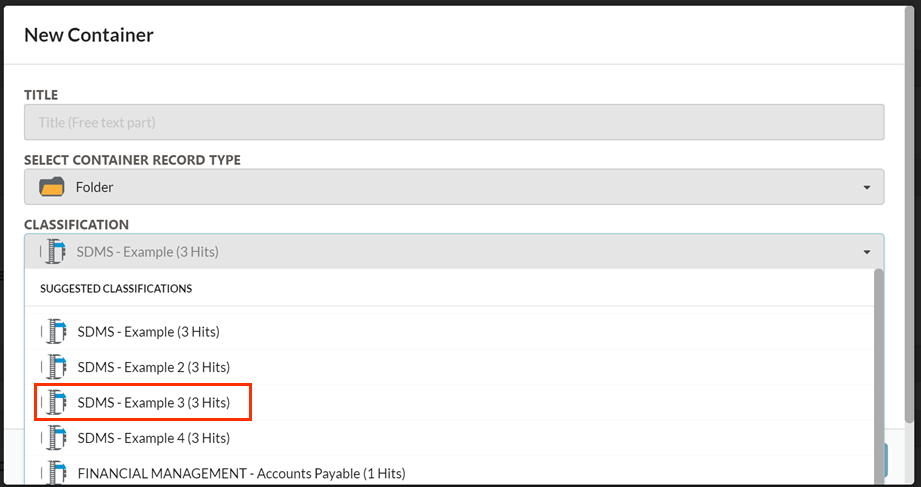
SUGGESTED CLASSIFICATIONS
If the ENABLE CLASSIFICATION SUGGESTIONS admin option is enabled, 365|2CM will suggest a list of classifications to use based on the names of Files and Folders in the Sharepoint Document Library.
-
In the Configuration Page of a Sharepoint Connection, click on the New Container button
-
Select a Record Type
-
If the selected Record Type has a classification field, 365|2CM will generate a list of Classifications based on the File and Folder names within the Document Library
-
Select a suggested classification.
CONNECTING A NETWORK SHARE
-
Navigate to the Network Share option in the left menu

-
Search for a shared folder using the UNC shared path e.g. \server-name\fyb\my shared folder$
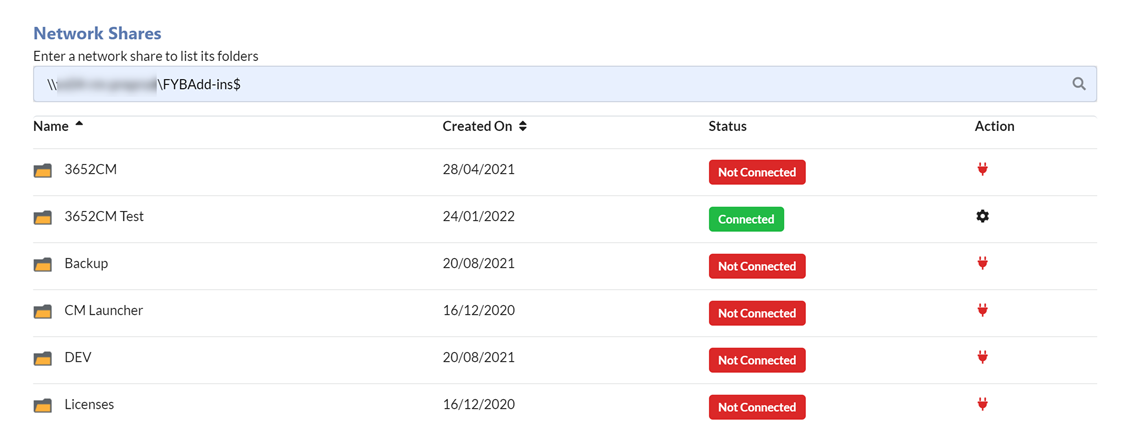
Ensure the account running the app pool has full permission to the shared drive
- All folders at the network share path will be displayed
- Click on any listed folder and configure the connection. The configuration steps are identical to those listed in the CONNECTING A DOCUMENT LIBRARY section of this guide
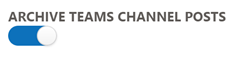
CAPTURING TEAMS CHANNEL POSTS
Sites that originate from Microsoft Teams have an additional option to capture Teams channel posts.
-
Navigate to the SITES page and search for a site that is associated with a Microsoft Team, click on this site
-
Select the documents drive

-
Enable the ARCHIVE TEAMS CHANNEL POSTS option. This option is only available for drives associated with a Microsoft Team
CONFIGURATION
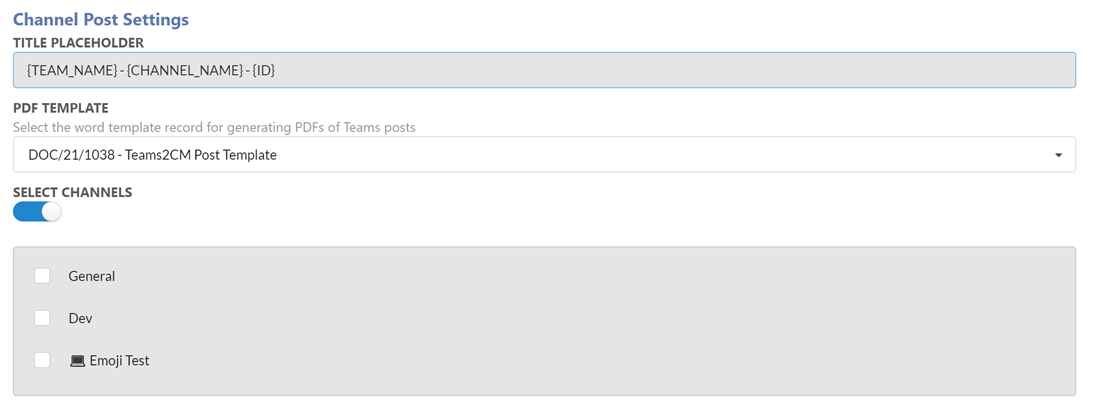
To capture Teams Posts from the channel as PDF Records, the following settings will need to be configured.
| NAME | DESCRIPTION |
|---|---|
| TITLE PLACE HOLDER | Specify placeholders for the title that will be used when creating Records from Teams Posts, see the TITLE PLACEHOLDERS section for more information. |
| PDF TEMPLATE | Specify the record number of the word template to be used when capturing Teams posts. See the PDF WORD TEMPLATE section for more information. |
| SELECT CHANNELS | If enabled, you can select which channels to archive posts from. If disabled, all posts from all channels are archived. |
TITLE PLACEHOLDERS
The following placeholders can be used in the Title Placeholder field. This will be replaced with the actual data coming from the Teams Post when creating the Record.
| Placeholder | Data |
|---|---|
| {TEAM_NAME} | Name of the Team |
| {CHANNEL_NAME} | Name of the Teams Channel |
| {SUBJECT} | The Teams Post subject |
| {ID} | The Teams Post Id |
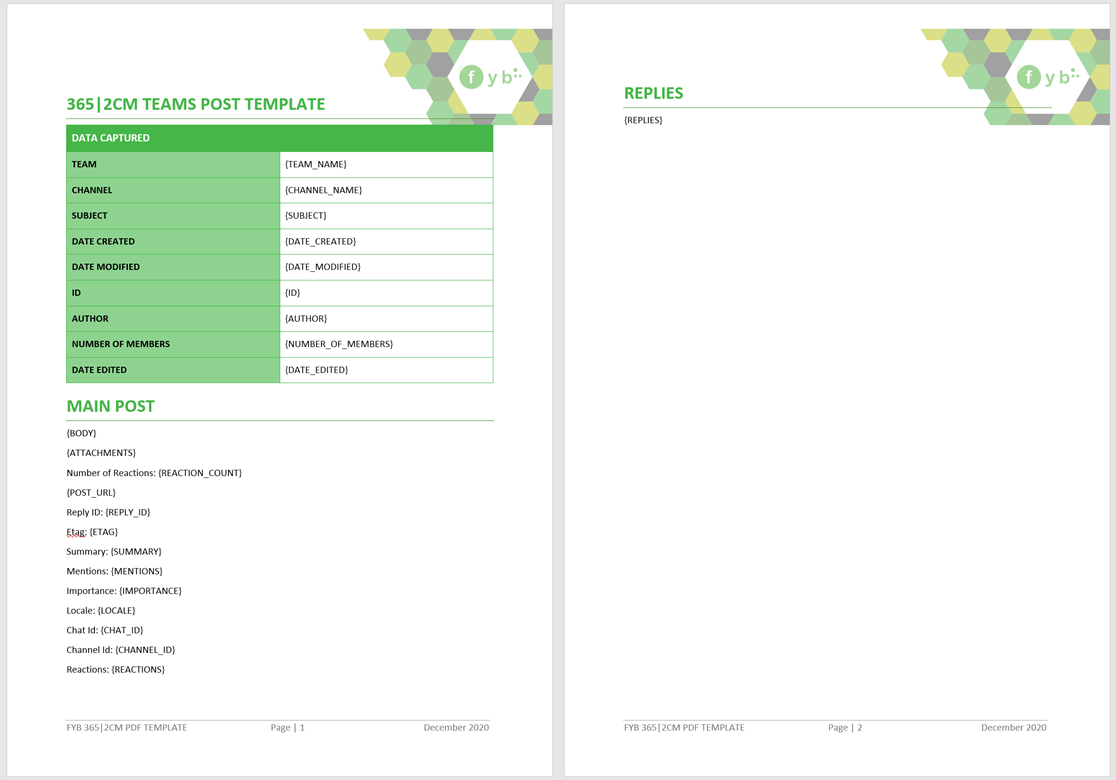
TEAMS POST TEMPLATE
A Microsoft Word template is required for generating PDFs for Teams Posts. The following placeholders can be used to capture data coming from the Teams Posts. The template must be stored in Content Manager.
| Placeholder | Data |
|---|---|
| {TEAM_NAME} | Name of the Team |
| {CHANNEL_NAME} | Name of the Teams Channel |
| {SUBJECT} | The Teams Post subject |
| {BODY} | The body content of the Teams Post |
| {DATE_CREATED} | The date created of the Teams post |
| {DATE_MODIFIED} | The date last modified of the Teams Post |
| {AUTHOR} | The display name of the author of the Teams Post |
| {REACTIONS_COUNT} | The number of reactions that the Teams Post received |
| {ID} | The Id of the Teams Post |
| {REPLIES} | All replies to the Teams Post |
| {ATTACHMENTS} | All image/gif attachments of the Teams Posts |
| {POST_URL} | Url to the post in Teams. This will be rendered as a hyperlink labelled "View Post" |
| {NUMBER_OF_MEMBERS} | The number of members in the Team |
| {DATE_EDITED} | The date the post was last edited |
| {DATE_DELETED} | The date the post was deleted on |
| {REPLY_ID} | The ID of the parent message/post |
| {ETAG} | Version number of the chat message |
| {SUMMARY} | Summary text of the chat message |
| {MENTIONS} | A comma-separated list of mentions in the post |
| {IMPORTANCE} | The importance of the post. The possible values are: normal, high, urgent |
| {LOCALE} | Locale of the post set by the client. Always set to en-us. |
| {CHANNEL_ID} | The Id of the Channel |
| {TEAM_ID} | The Id of the Team |
| {REACTIONS} | Comma-separated list of reactions on the post |
An example Word Template:
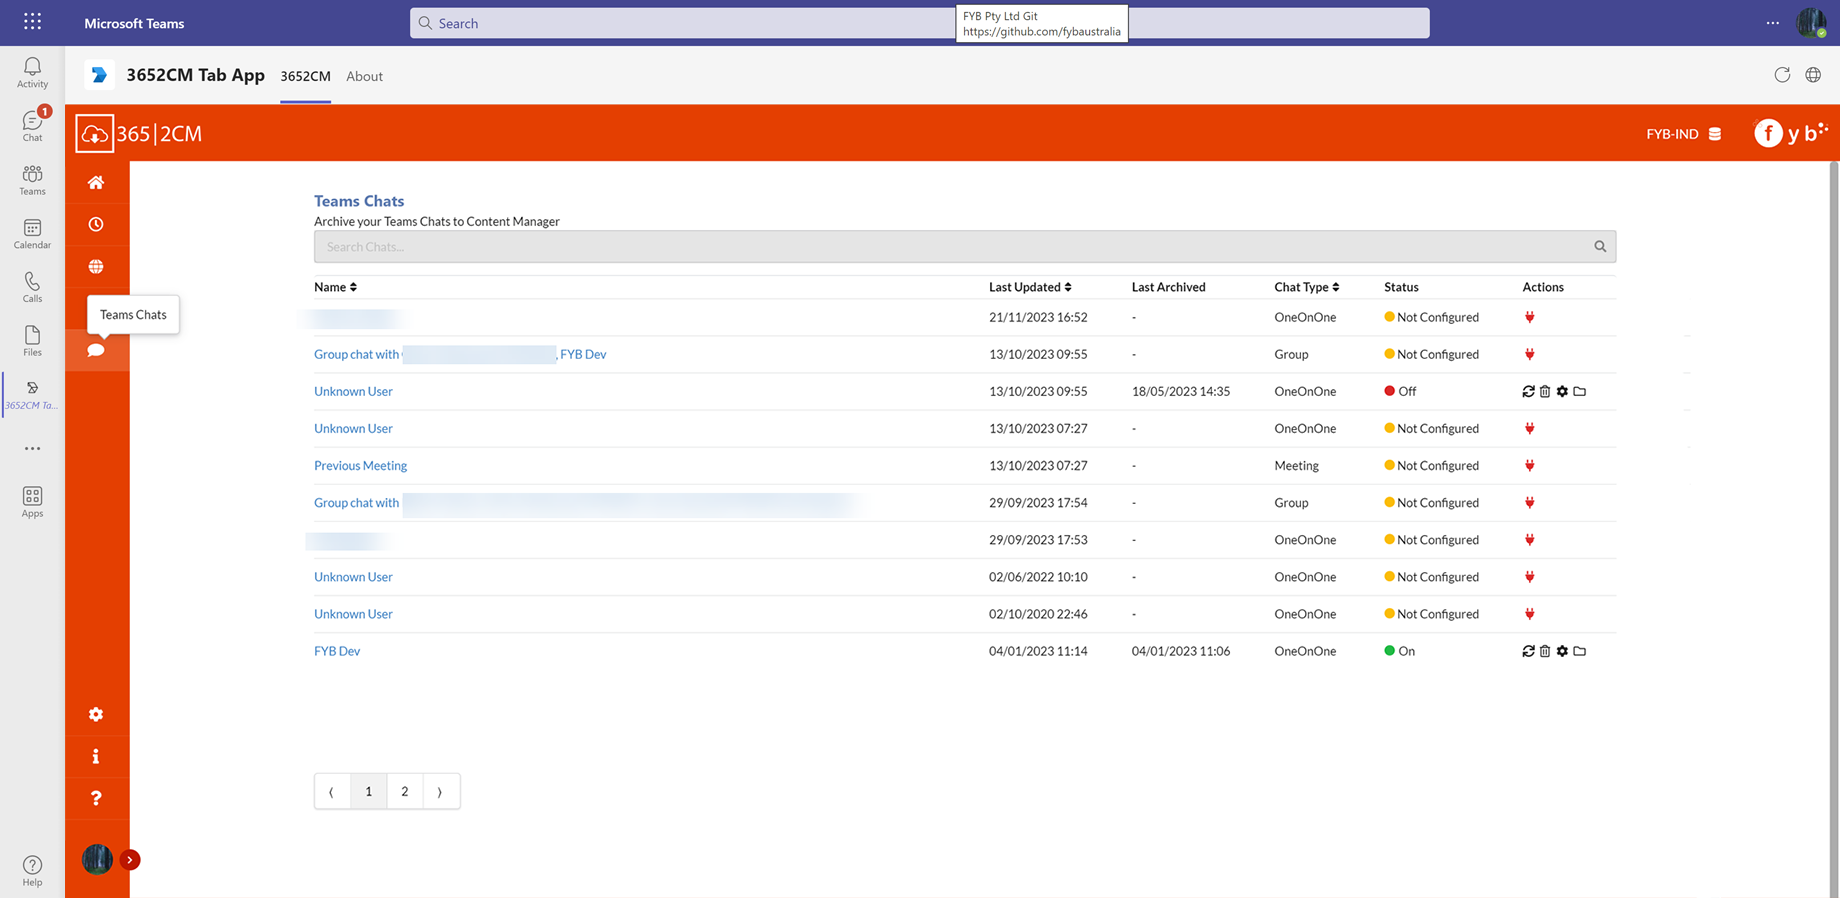
CAPTURING TEAMS CHAT MESSAGES
This feature is open to all users and allows each user to archive their personal Teams Chat Messages as PDFs and chat files to Content Manager. The Teams Chats page can be navigated by clicking on Teams Chats.
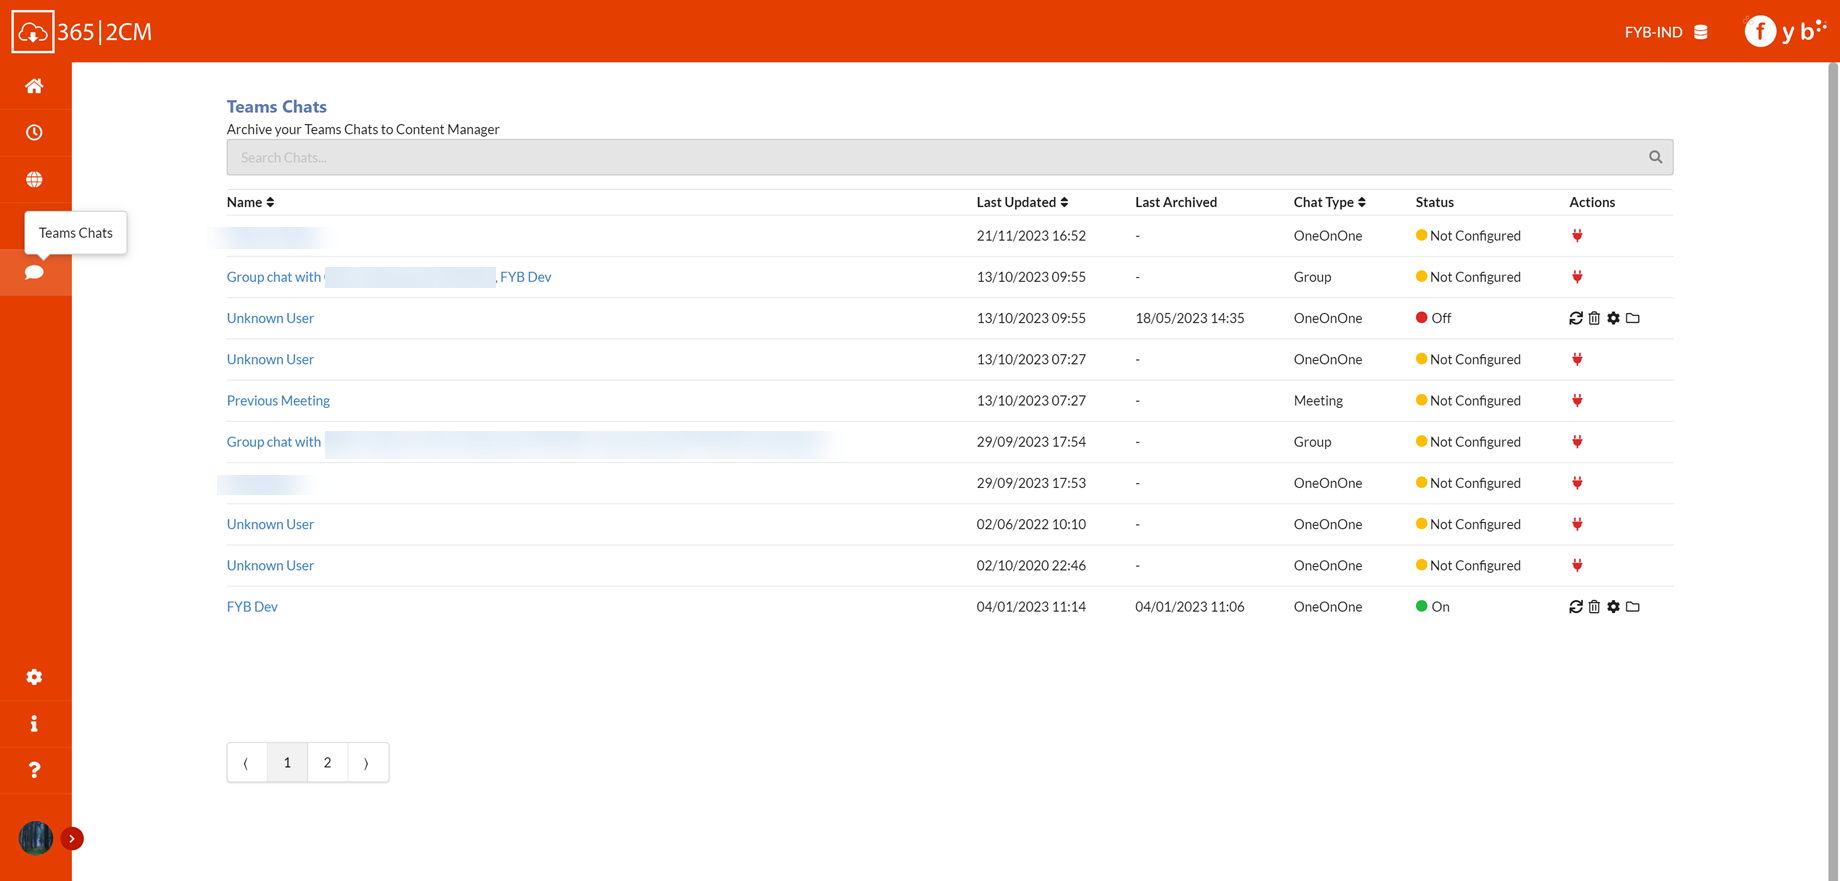
| NAME | DESCRIPTION |
|---|---|
| Chat Display Name |  The Name of the Teams chat, clicking on the Display name will open the Chat in Teams |
| Last Updated | The date that the Teams Chat was last updated |
| Last Archived | The date that the Teams Chat was last Archived to Content Manager |
| Chat Type | The type of the Teams chat |
| Status | The background scheduler status (either On, Off or Not Configured) |
 |
Configure a connection to a Teams Chat to enable archiving |
|
Instant archiving - Instantly archive a Teams chat within a given date range as a PDF to Content Manager. Subsequent archives will create a new Record Revision. |
|
Delete Configuration - Deletes the configuration to a Teams Chat |
|
Configure - Adjust the current configuration settings for the Teams Chat |
|
The CM folder action allows you to view the connected CM folder |
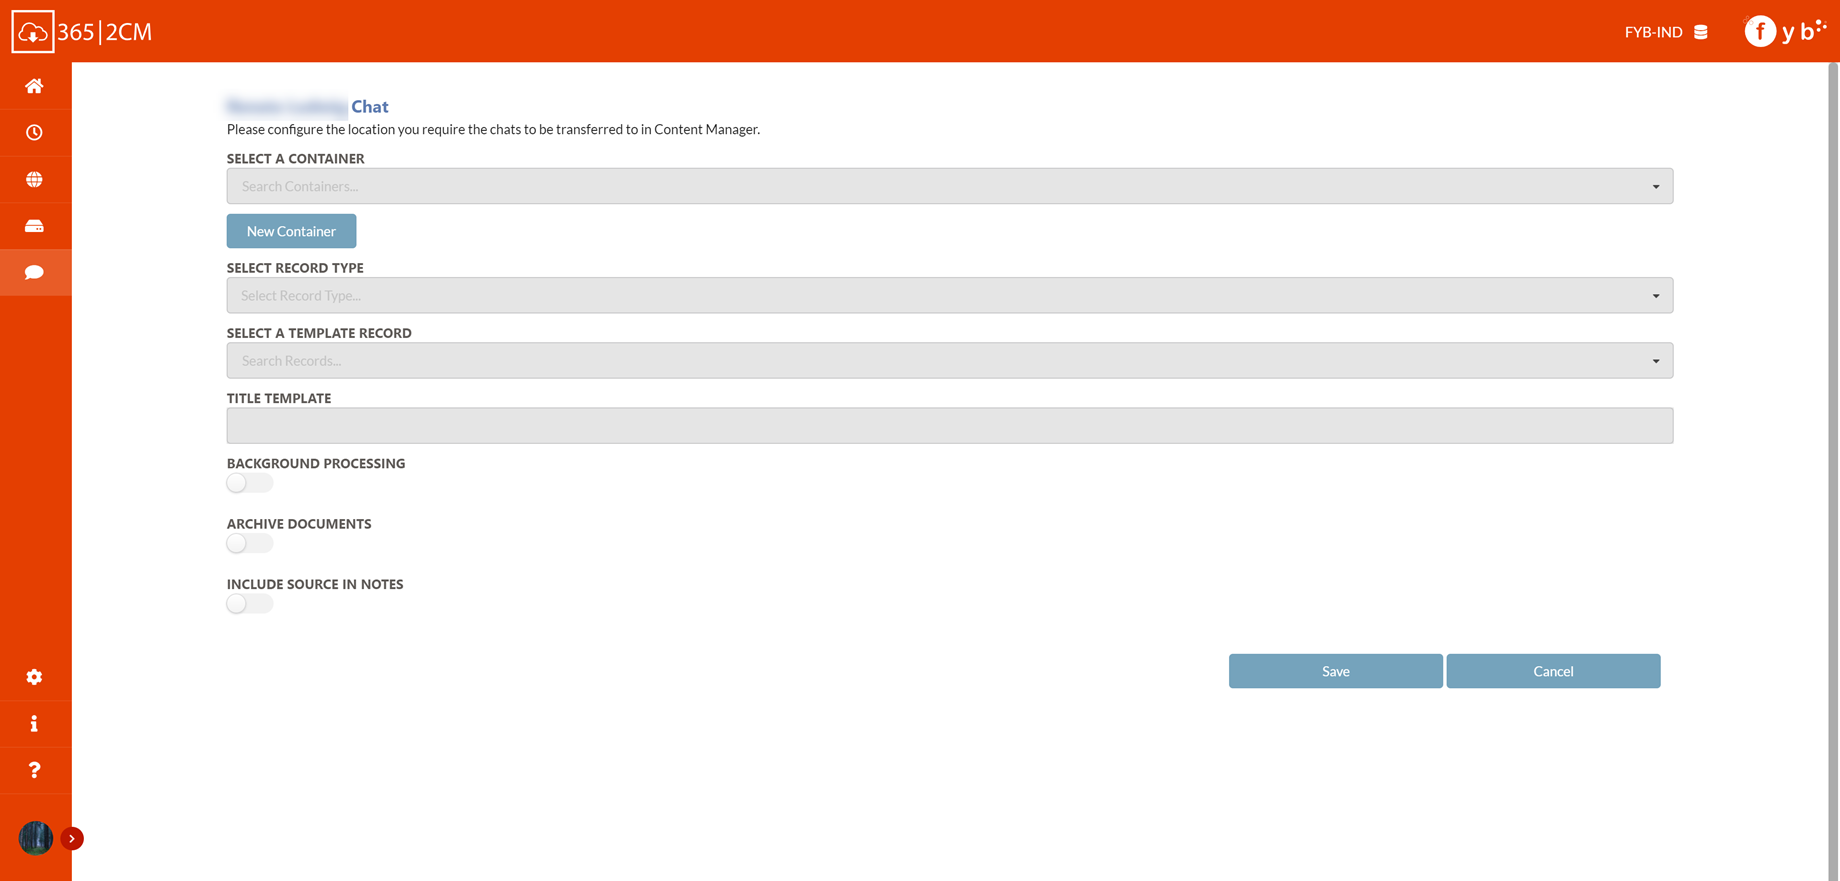
CONFIGURATION
To configure a new connection to a Teams Chat:
-
Click on the plug Icon

-
You will be redirected to the configuration screen
-
Provide the record number for the CM container you wish to store that chat within, this can be searched for by number, title or URI
Alternatively, you can create a new folder by pressing on the New Container button, this will redirect you to the Create a new Container screen.
-
Select the desired document record type from the drop-down menu
-
Select a template Record for creating PDFs. This record must be a Word document. See the Teams Chat Template for more information

-
Specify placeholders for the title that will be used when creating Records from Teams Chats. The following placeholders can be used in the Title:
| PLACEHOLDER | DESCRIPTION |
|---|---|
| {CHAT_ID} | The ID of the Teams Chat |
| {RECIPIENT} | The recipient's name in the Chat |
| {DATE_CREATED} | The Chat's creation date |
| {DATE_LAST_UPDATED} | The Chat's last updated date |
- Specify if automated archiving of the Teams Chat should be enabled (Optional)
If this option is enabled then the user must upload the 365|2CM Teams Chat Capture app package to their instance of Teams - See AUTOMATED TEAMS CHAT ARCHIVING for more details.

- If BACKGROUND PROCESSING is enabled, then the archiving frequency must be selected

| NAME | DESCRIPTION |
|---|---|
| Hourly | The connection will archive chats hourly. Only chats made in the last hour will be captured. |
| Daily | The connection will archive chats daily at 7:00 AM. Only Chats made in the past 24 hours will be captured |
| Weekly | The connection will archive chats once a week on Monday at 7:00 AM. Only chats made in the past week will be captured. |
| Monthly | The connection will archive chats on the first day of every month at 7:00 AM. Only chats made in the past month will be captured. |
-
Toggle the Archive Documents option. If enabled, files shared in the chat will also be archived in Content Manager as new Records. The Records will be created using the record type specified in Step 4.
-
Toggle the Include Source In Notes option. If enabled, the URL of the Teams chat is added to the Record's notes

-
Once all the settings have been configured, click on the Save button

TEAMS CHAT TEMPLATE
A Microsoft Word template is required for generating PDFs for Teams Chats. The following placeholders can be used to capture data coming from the Teams Posts. The template must be stored in Content Manager.
| Placeholder | Data |
|---|---|
| {CHAT_ID} | The ID of the Teams Chat |
| {RECIPIENT} | The recipient's name in the Chat |
| {LINK} | A hyperlink to the Chat in Teams |
| {DATE_CREATED} | The Chat's creation date |
| {DATE_LAST_UPDATED} | The Chat's last updated date |
| {CONVERSATION} | The conversation between members in the Teams Chat |
AUTOMATED TEAMS CHAT ARCHIVING (OPTIONAL)
At this stage, the 365|2CM Teams app can only be run in the Teams Web app in the browser of your choice
For Teams Chats to be automatically archived, 365|2CM must be created as a Teams Personal Tab App and uploaded to Teams. This is because the user's access token is required to archive their chats without user interaction and without 365|2CM needing to be open in a browser.
- Obtain a copy of the 365|2CM Teams Chat app package from your IT Teams administrator
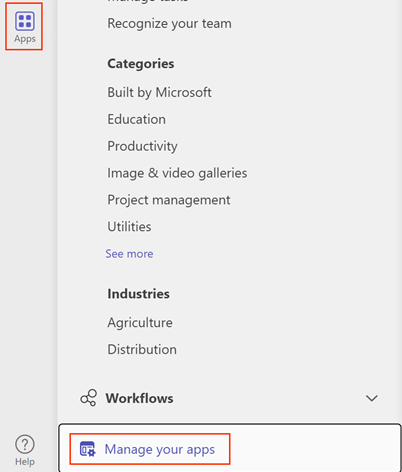
- Open Microsoft Teams
- Click on Apps and click on Manage Your Apps
- Click on Upload an app

- Click on Upload a custom app
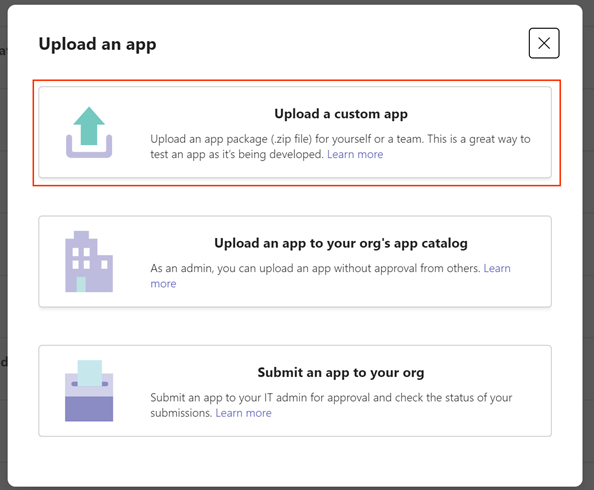
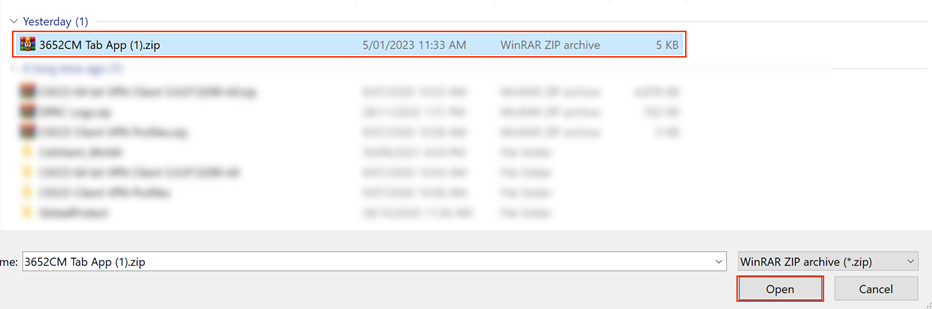
- Locate the 365|2CM Teams Chat app package and click Open
- Click on the Add button
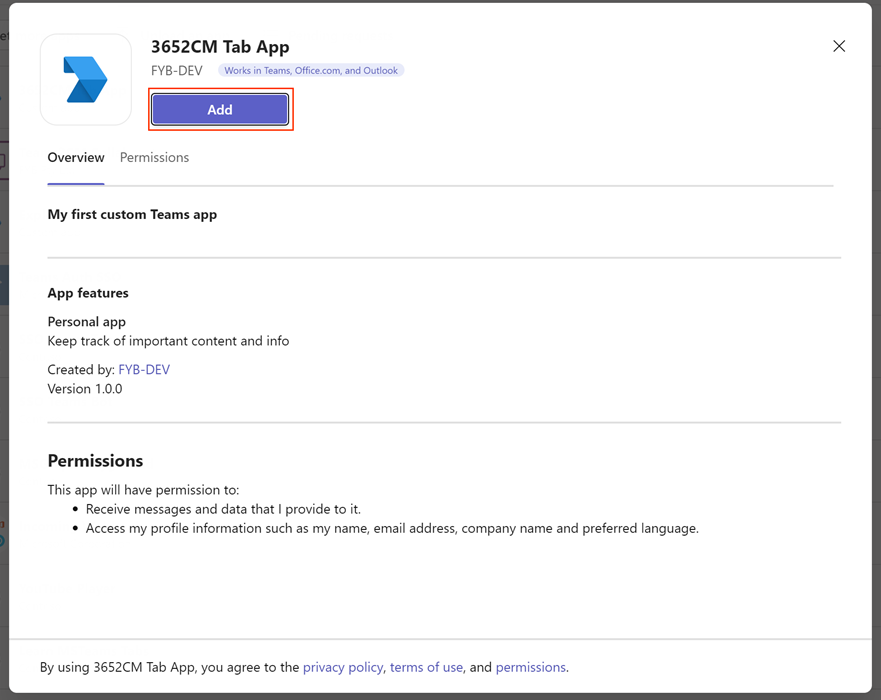
- 365|2CM will be added as a Personal Tab App
- Any background processing (automated) Teams chats that you have set up will now function
EDIT/VIEW IN M365
The latest version of CMLauncher is required for this feature. CMLauncher will need to be set up to connect to Azure. Refer to the CMLauncher Azure App Registration and CMLauncher Install Guide for more information
This feature will only work for documents that contain valid 365ID and Drive ID additional field values
EDIT IN M365
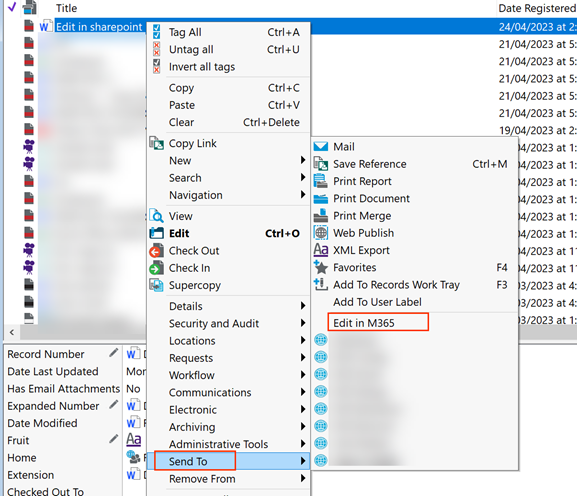
- In CM, Right-click a record that was previously transferred from Sharepoint via 365|2CM
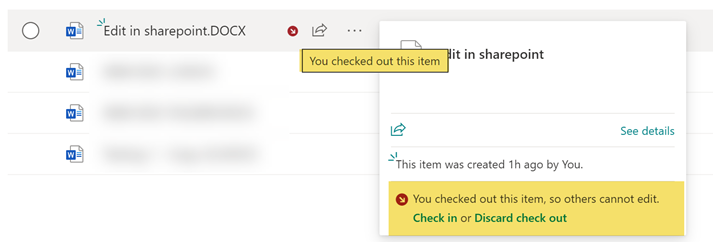
- Click on Send To -> Edit in M365
- The same document will be checked out in Sharepoint
- Once you have finished making changes, close the program.

- CMLauncher will automatically check the document back into SharePoint with the changes made.
- The next time the 365|2CM archiving process is run on the Sharepoint Library that contains the document edited above, the respective Record's electronic document will be updated
VIEW IN M365
- In CM, Right-click a record that was previously transferred from Sharepoint via 365|2CM
- Click on Send To -> View in M365

- The document will launch in Read-Only mode in the default program specified for its file type.