

USING THE SOFT DELETER
To launch the Soft Deleter from Content Manager web client for a single record please follow the steps below:
- From the Content Manager Web Client interface, select a record
- Click on the more drop-down menu and click on soft deleter option
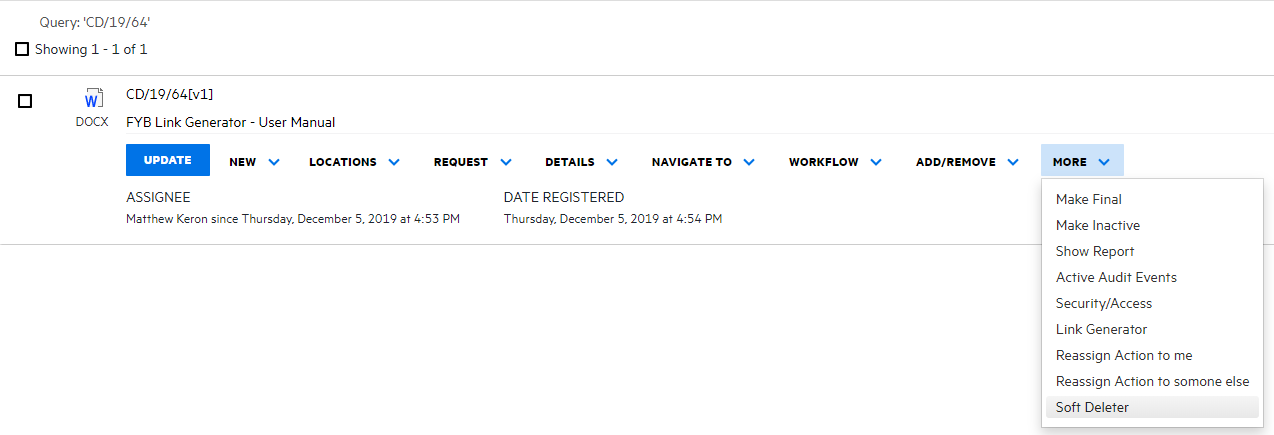
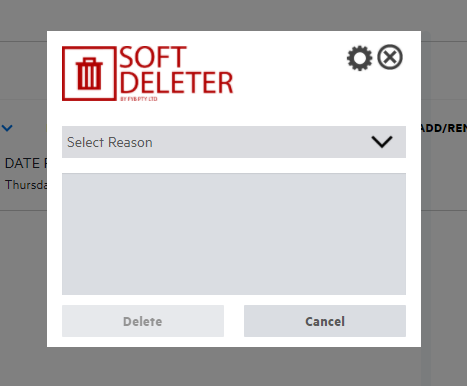
- The Soft Deleter interface will be displayed
To launch the Soft Deleter from Content Manager web client for multiple records please follow the steps below:
Note that tagged processing is currently not supported for CM10 and above.
- From the Content Manager Web Client interface, tag the required records as shown below
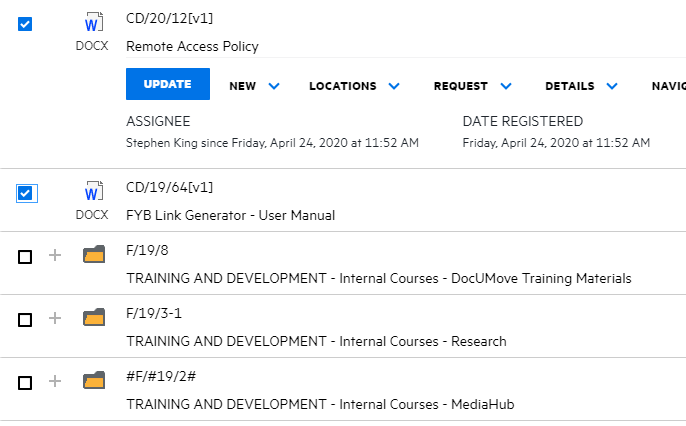
- Once you have tagged more than one record, a Record panel will be displayed on the left hand side
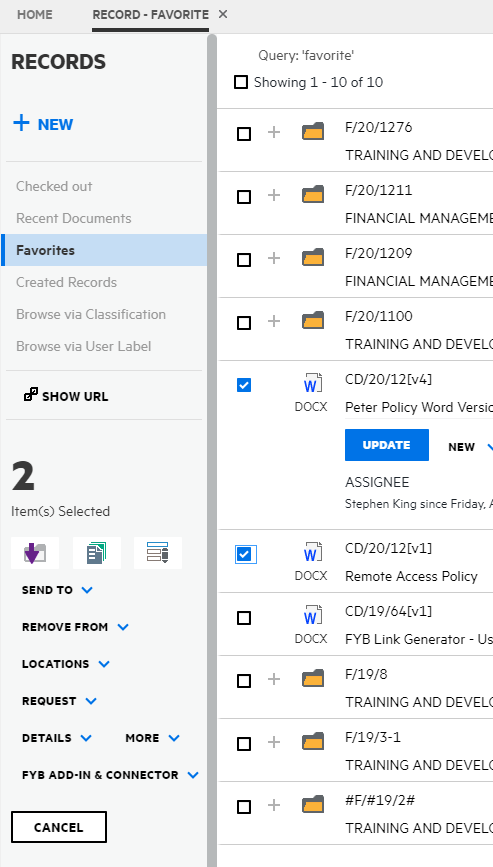
- Click on fyb-addin & connector dropdown menu and select Soft Deleter
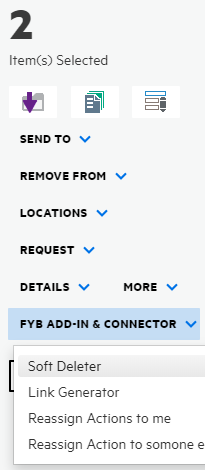
- The Soft Deleter interface will be displayed
For information on how to use the Soft Deleter please refer to the Soft Deleter user manual using the URL below: Soft Deleter User Manual
USING THE LINK GENERATOR
To launch the Link Generator from Content Manager web client for a single record please follow the steps below:
- From the Content Manager Web Client interface, select a record
- Click on the more drop-down menu and click on Link Generator option
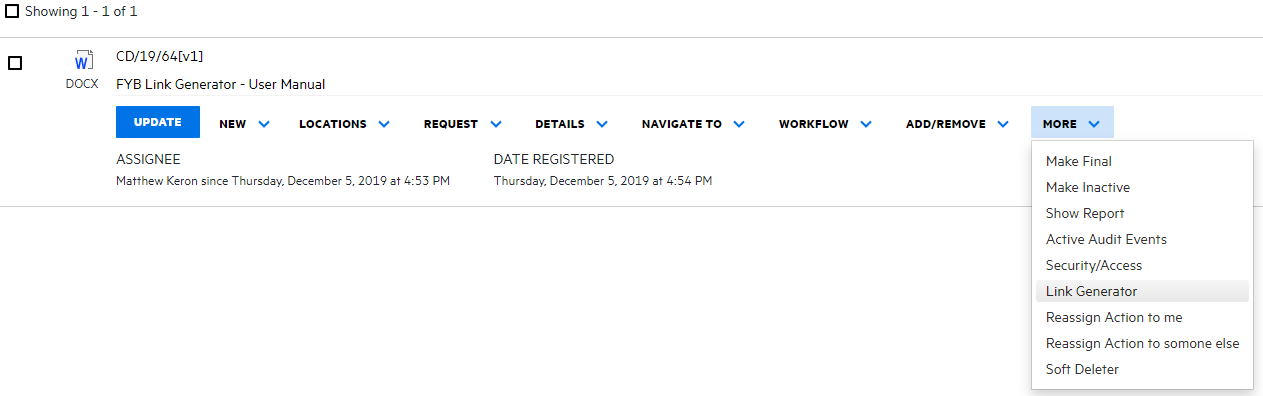
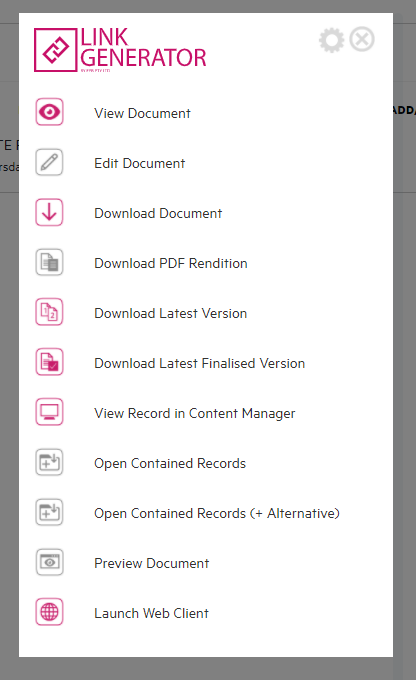
- The Link Generator interface will be displayed
To launch the Link Generator from Content Manager web client for multiple records please follow the steps below:
Note that tagged processing is currently not supported for CM10 and above.
- From the Content Manager Web Client interface, tag the required records as shown below
- Once you have tagged more than 1 record, a Record panel will be displayed on the left hand side
- Click on fyb-addin & connector dropdown menu and select Link Generator

- The Link Generator interface will be displayed
For information on how to use the Link Generator please refer to the Link Generator user manual using the URL below: Link Generator User Manual
USING REASSIGN ACTIONS
To launch the Reassign Action from Content Manager web client for a single record please follow the steps below:
-
From the Content Manager Web Client interface, select a record
-
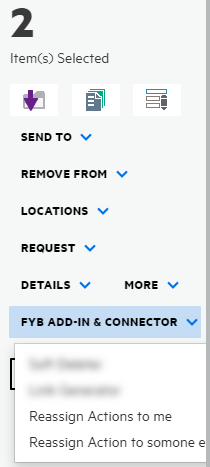
Click on the more drop-down menu and click on either reassign action to me or reassign action to someone else option
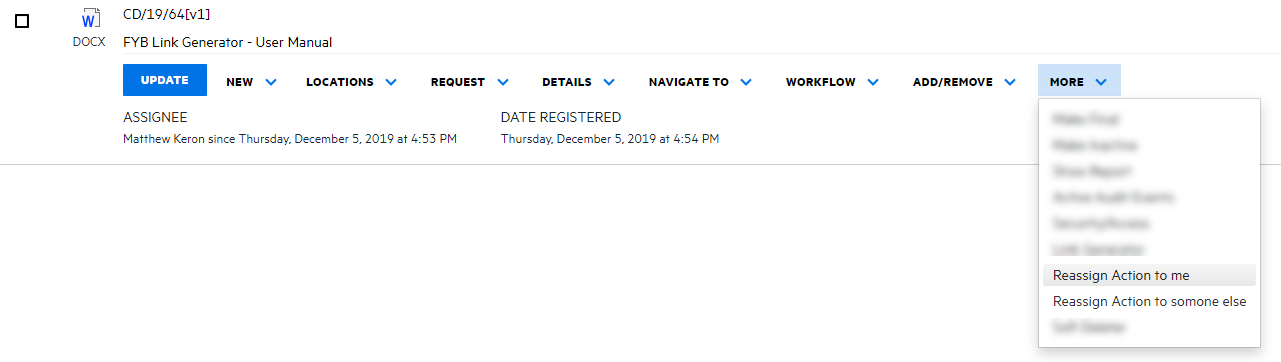
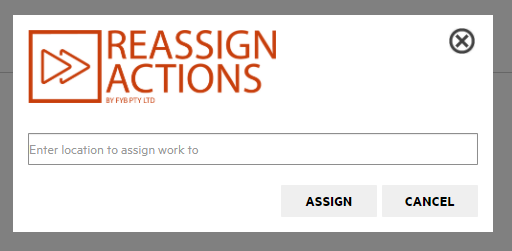
- If you have selected the option reassign action to someone else the reassign action interface will be displayed where you can choose the location to reassign to action to. Otherwise, if you have selected the option reassign action to me the interface will not be displayed and the current action on the Record will be assigned to you
To launch Reassign Actions from Content Manager web client for multiple records please follow the steps below:
Note that tagged processing is currently not supported for CM10 and above.
- From the Content Manager Web Client interface, tag the required records as shown below
- Once you have tagged more than 1 record, a Record panel will be displayed on the left hand side
- Click on the fyb-addin & connector dropdown menu and click on either reassign action to me or reassign action to someone else option
- If you have selected the option reassign action to someone else the reassign action interface will be displayed where you can choose the location to reassign the action to. Otherwise, if you have selected the option reassign action to me the interface will not be displayed and the current action on the Record will be assigned to you and
For information on how to use the Reassign Action please refer to the Reassign Action user manual using the URL below: Reassign Action User Manual