If upgrading from v2.2x or below, dashboards will need to be imported into Reportilize to allow for setting changes within this version.
GENERAL
The general configuration provides all the general config of the application.
Click on the General Tab and the following page will load.
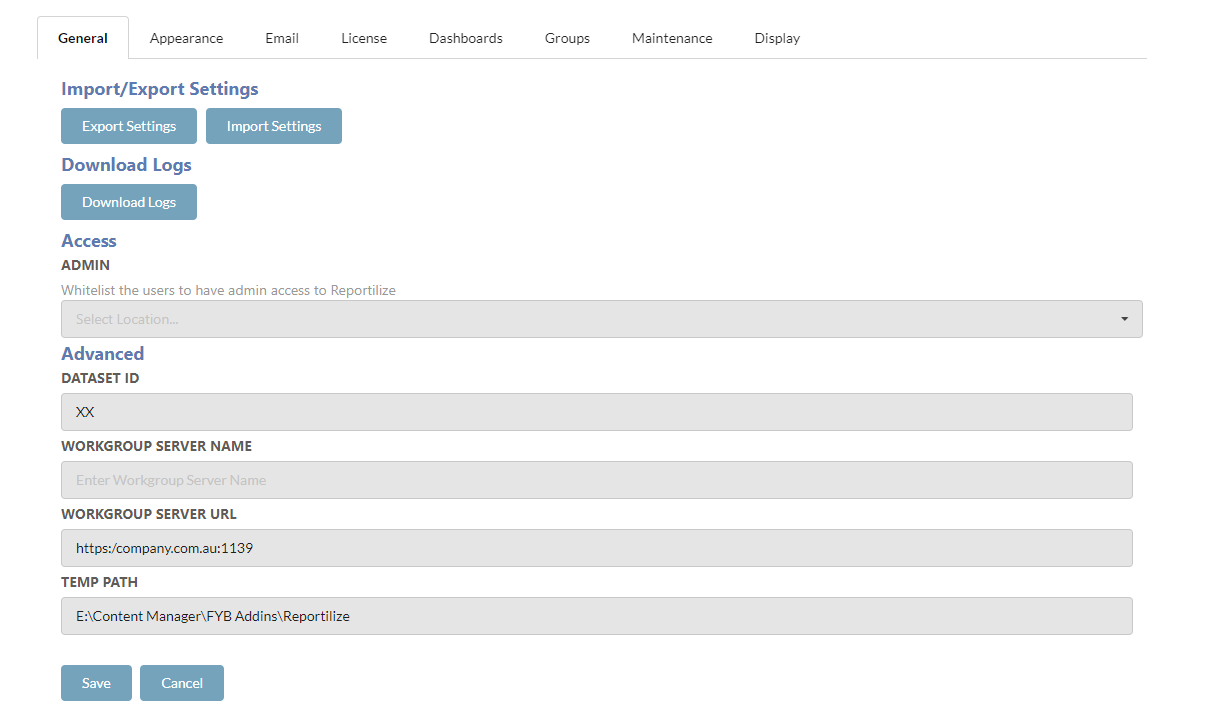
EXPORTING SETTINGS
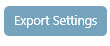
To export Reportilize settings, click the Export Settings button. The JSON files will automatically download.
If not all the files automatically download, ensure that your browsers accept multiple files for download.
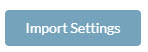
IMPORT SETTINGS
To import new settings into Reportilize, complete the following.
The file name of the json file being imported must match the file names of the JSON files used within Reportilize. Changing the file names will result in a failed upload.
-
Click on the Import Settings Button
-
Select the settings file you want to upload
-
Click on the Open button and the files will be automatically imported
DOWNLOAD LOGS
Clicking on the Download Logs button will download all server logs into a zip file locally.
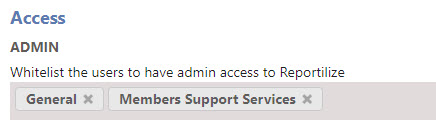
ADMIN WHITELIST
The ability to whitelist selected locations to have administrator access to Reportilize.
DATASET ID
The Dataset ID of the Content Manager database Reportilize is connected to.
WORKGROUP SERVER NAME
The workgroup server name of the Content Manager database Reportilize is connected to. Dataset connection can be made with either the workgroup server name or URL.
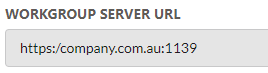
WORKGROUP SERVER URL
The workgroup server URL of the Content Manager database Reportilize is connected to. Dataset connection can be made with either the workgroup server name or URL.
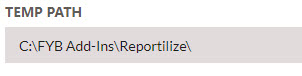
TEMP PATH
The temporary path on the server that is used by Reportilize.
APPEARANCE
Click on the Appearance Tab, the page will load as follows.
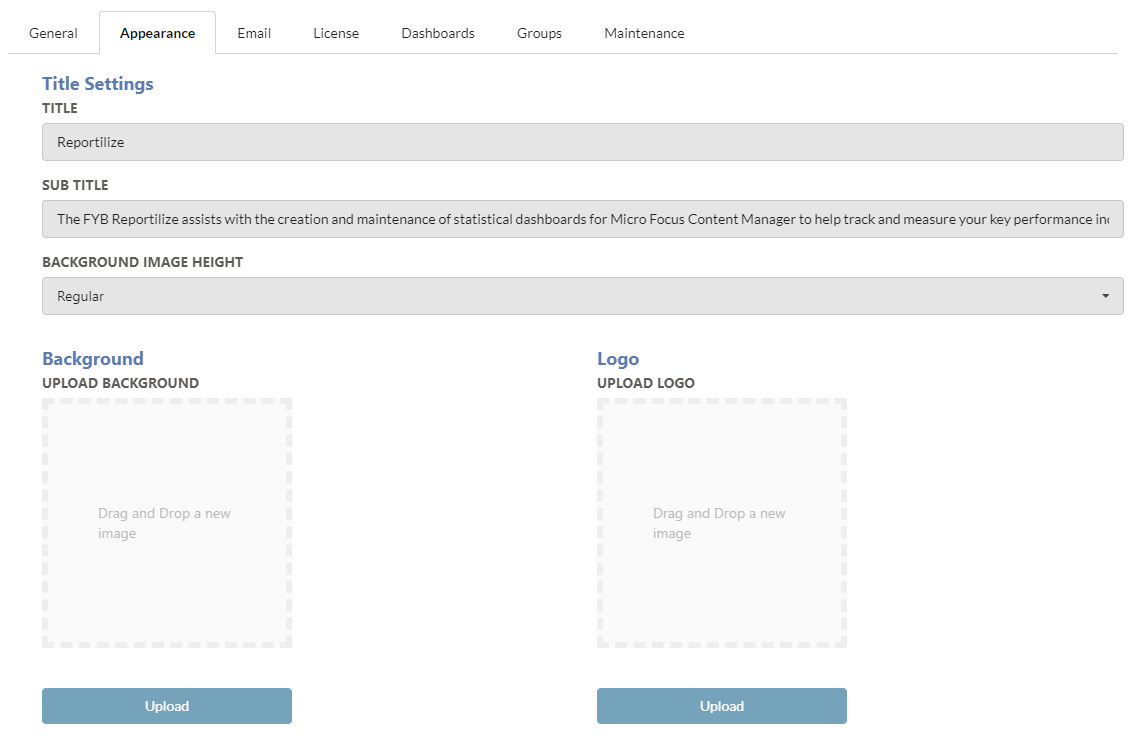
TITLE CONFIGURATION
| NAME | DESCRIPTION |
|---|---|
| Title | The main title of the Home page |
| Subtitle | The subtitle of the Home page |
| Background Height | The sizing of the home page background image |
COLOURS
| NAME | DESCRIPTION |
|---|---|
| Primary Background Colour | The header and footer colour |
| Primary Font Colour | The primary font colour |
| Main and Subtitle Font Colour | The home page titling font colour |
-
Click Pick Colour - the Colour Picker will appear

-
Select the colour desired
-
Click on the Pick Colour button again to close it
-
Click on the Save button

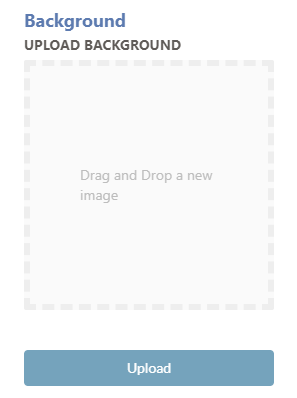
BACKGROUND
The homepage background image can be changed to the desired image.
-
Drag and Drop the desired image into the background section
-
Alternatively, you can click on the drag and drop area and select your image from the browser window.
-
Click on the Upload button to save your changes.
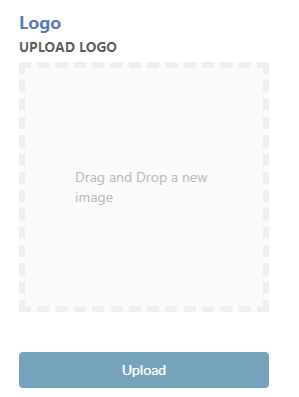
LOGO
The header logo can be changed to the desired image.
-
Drag and Drop the desired image into the Logo section
-
Alternatively, you can click on the drag and drop area and select your image from the browser window.
-
Click on the Upload button to save your changes.

The email configuration provides all configuration for sending email notifications.
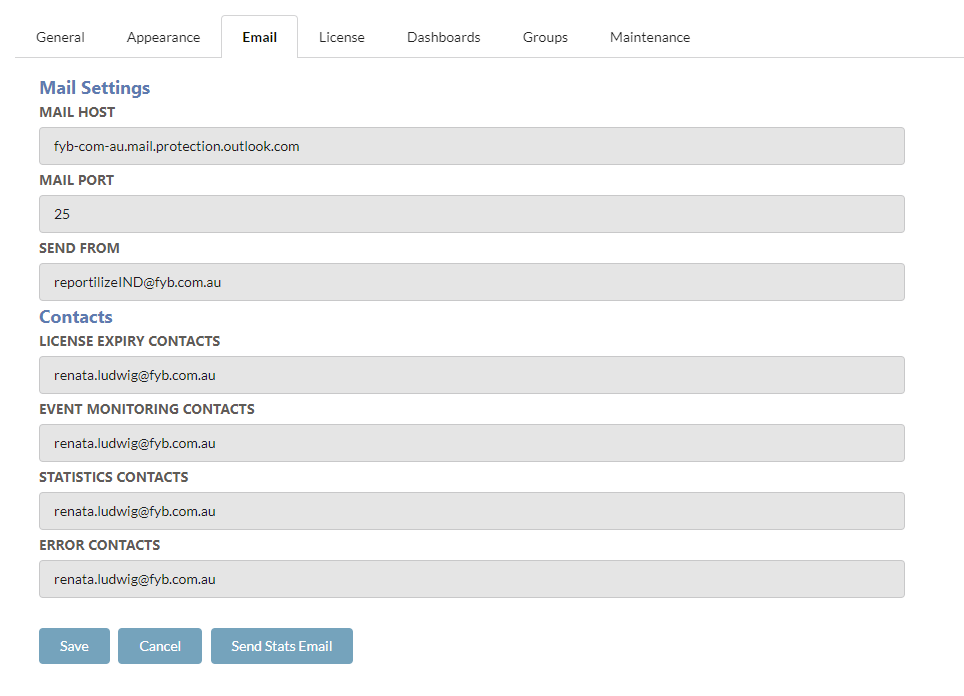
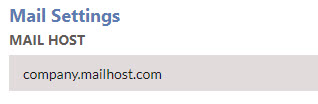
MAIL SETTINGS
MAIL HOST
The mail host service.
MAIL PORT
The port specified for the host service.

SEND FROM
The email addresses the dashboard and maintenance reports will be sent from.
CONTACTS
You can add multiple email addresses by adding ';' between each email address.
LICENSE EXPIRY CONTACTS
The email addresses of users that will be contacted when the FYB Reportilize license is due to expire.
EVENT MONITORING CONTACTS
The email addresses of users that will be contacted when Content Manager event processing is blocked or fails.

STATISTICS CONTACTS
The email addresses of users that will be contacted when the monthly Reportilize statistical data report is generated. The statistics report generated will give a breakdown of the monthly usage of Reportilize and display the most popular dashboards used that month.
ERROR CONTACTS
The email addresses of users that will be contacted when Reportilize experiences an error processing scheduled tasks such as performing monthly maintenance or sending emails to specific contacts.
LICENSE
The license configuration provides all configuration for licensing of Reportilize.
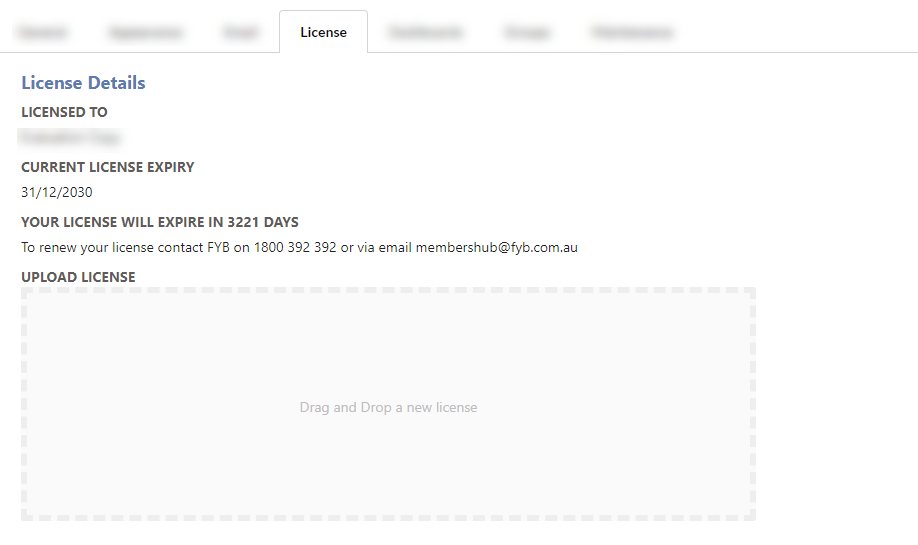
For instructions for uploading a new license see the Reportilize License Guide
DASHBOARDS
Click on the Dashboards Tab. The page will load as shown below.
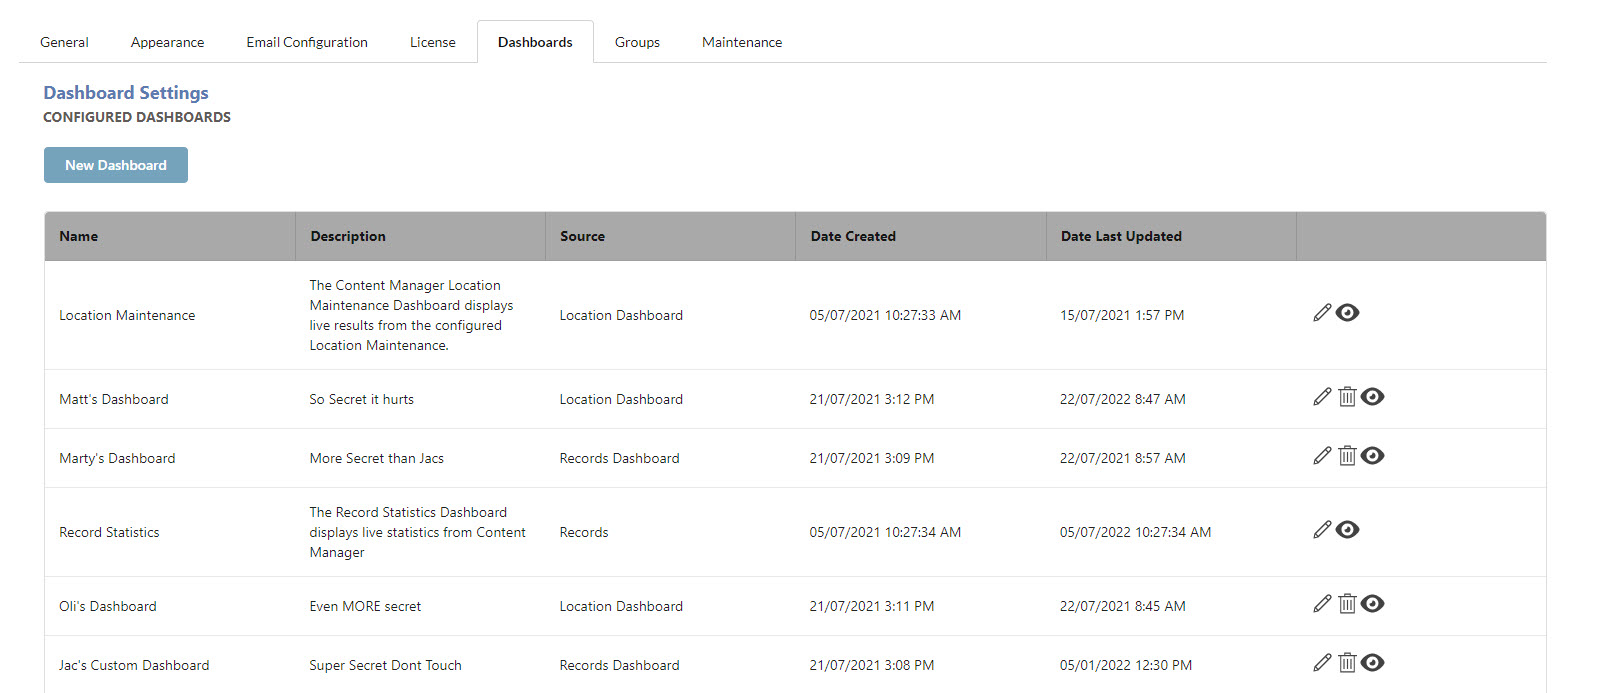
This is where you can create, edit, and delete dashboards.
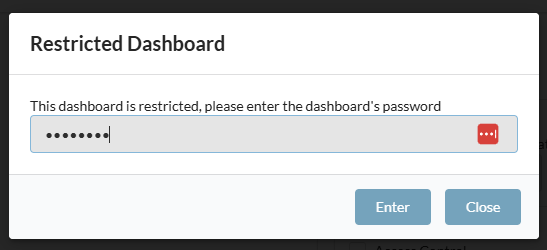
RESTRICTED DASHBOARDS
FYB Content Manager Maintenance Dashboards (if enabled during installation) will prompt for the maintenance password to gain access to edit these dashboards.
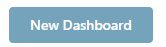
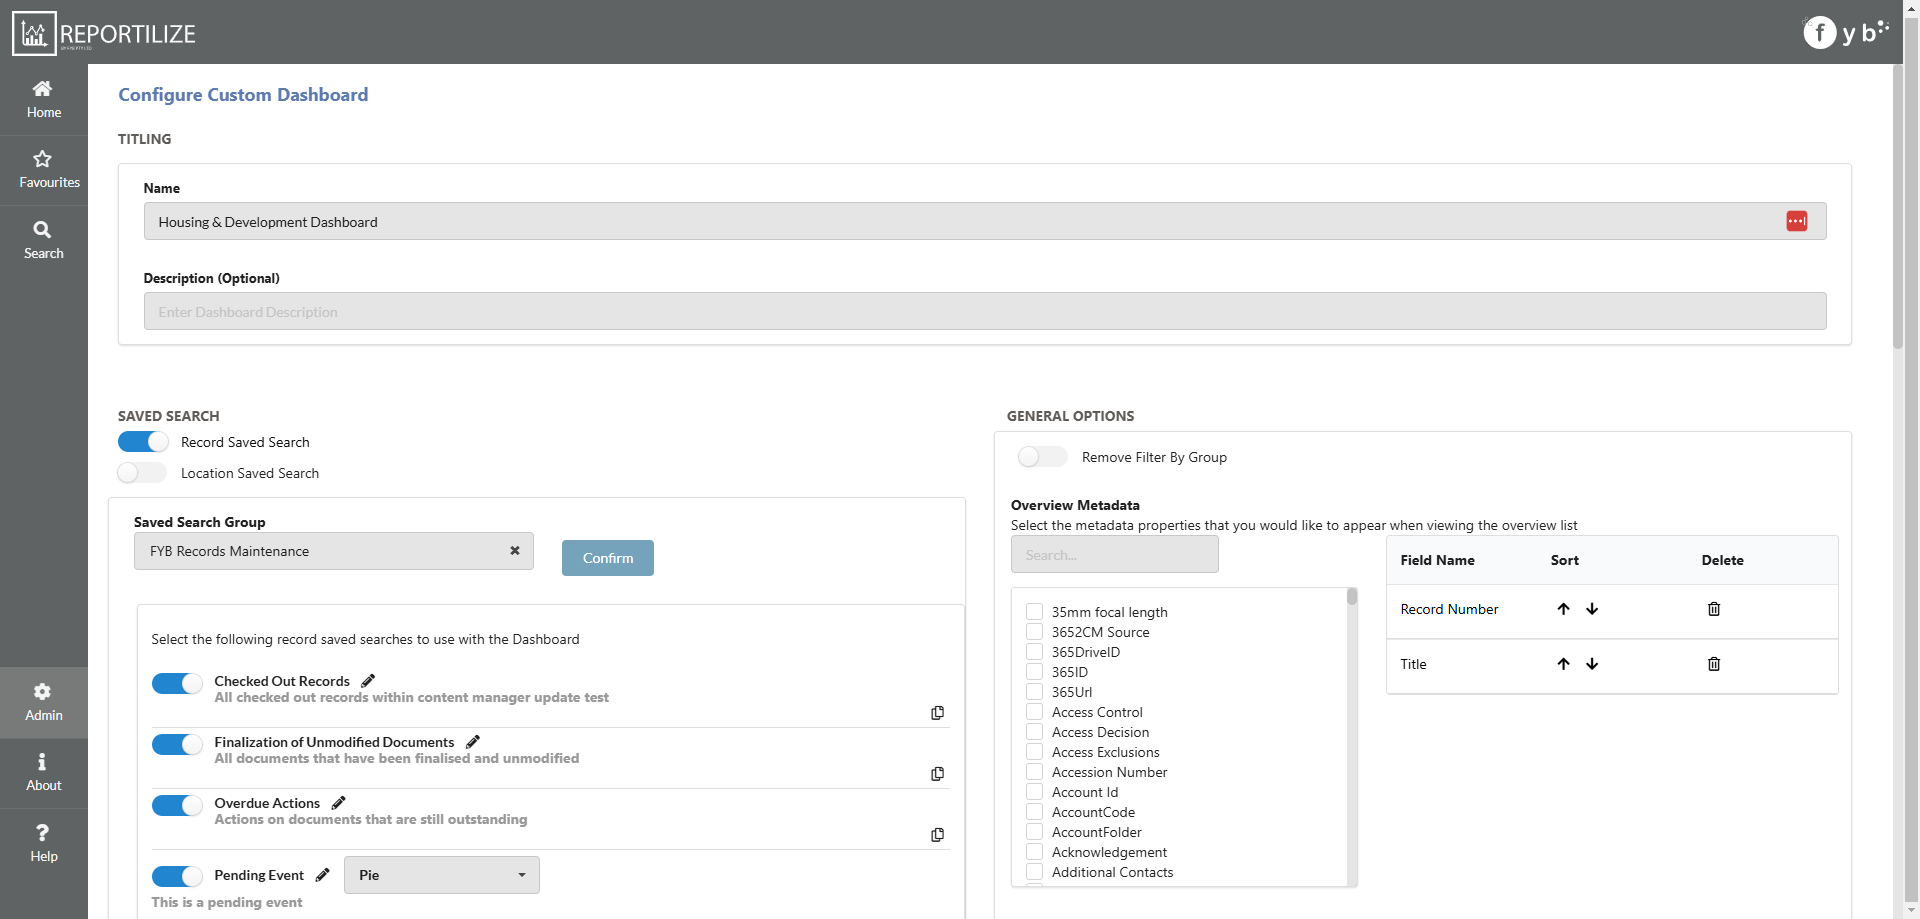
CREATING A NEW DASHBOARD
To create a new dashboard, click on the New Dashboard button.
The configuration screen will load as follows.

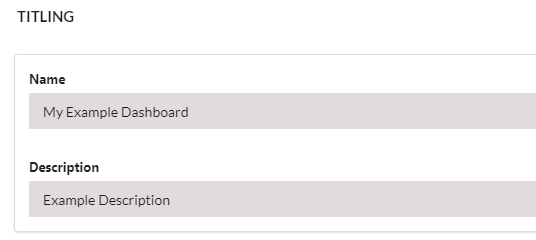
TITLING
Enter a name and description for the dashboard.
SAVED SEARCH
Select from a Record or Location saved search, using the toggles. Enter the name of the saved search group intended to be used for the dashboard.
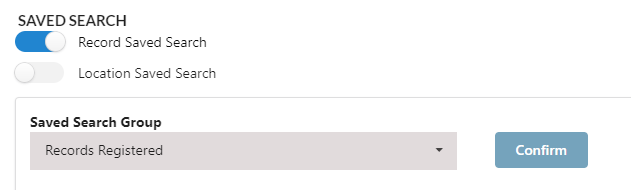
The saved search group must already be configured within Content Manager.
All saved searches contained in the saved search group will be displayed on the dashboard.
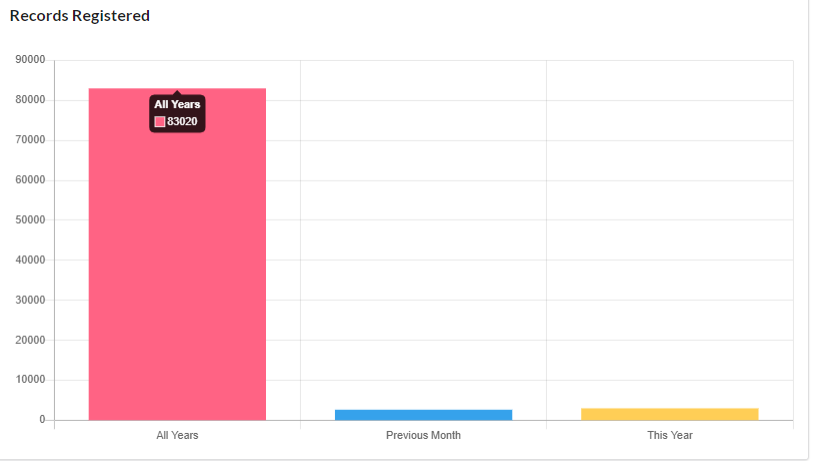
Singular Searches will always display as number cards on the dashboard.
Grouped Searches will always display as charts on the dashboard.
To select which searches to display on the dashboard:
- Enter the parent group name in the Saved Search Group field
- Click on the Confirm button
- A list of all saved searches will appear
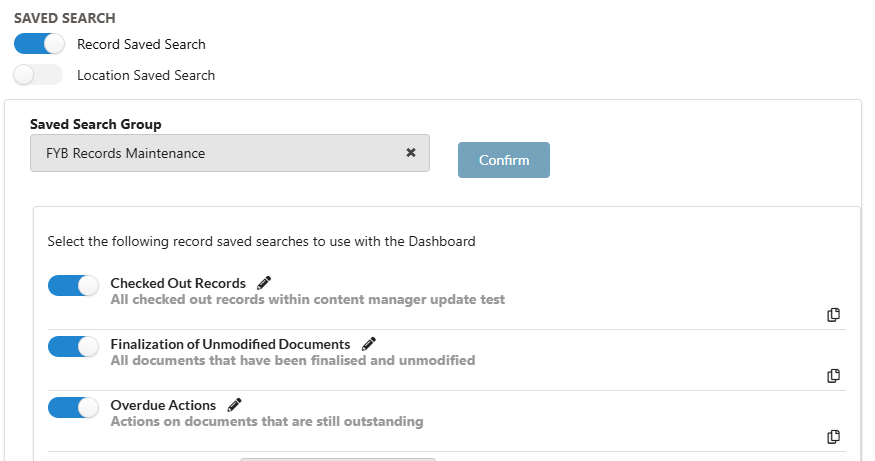
ADDING A SAVED SEARCH TO THE DASHBOARD
To add a saved search to the dashboard, click the toggle button on the left-hand side of the desired saved search.
An active saved search will be toggled on - This will display in the dashboard.

An inactive saved search will be toggled off - This will not display in the dashboard.

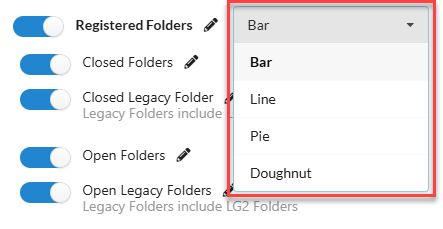
SELECTING A CHART TYPE FOR GROUPED SEARCHES
Grouped searches will display data in a chart. This chart can be defined in the dropdown box that is displayed on the right-hand side of the valid search. The following charts can be selected for use.
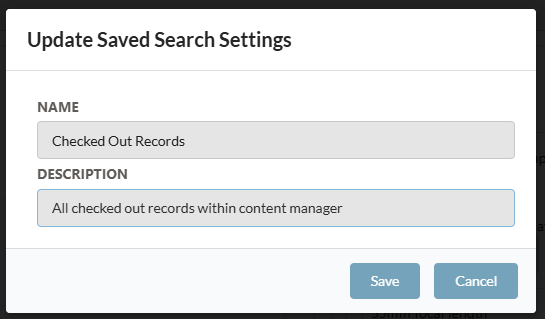
UPDATING SEARCH NAME AND DESCRIPTION
The individual Saved Search name and description can be modified within Reportilize. Updating these will update them within Content Manager.
To update the search and description, click on the pencil icon next to the associated search to update.

A pop up will appear allowing you to modify both the name and description.
If you do not wish to have a description, leave the field blank.
Click Save to save the changes.
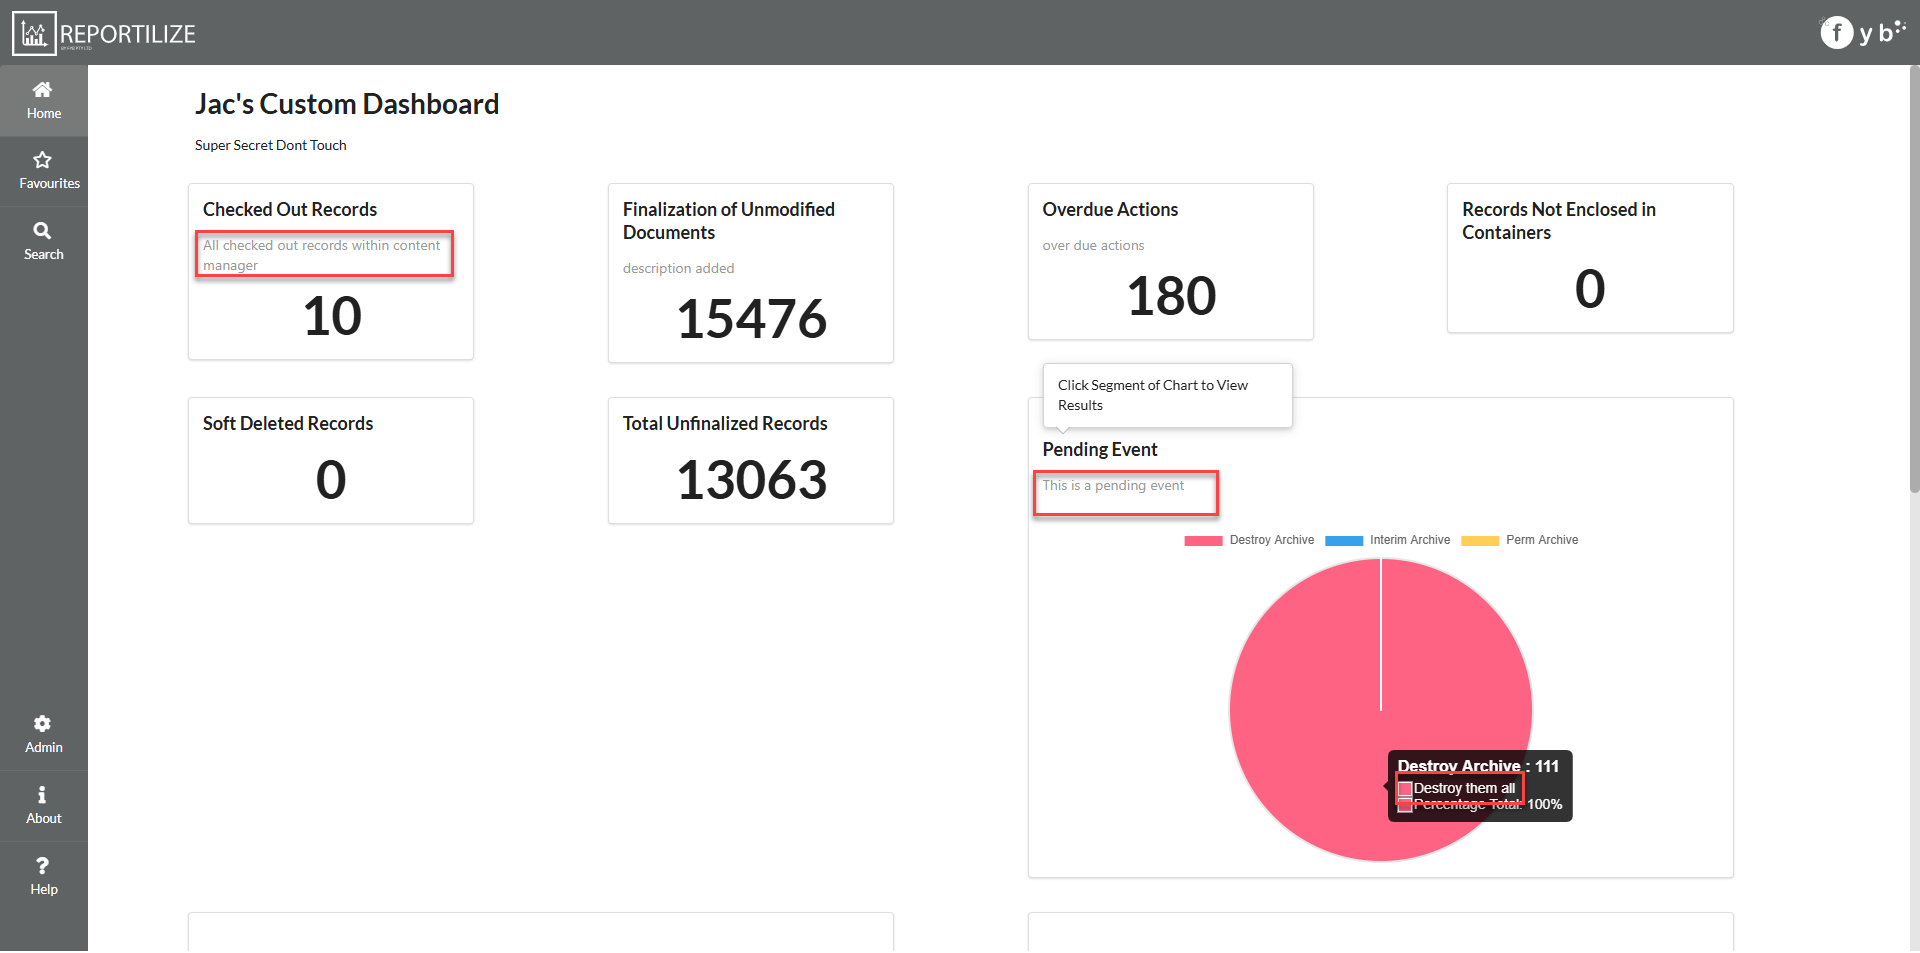
Descriptions can be added to both parent and sub searches to provide additional context within the rendered chart and number display.
REPORT PLACEHOLDERS
If utilizing the dashboard reporting feature, placeholders for each search can be generated using the copy placeholder buttons.

REMOVE FILTER BY GROUP
Option to remove the 'Filter By Group' option from the dashboard created.
If checked, the filter will not appear on the dashboard.

If unchecked, the filter will display on the dashboard.

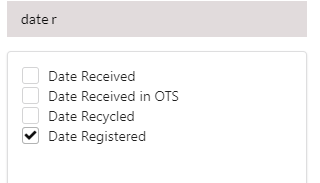
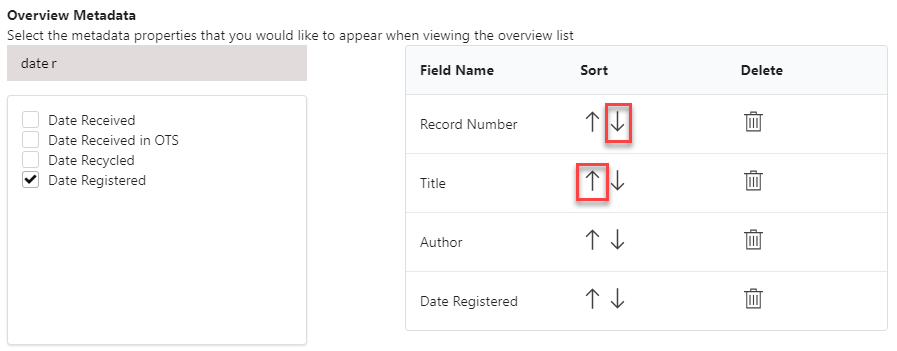
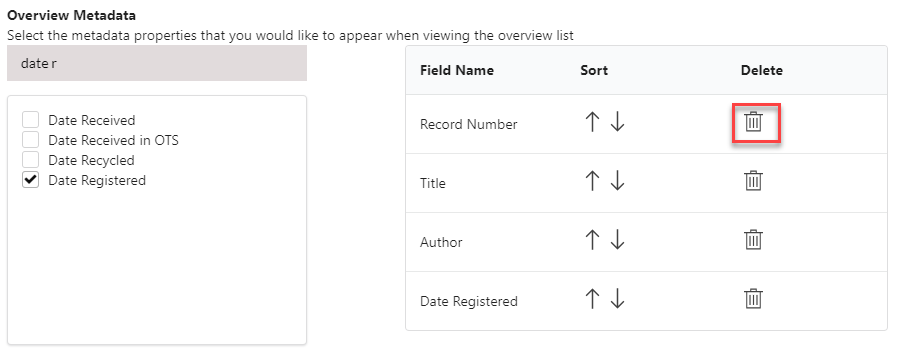
OVERVIEW METADATA
The table columns of the overview page are customisable to display specific metadata from the records retrieved.
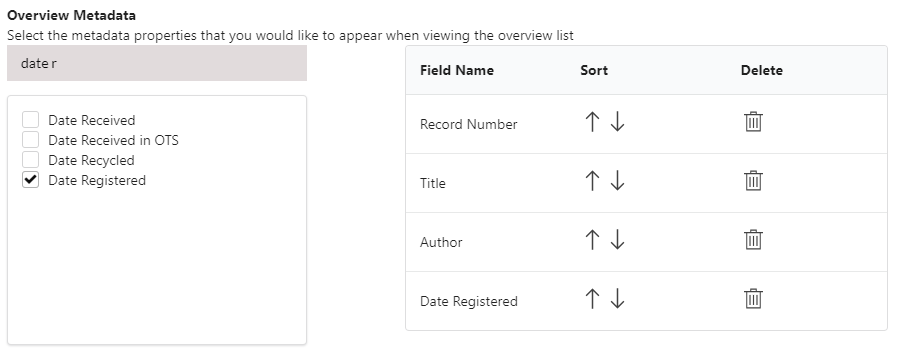
To add a column to the table, use the search bar to find a record field.
Enable the checkbox of the associated field. The field will appear in the table on the right-hand side.
To change the order of the columns, click the sorting arrows on the associated field to move the field up or down.
To delete a column, click on the bin icon on the associated field to delete it from the table.
Alternatively, unchecking the fields checkbox will also remove the field from the table.
SORT ORDER (OPTIONAL)
Dashboard overviews will display a table list of all records or locations results from the search selected. For these results, the sort order can be selected.
Select any additional field or property to sort by using Sort By Field, and Sort Order
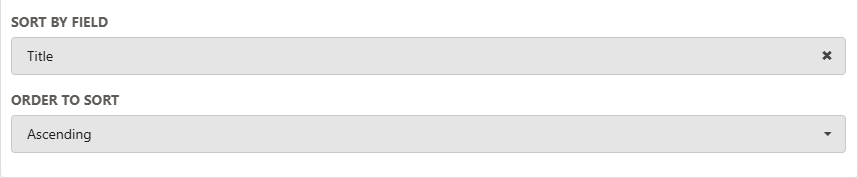
If no option is selected, the results will be returned by the default Content Manager sort order.
RESULTS PER PAGE
To prevent extensive loading time for searches that contain lots of records, the overview page must be limited to run efficiently.
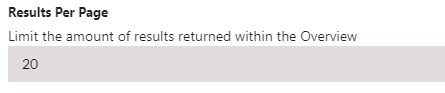
The default limit is set to 20. It is recommended not exceeding 500 records per page to help with load times.
REPORTING TEMPLATE
A report template will be unique for each dashboard and what you want to capture from it.
To create a reporting template the following criteria must be met:
- The template must be in the format of a Word Document (.docx) or Excel Spreadsheet (.xlsx)
- The template must have no restrictions (i.e., read-only)
- Report Templates must be stored in Content Manager and must be of the same record type that was declared during the installation process (Template RecType URI).
To populate a template, specific placeholders can be added into the template that Reportilize will be able to identify and populate with a value.
These placeholders can be obtained on each Saved Search item within the Dashboard Config

Placeholders can be inputted into any section of a word document.
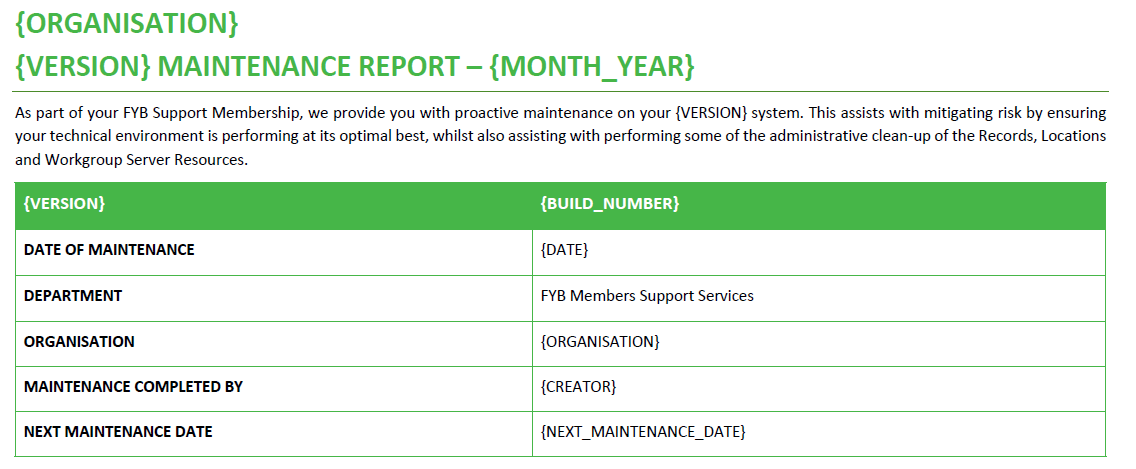
Additional Generic Placeholders can be used within the template including.
| Placeholder | Value |
|---|---|
| {BUILD_NUMBER} | The build number of Content Manager Installed. |
| {DATE} | Today's date in format dd/mm/yyyy |
| {ORGANISATION} | The organisation name attached to the service account. |
| {VERSION} | Value outputs : Content Manager |
| {MONTH_YEAR} | Month and Year in format example (December 2020) |
| {CREATOR} | Value outputs: FYB Reportilize |
| {NEXT_MAINTENANCE_DATE} | Calculated Date of the next scheduled report. |
| {NAME} | Dashboard Name |
| {DESCRIPTION} | Dashboard Description |
If a template is created in Excel, placeholders can be used to create dynamic charts within the spreadsheet. The placeholders will be automatically populated by Reportilize and will render the pre-set-up charts. This functionality can also be completed for pre-set formulas that have placeholders used.
GENERATE REPORT TO PDF
Report Templates can be generated into a PDF document when this option is enabled.

Only templates created in Word (.doc / .docx) are supported for PDF conversion.
If this option is disabled, the report will be generated in its standard format (i.e., Word)
GENERATE TR5 FILES
During the scheduled reporting, all saved searches within the dashboard can be generated into individual TR5 files that will be attached to the scheduled email with the original report.

FINALISE RECORDS IN SAVED SEARCHES
During the scheduled reporting, any selected saved searches within the dropdown will have all returned records finalised.

Warning this will finalise all records found in the selected search.
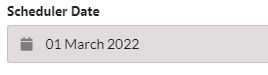
SCHEDULER DATE
Defines when the first run of the report should start. This cannot be a date from the past.
SCHEDULER FREQUENCY
Defines the frequency the reporting scheduler will run for this dashboard. This is the frequency of when a Dashboard Report will be either sent via email or saved into Content Manager.
You can choose to complete both or just one of the saving options for a generated report.
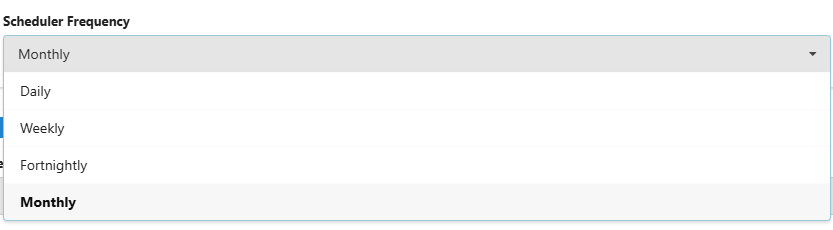
Note that reports will be emailed or sent to Content Manager at 7AM the day of the scheduled run.
EMAIL SUBJECT
Defines the subject / titling of the email.

Hovering over the ? next to the field will display all placeholders that can be used within the email body and subject.
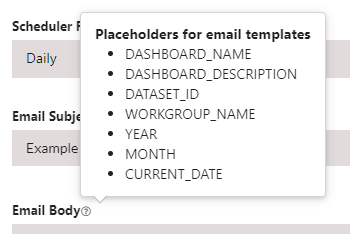
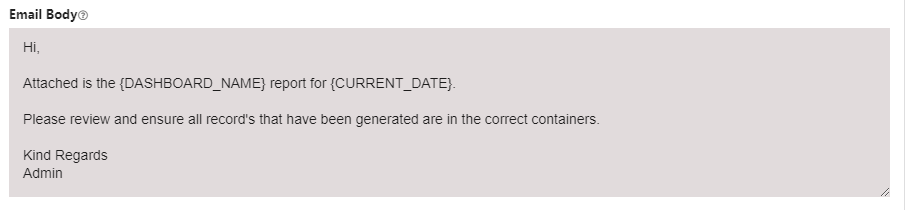
EMAIL BODY
Defines the body / contents of the email. Customisable emails can be sent to personalise the reporting features. Hovering over the ? next to the field will display all placeholders that can be used within the email body and subject.

Placeholders must be surrounded by { } and in capital letters.
SEND REPORT TO
Defines the recipient(s) of the emailed report. To include multiple separate use a ';' to separate each address.

To Save a dashboard click on the Save button. This will redirect you back to the Admin page.

To cancel all changes, click on the Cancel button. This will redirect you back to the Admin page.

SAVE REPORT TO CM
Toggling this checkbox will allow Reportilize to store any reports generated for this dashboard into Content Manager under the specified folder.

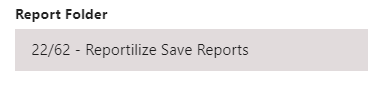
REPORT FOLDER
Search for a folder that will be used as the container for the SAVE REPORT TO CM feature.
EDITING A DASHBOARD
To edit a dashboard, click on the pencil icon for the desired dashboard.
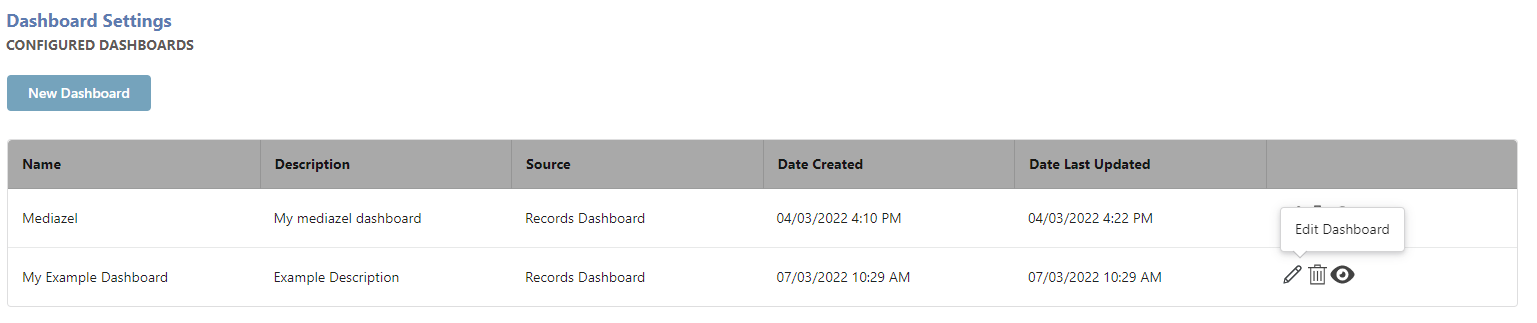
The dashboard will load as follows.
Complete the changes as needed and click on the Save button.

To cancel all changes, click on the Cancel button.

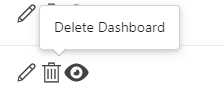
DELETING A DASHBOARD
To delete a dashboard, click on the rubbish bin icon for the desired dashboard. The dashboard will be deleted and removed from view.
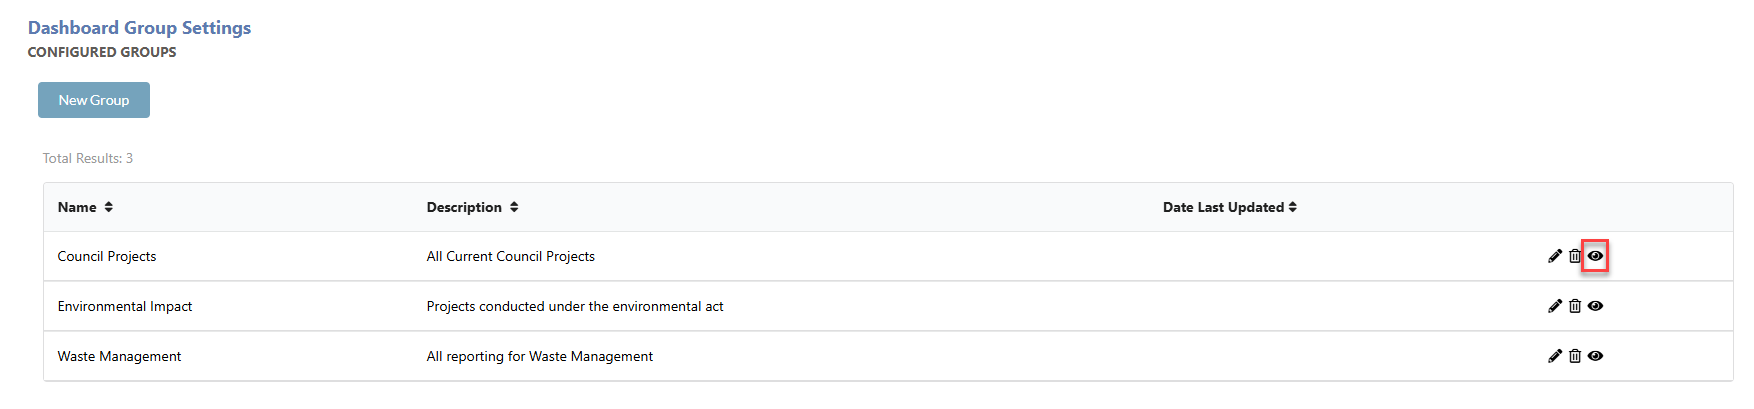
GROUPS
Dashboard groups allow for multiple dashboards to be grouped together with added access restrictions to who can view these dashboards.
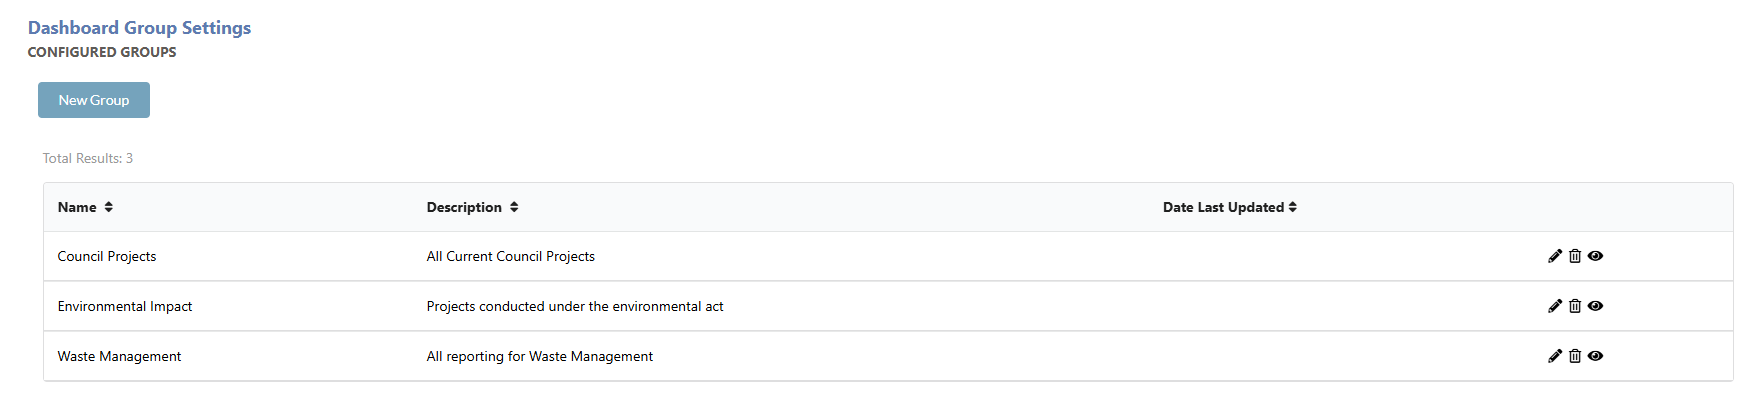
A dashboard group will be accessible from the home page.

Administrators can bypass access restrictions to the dashboards. General users will be unable to view the contents of a dashboard group they do not have access to.
CREATING A GROUP
To create a new group, click on the New Group button.
The group configuration will display as follows.
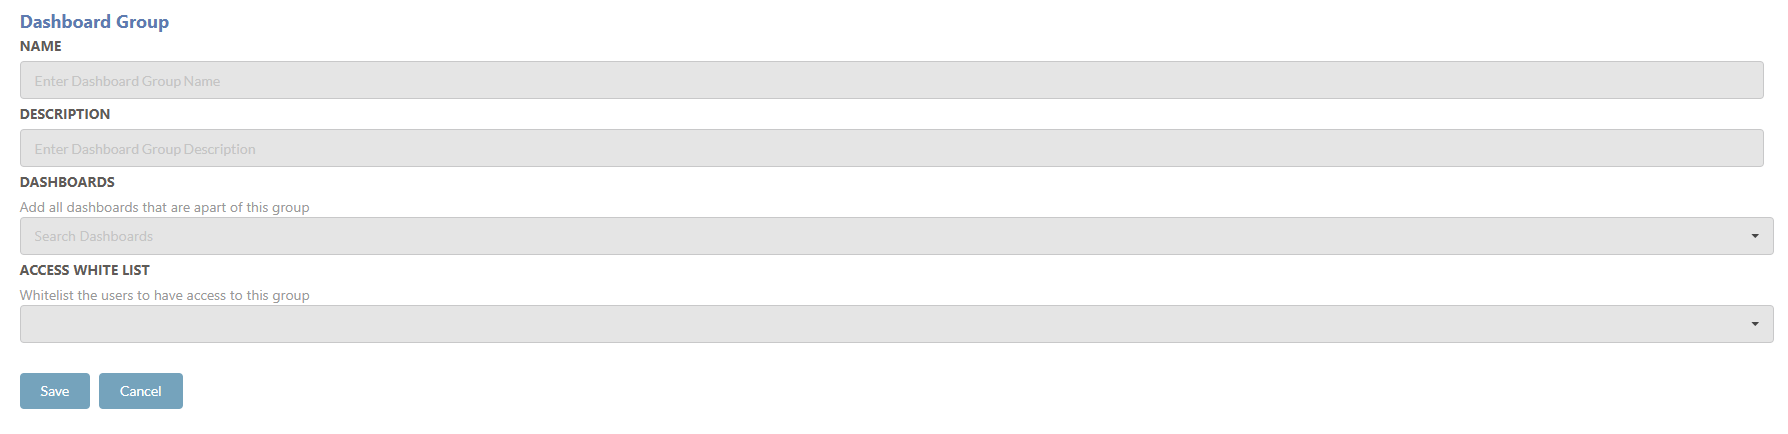
NAME
Defines the name title of the Dashboard Group.
DESCRIPTION
Defines the description of the Dashboard Group.
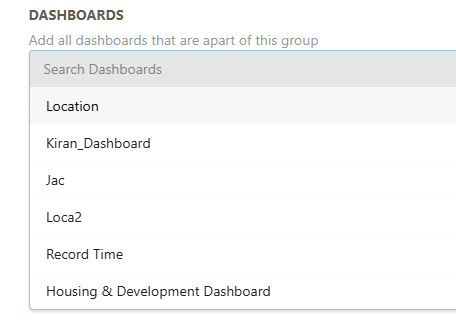
DASHBOARDS
Clicking on the dropdown provides a list of dashboards that can be selected. Multiple dashboards can be selected for a group.
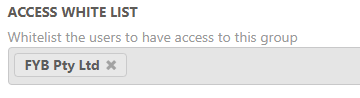
ACCESS WHITELIST
A dashboard group can have restricted access to lock a dashboard group to specific locations. If this field is left blank, anyone is free to view this group.
To save a group, click on the Save button.

To cancel all changes, click on the Cancel button.

EDITING A GROUP
To edit a group, click on the pencil icon for the desired group.

The group will load as follows.

Complete the changes as needed and click on the Save button.
To cancel all changes, click on the Cancel button.
DELETING A GROUP
To delete a group, click on the rubbish bin icon for the desired group. The group will be deleted and removed from view.
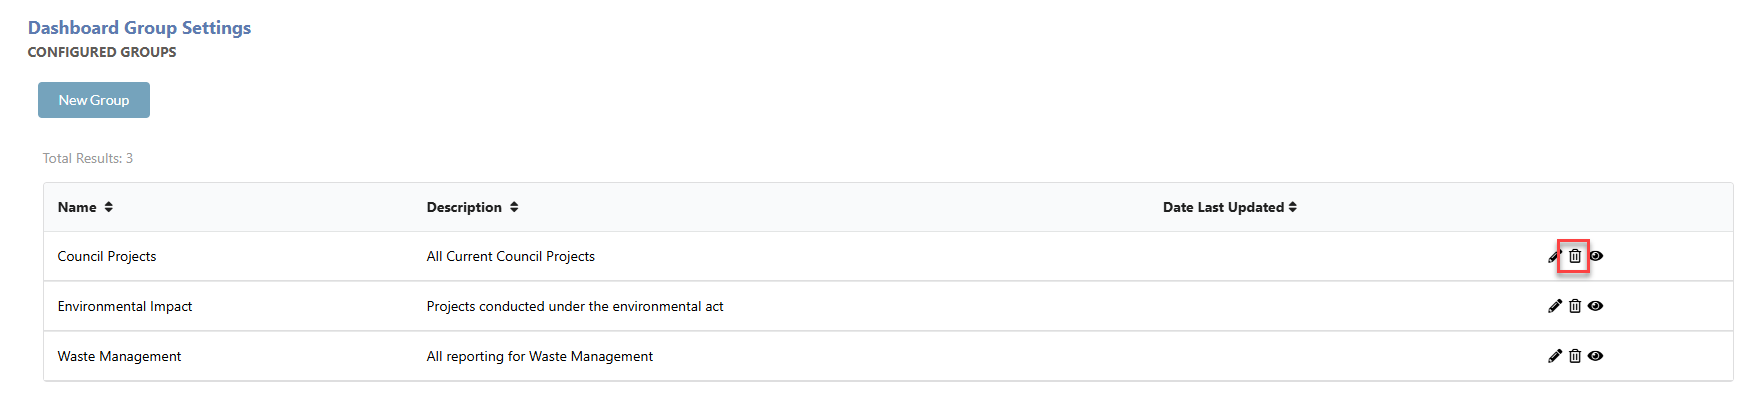
VIEW A GROUP
To view a group, click on the eye icon for the desired group. You will be redirected to the Dashboard Group
MAINTENANCE
All settings for the assistance with completing the monthly maintenance for Reportilize.
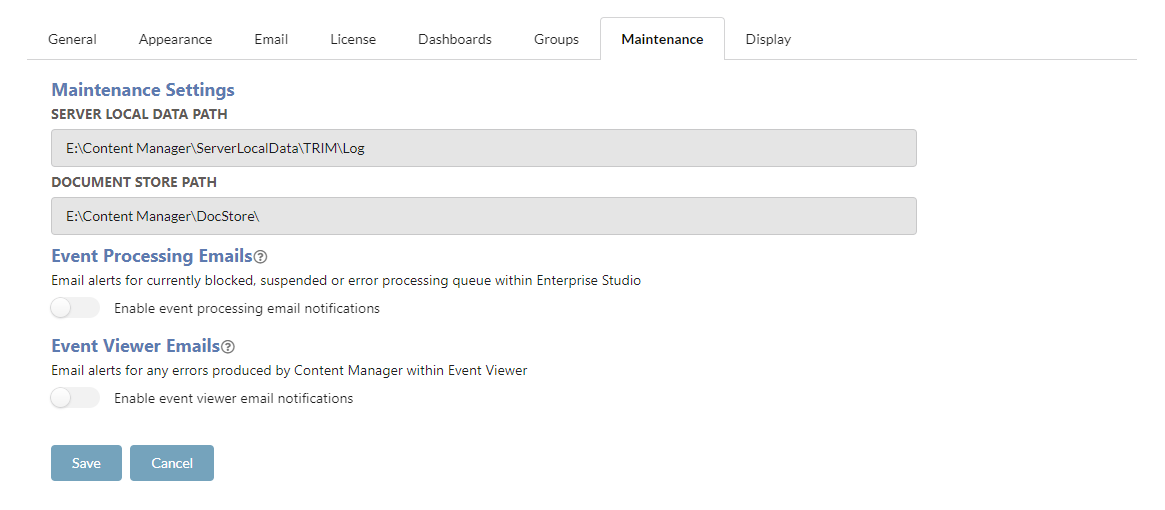
SERVER LOCAL DATA FILE PATH
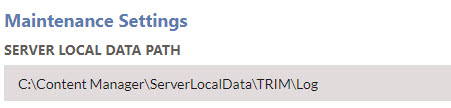
The path where Content Manager's local data and log files are kept. This path must be on the same server FYB Reportilize is installed on.
DOCUMENT STORE FILE PATH

The path where Content Manager's Document Store is installed on. This path can be a file share path if the Document Store is installed on a different server to Content Manager.
EVENT PROCESSOR EMAILS
Two different event processes will be checked when this setting is enabled.
- Event Processor: Checking currently blocked, suspended, or errored processing queues within Enterprise Studio.
- Stalled Event Processor: Checking currently stalled event processors stopping Content Manager from successfully processing. Events are considered stalled when the queued and processed events do not change within a 4-hour period.
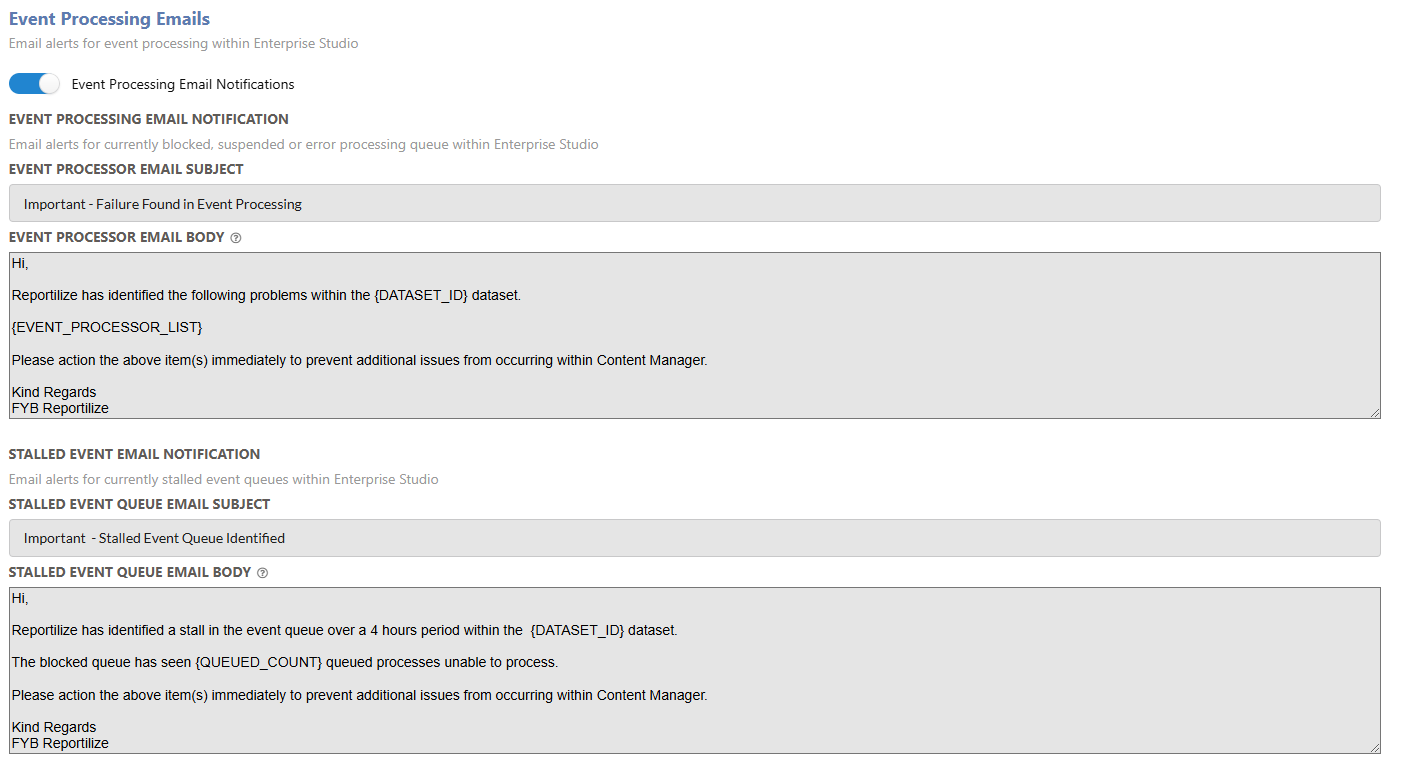
Email Subject and Body are customisable and can be modified to desired needs.
Hover over the ? icon, to help with adding placeholders within the email.
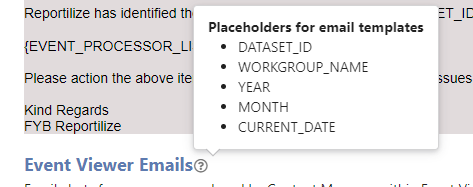
EVENT VIEWER EMAILS
An email alert for notifying of any errors produced by Content Manager within Event Viewer.
An attachment of the event log is added to the email.

The Event Viewer Email Subject and Body is customisable and can be modified to desired needs.
Hover over the ? icon, to help with adding placeholders within the email subject.

Once all changes are made, click on the Save button.

DISPLAY
All settings are for the Reportilize display.
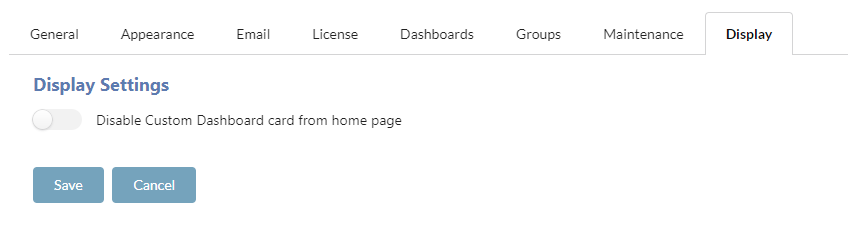
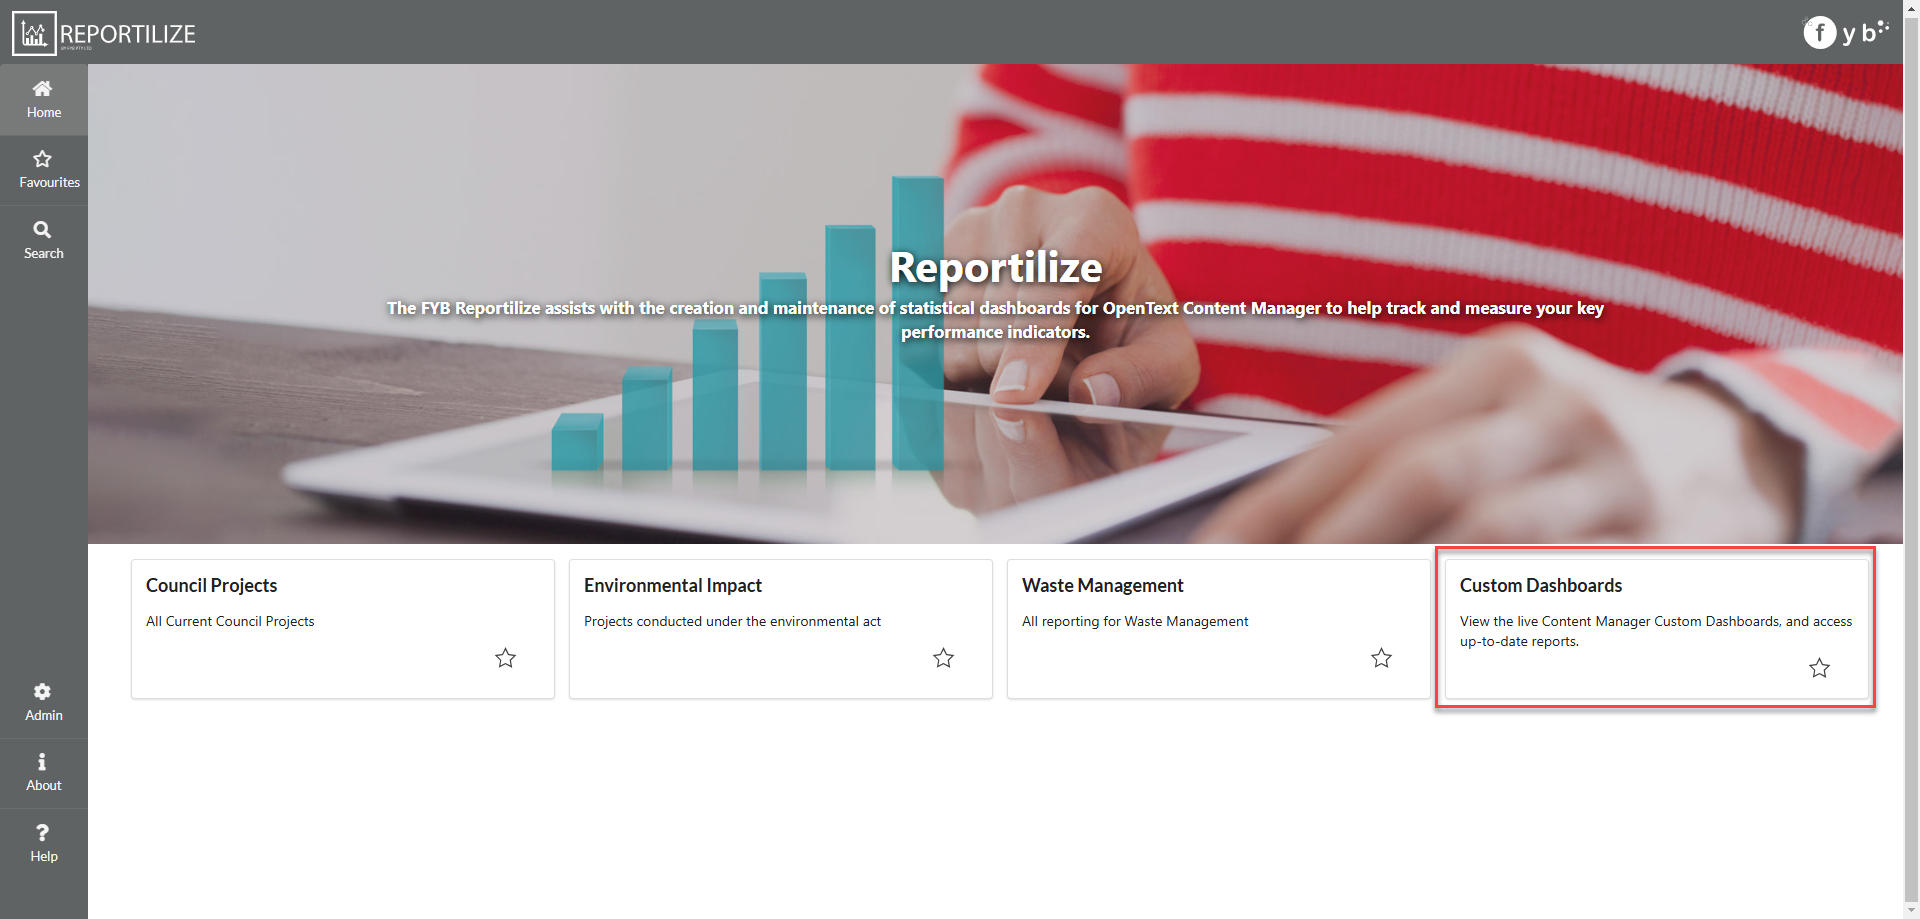
DISABLE CUSTOM DASHBOARD CARD FROM HOMEPAGE
Toggling on this setting will remove the Custom Dashboards quick access card from the home page.