GETTING STARTED
-
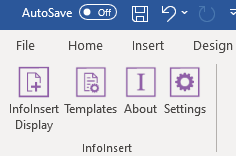
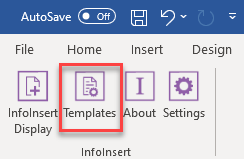
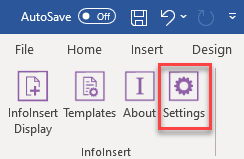
Open Microsoft Word and navigate to the Add-ins tab

-
Within the Add-ins tab, tne following buttons will appear:
- InfoInsert Display - Allows users to insert metadata properties associated with a CM record into the current document
- Templates - Allows administrator's to create, update, modify and delete word templates
- About - Displays basic information about the application
- Settings - Allows user to set application usage settings
-
To display the required panel, click on any of the buttons to reveal the desired task pane
-
The panel will be displayed on the right-hand side of the document
METADATA TABS
There are a number of different record metadata properties that can be added to documents. These are grouped into tabs on the right hand side of the document.
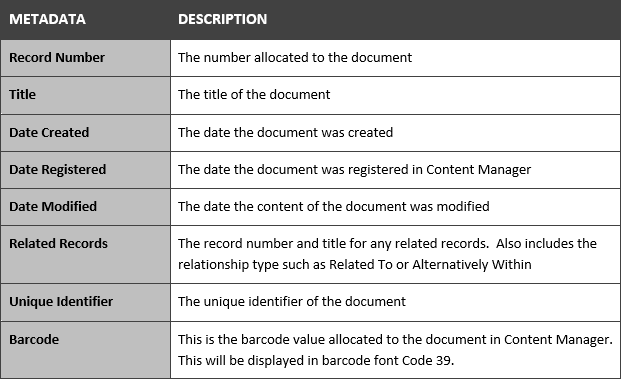
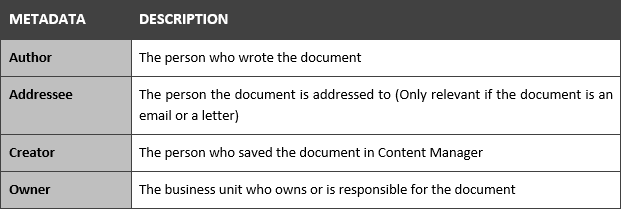
DOCUMENT TAB
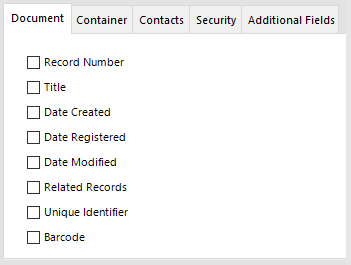
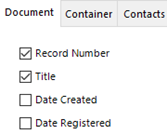
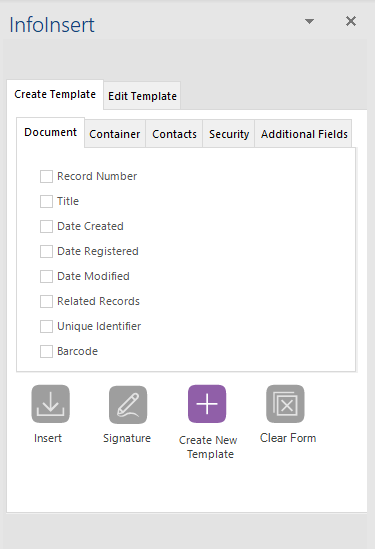
The following document metadata can be inserted into the document, using the Document tab.
The Date fields can be inserted in multiple formats (as illustrated below)
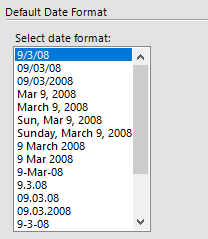
The dates formats can be adjusted accordingly within the setting task pane
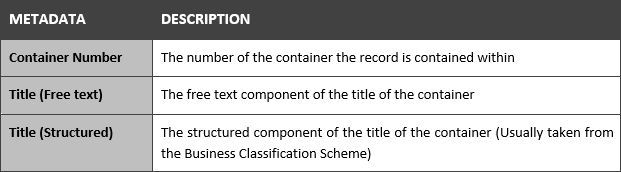
CONTAINER TAB
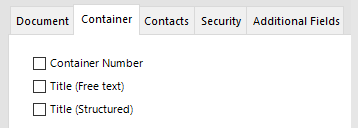
The following container metadata can be inserted into the document, using the Container tab.
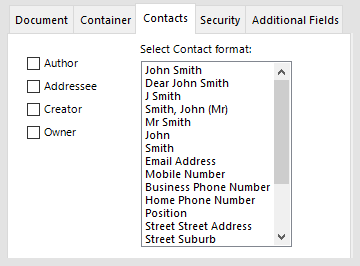
CONTACTS TAB
The following contact metadata can be inserted into the document, using the Contacts tab.
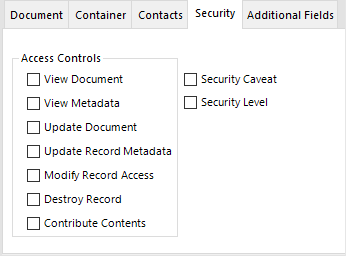
SECURITY TAB
The following security metadata can be inserted into the document, using the Security tab.
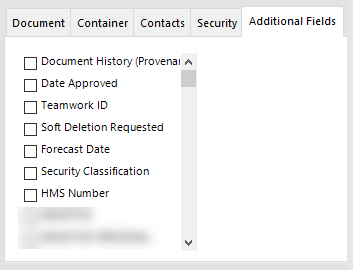
ADDITIONAL FIELDS TAB
The additional fields tab will list any additional metadata which can also be inserted into the document.
INSERTING METADATA PROPERTIES
To begin inserting metadata into the document, the document first needs to exist in Content Manager and be checked out to you.
EXISTING DOCUMENT
To insert metadata into an existing document, open the document from Content Manager in Edit mode.
NEW DOCUMENT
To insert metadata into a new document, users must first create the record in Content Manager. InfoInsert automates this process by creating the record and checking the document out to you. See instructions in the CREATING A NEW DOCUMENT section.
If the document is created through the Content Manager integrated ribbon instead of the InfoInsert New Document feature, properties cannot be inserted into the document until it has been closed, Checked In, and then Checked Out again.
HOW TO INSERT
-
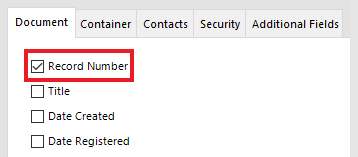
Place the mouse cursor where you would like the metadata property to be inserted in the document

-
Select the required metadata property, for example; Record Number
-
Click the Insert button

-
The metadata property will be inserted into the document and the InfoInsert pane will reset, ready to use again

INSERT MULTIPLE METADATA
InfoInsert is designed to allow multiple metadata to be inserted at once. Each property will be separated by a space, to insert multiple metadata please follow the steps below:
-
Place the mouse cursor where you would like the metadata property to be inserted in the document
-
Select the required metadata properties
-
Click the Insert button
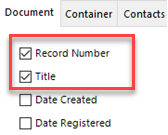
For example; displaying the Record Number and Title in the footer of the document:

Select the Clear Form button to reset all currently ticked metadata.

INSERTING A SIGNATURE
You can insert digital signature belonging to yourself, or any location that you are a delegate of. To insert a digital signature into the document:
-
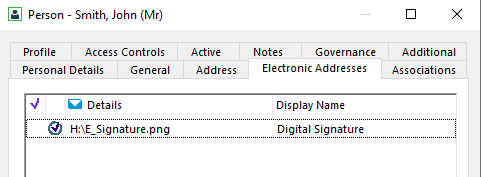
Ensure you have a digital signature available in your Content Manager (Records Manager) profile
-
Place the mouse cursor where the signature is to be inserted
-
Click the Signature button

-
If more than one signature is available, a menu will appear. Select the location whose signature you want to insert. If only one signature is available, then this step is skipped.)
-
The signature will be inserted into the document

CREATING A NEW DOCUMENT
There are two ways to create new documents and save them to CM using InfoInsert.
This features should only be used on brand new documents that have not previously been saved locally. If the document has been saved previously (e.g. on your laptop) then this feature may not work as intended.
USING THE NEW DOCUMENT BUTTON
To create a new document in Content Manager via InfoInsert:
-
Navigate to the Add-ins tab
-
Click on the InfoInsert Display button to activate the InfoInsert Display pane
-
Click the New Document button

-
This will launch the Record Type selection dialog
-
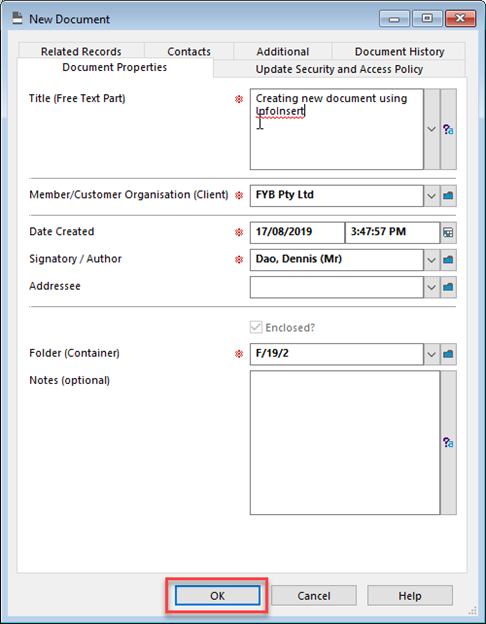
Select the Record Type and click the OK button

-
Fill out the relevant fields on the record entry form and click the OK button
USING THE SAVE AS MENU
As an alternative to using the New Document button on the InfoInsert ribbon, documents can be created in Content Manager via the File > Save As menu, as follows:
-
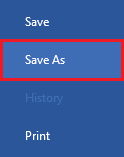
On the Microsoft Word ribbon, click on File

-
From the File menu, click on Save As
-
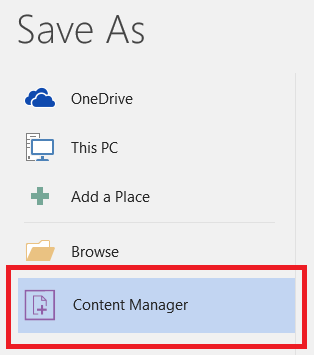
In the Save As menu, click on the Content Manager button
-
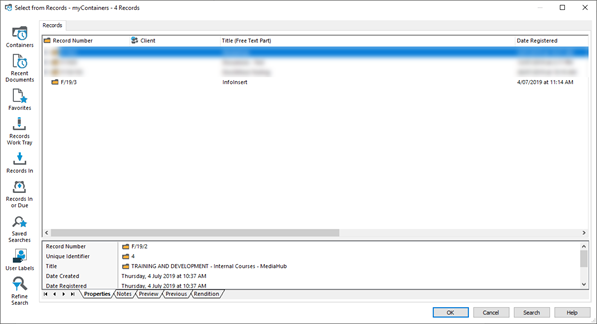
Select one of the following options, to find the required folder
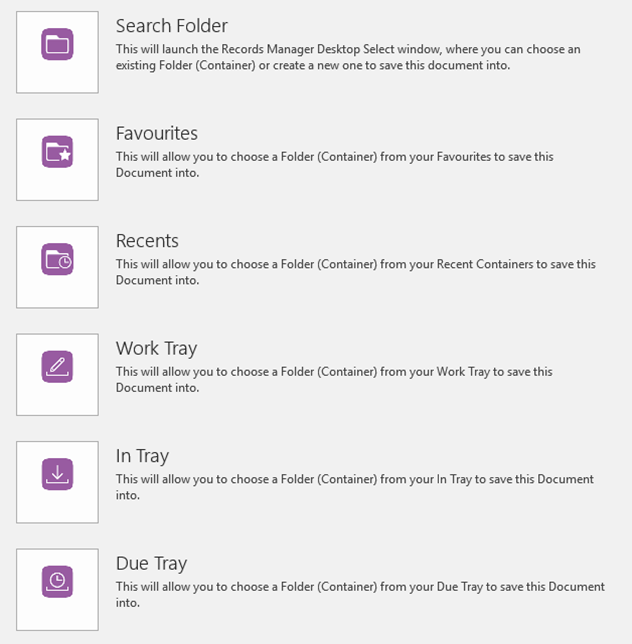
-
Once you have selected the folder, click the OK button
-
Select a Record Type and click the OK button

-
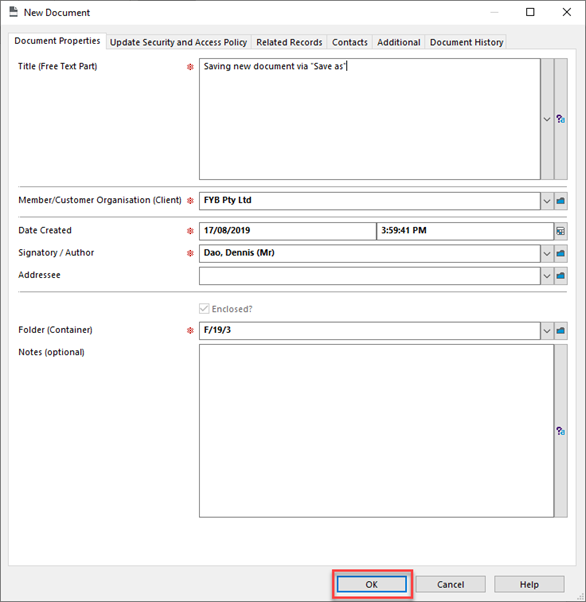
Fill in the relevant fields on the record entry form
-
Click the OK button to save the document into Content Manager.
REPLYING TO RECORD
The reply to document functionality in FYB InfoInsert provides users with the ability to quickly establish a relationship between two records as well as automatically populate the Author and Addressee field.
When a record is selected for reply, the Author field will be used as the Addressee field and the Addressee field will be used as the Author field for the new record. The reply document can be either created using a template or a new document.
To reply to a document please follow the steps below.
-
Click on the **InfoInsert Display **Button from the Add-ins Tab
-
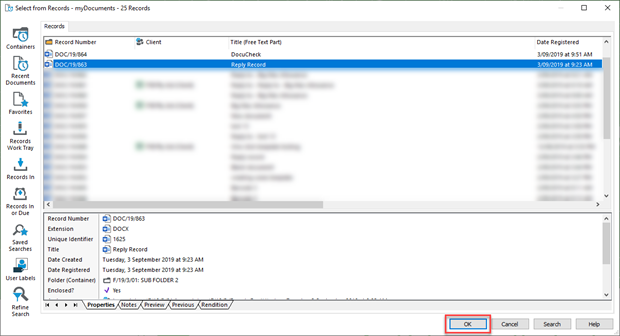
Click on the Reply Record button

-
When the Record search window appears, select the require document for reply
-
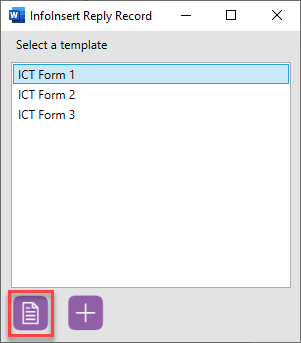
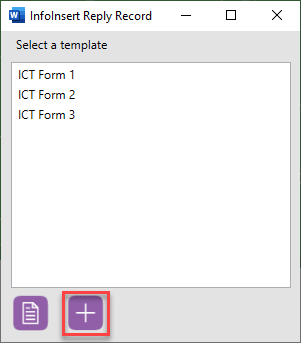
When the Reply Record Window appears, Either:
a. Select a template from the list and click on the Create From Template button
b. Click on Create New Document button
-
Select a Record Type and click the OK button

-
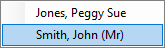
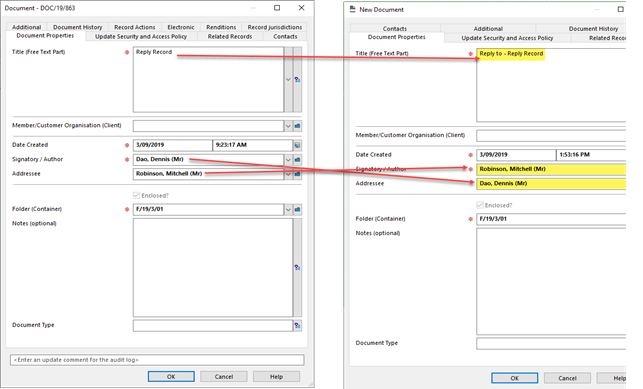
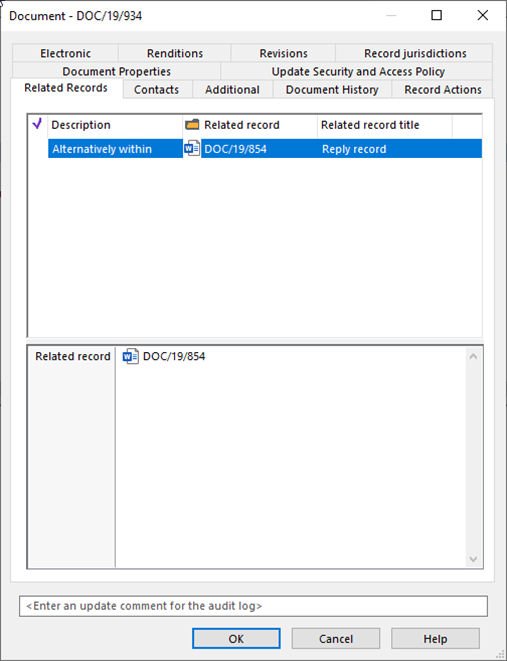
When the record entry window appears, you will notice the author field and addressee field are automatically populated using information from the reply record (as illustrated below).
Fill in any additional mandatory metadata as required by the record type and click the OK button.
In addition, on the Related Records Tab, you will notice the reply document has been attached as a related record to the new document.
- When the document is created, you can continue working on the document and insert additional metadata as required
UPDATING METADATA PROPERTIES
If any metadata properties have been updated in Content Manager for a particular document, the corresponding metadata properties that have previously been inserted into the document can be updated.
To update metadata on a document:
-
Open the document in Edit mode from Content Manager
-
Toggle on the InfoInsert add-in
-
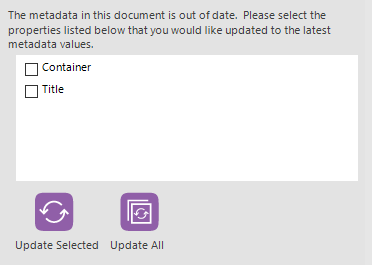
The user will be automatically prompted to update any out of date metadata in their document.
-
Either:
a. Select the required field that needs to be updated and click on the Update Selected button
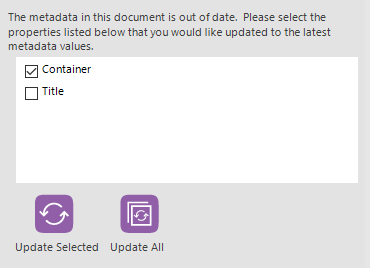
b. Select the Update All button to replace all listed metadata values in the document

INFOINSERT TEMPLATES
The FYB InfoInsert templates feature provides Content Manager Systems Administrators/Records Managers with the ability to easily create, update and delete templates using an intuitive user interface.
Templates streamline the document creation process by automatically populating Content Manager record metadata into a Word document from a template during the save process. This increases efficiency and ensures that consistent and high-quality documents are produced.
HOW TO CREATE A NEW TEMPLATE
To create, edit or delete InfoInsert templates, the user needs to be a Content Manager System Administrator/Records Manager.
To create a new template:
-
Open Microsoft Word
-
Click on the Add-ins tab

-
Click on Templates

-
The InfoInsert Template panel will toggle on
-
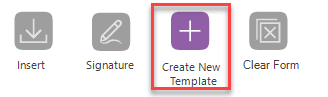
Click on Create New Template button
-
This will launch the Select from Record Types window.
-
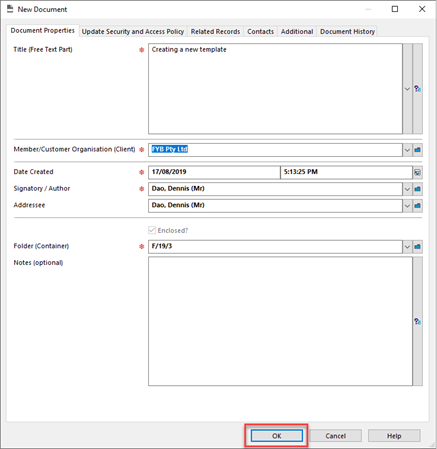
Select the Record Type and click the OK button

-
Fill in the relevant fields on the record entry form and click the OK button
-
The Template is now ready for editing and will automatically be Checked In once the document is closed.

-
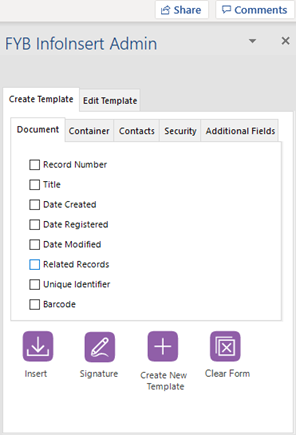
To insert metadata placeholders into the template, place the cursor where you would like the metadata to be inserted
-
Tick the required metadata property, e.g. Record Number

You will notice the placeholder value, [Record Number] is inserted into the Word document.
This indicates where the record number value will populate in the template. Once the template is used to generate a document the placeholder will be replaced with the corresponding metadata from Content Manager, e.g. DOC/19/217.

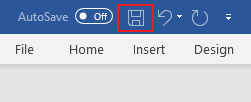
- To save your template, click the Microsoft word Save button and close the document
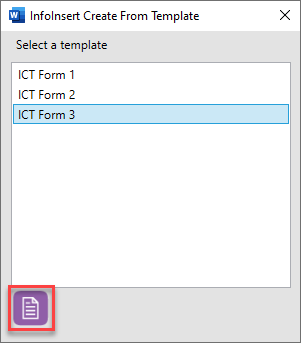
HOW TO USE AN EXISTING TEMPLATE
-
Open Microsoft Word
-
From the Add-ins tab, select the InfoInsert Display button

-
Click the Create New Document from Template button

-
When the template list window appears, select the required template from the list and click on the Create Template button.
-
This will launch the Select from Record Types window.
-
Select the Record Type and click the OK button

-
Fill in the relevant fields on the record entry form and click the OK button
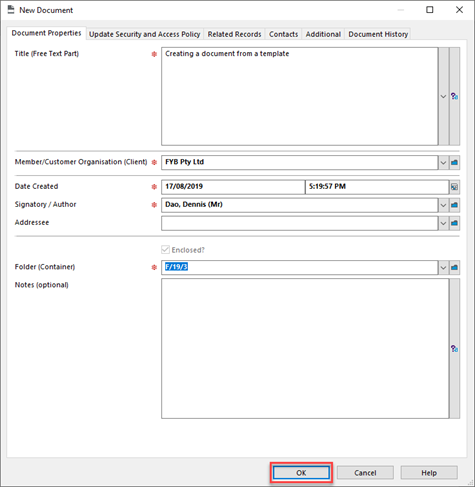
-
Once the document is created in Content Manager, the document will be loaded into the current Microsoft Word window and the metadata will be automatically populated by replacing the corresponding placeholder tags.
-
You can continue working on the document and insert additional metadata as required.
NOTE: The document will be Checked Out to the current user during this process and will be automatically Checked In after closing Microsoft Word.
HOW TO EDIT A TEMPLATE
-
Open Microsoft Word
-
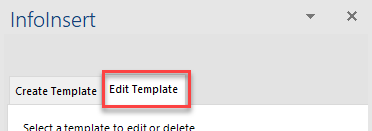
From the Add-ins ribbon, select the Templates button.

-
This will open the Templates panel

-
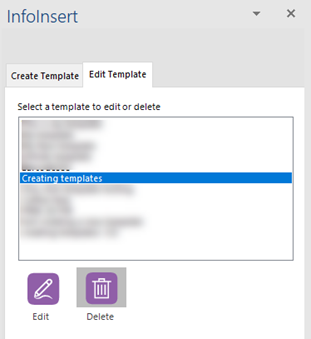
Click on the Edit Templates tab

-
Select the required template and click Edit
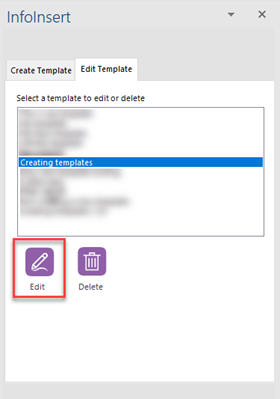
This will load the selected template from Content Manager in Microsoft Word and Check Out the document to the current user.
6. Once the template has been loaded into Microsoft Word, the edit controls will become active and the template is available for editing.
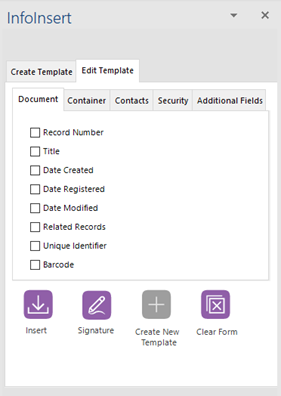
-
To insert metadata placeholders into the template, place the cursor where you would like the metadata to be inserted

-
Tick the required metadata property, e.g. Record Number

-
To save the changes, click the Microsoft word save icon and close the document.

HOW TO DELETE A TEMPLATE
-
Open Microsoft Word
-
From the Add-ins tab, select the Templates button
-
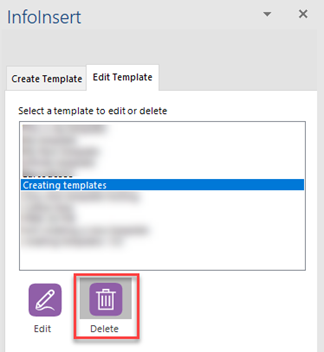
From the Template panel, select the Edit Template tab
-
Select the desired template to delete from the list
-
Click on the Delete button to delete the template
INFOINSERT SETTINGS
While using InfoInsert you can change the following settings:
-
To open the settings task pane click on the cog button
-
The settings task pane will be displayed on the right-hand side
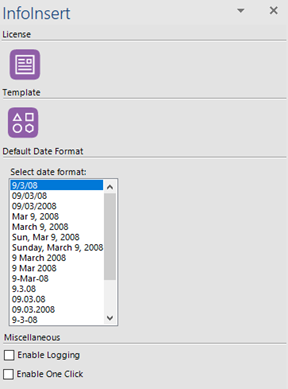
Within the setting task pane the following settings are available for adjustment.