SUPPORTED FILE TYPES
Currently, DocULink supports the following file types:
| Application | Extension |
|---|---|
| Word | doc, docx, docm |
| Excel | xls, xlsx, xlsm |
| PowerPoint | ppt, pptx, pptm |
USING THE DOCULINK EXTERNAL LINK
NAVIGATION BUTTONS
 Help - Launches the User Manual in Document360.
 Admin - Launches the admin console.
 Close - Closes DocULink
UPLOADING LINKED DOCUMENTS
DocULink can wither be launched by:
- Clicking the executable or
- Right-clicking a supported file -> Send To and opening it with DocULink.
This method will prepopulate the File Path and Linked Files fields.

-
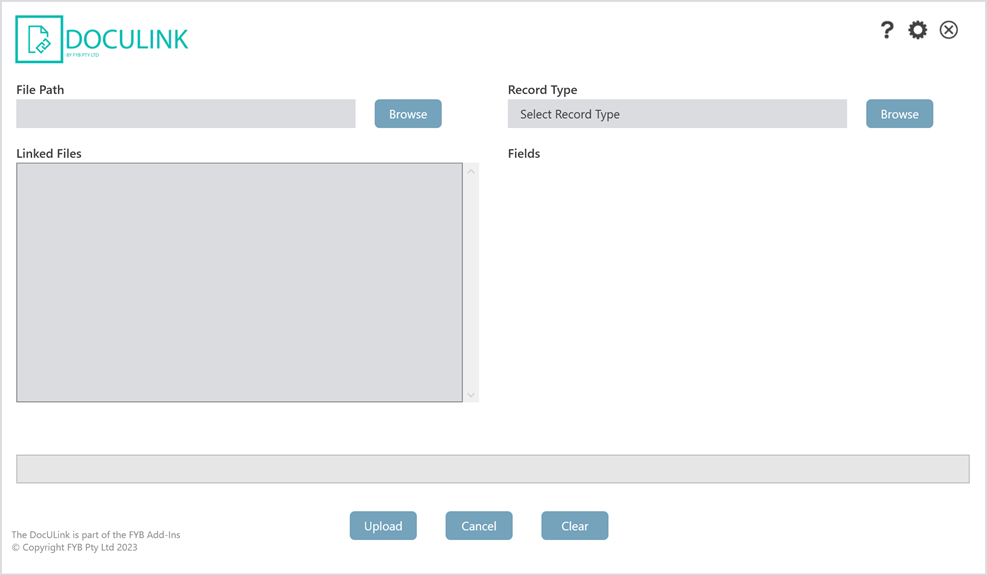
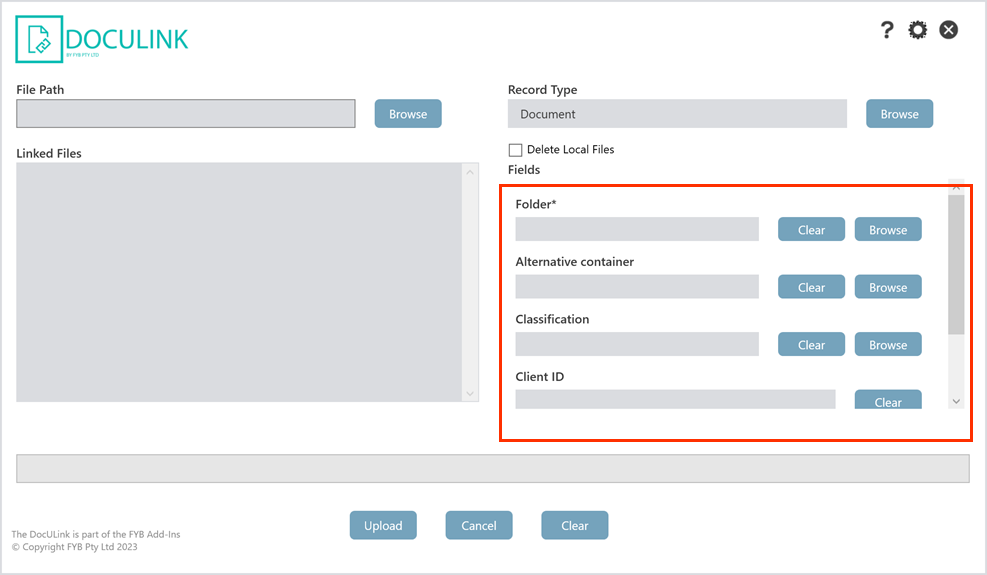
Launch the DocULink executable. The DocULink Upload Page will open.
-
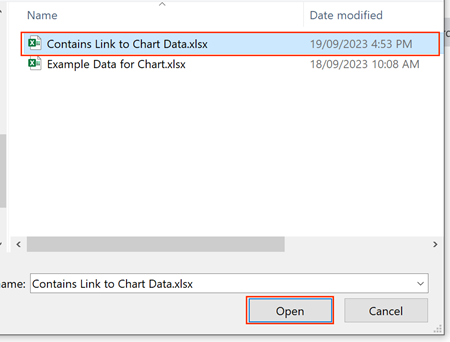
Click the Browse button to select a file.

-
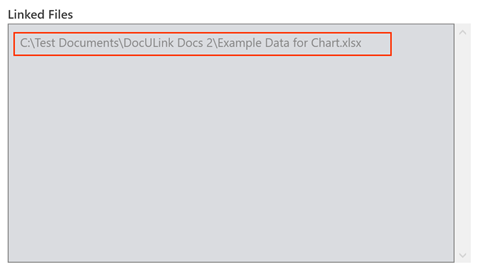
DocULink will find all linked documents that are linked to the file selected in Step 2
-
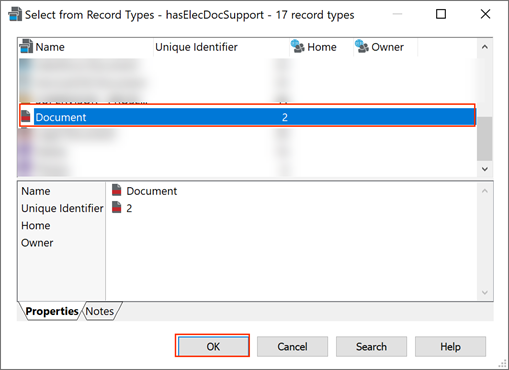
To select a Record Type, click on the Browse button and select a Record Type from the Content Manager Window and click on the Ok button.

-
Once the Record Fields are shown, fill in the mandatory fields (marked with a *)
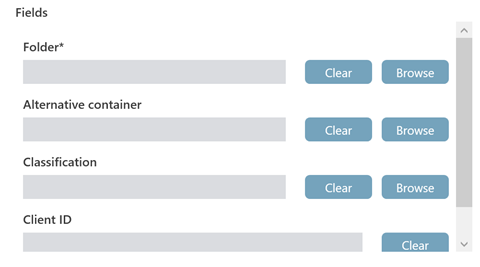
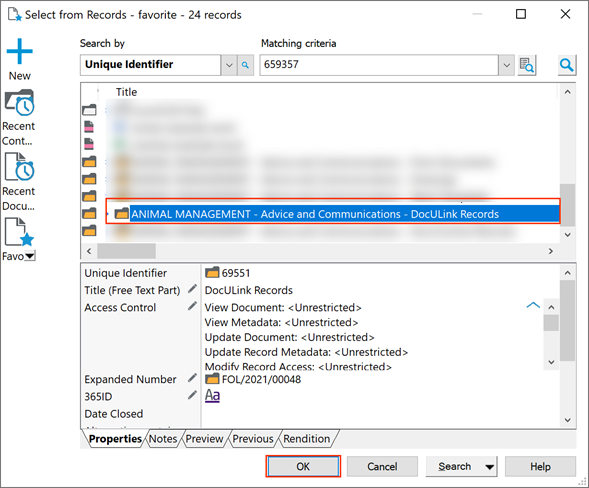
CM object fields such as Container and Author fields are rendered with a Browse button. Use this button to select the appropriate Content Manager object.
E.g.
-
Optional Enable to Delete Local Files option to delete the documents from your drive after a successful upload to Content Manager.
-
Once all the mandatory fields have been filled in, click on the Upload button.
-
The progress bar will update per document uploaded to Content Manager

-
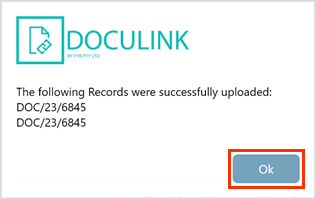
Once all files are uploaded, a message will appear with the Record Numbers of each uploaded file will appear. Click on the Ok button to close the window.
-
A Linked Document relation will be created between all uploaded Records

-
The URI of each record will be added to the respective file's metadata. This will allow subsequent uploads of the same files to be added as new revisions to the existing Records in Content Manager.
-
The Cancel button will cancel the upload process.
-
The Clear button will clear all fields.
OPEN LINKED DOCUMENTS
The following instructions will only apply to records that have a "Linked Document" relationship with another record.
When opening Word documents that contain links to other Word documents, the Open all documents checkbox must be enabled
- In Content Manager, locate the record that contains a Linked to relationship you wish to checkout
- Right click on the relevant record and navigate to and select Send to > FYB DocULink
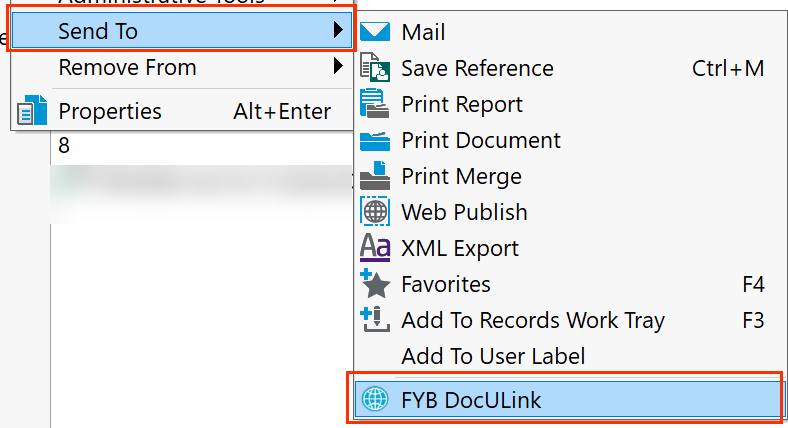
- DocULink will open
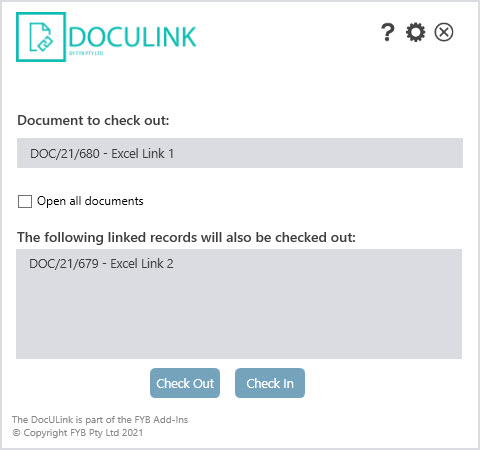
| FUNCTIONALITY | DESCRIPTION |
| - | - |
| DOCUMENT TO CHECK OUT | Displays the document number and title that will be checked out. The broken link in this document will be updated. |
| OPEN ALL DOCUMENTS | If checked, all linked records will open. If unchecked, only the record listed in the Document to check out field will be opened. |
| LINKED RECORDS TO BE CHECKED OUT | Any record that shares a “Linked to “ relationship with the record to be checked out will appear here. |
| CHECK OUT | This button will commence the check out process. Only the main record will be opened unless the Open All Documents checkbox is enabled. |
| CHECK IN | This will check in all records that were checked out by DocULink after clicking the Submit button. |
| HELP | Opens the DocULink help file in Document 360. |
| SETTINGS | Clicking the cog icon opens the configuration menu. |
| CLOSE | Clicking the close button will close DocULink. |
If at least one Record is checked out, all Records are opened as Read-Only
SETTINGS
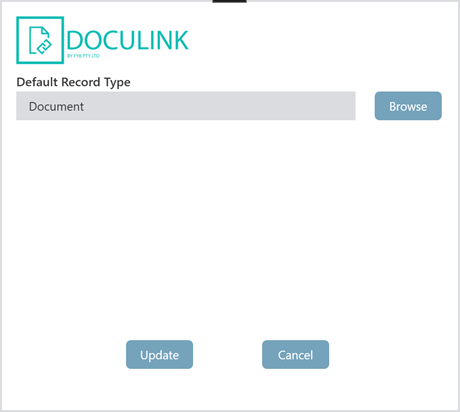
DEFAULT RECORD TYPE
Specify the default record type when uploading documents.